Learn to create WiFi heatmaps for stronger internet coverage throughout your home. This article guides you through setting up NetSpot, conducting a WiFi survey, and analyzing the results to optimize your network. Key steps include installing NetSpot, creating a map, taking room-by-room measurements, and troubleshooting issues like router placement or network interference. Also, check out available visualizations like signal-to-noise ratio and overlapping channels. Stay tuned for our next forum post, where we will provide a more detailed tutorial.
Get Amazing WiFi Coverage Everywhere with WiFi Heatmaps! 
Hey folks! Ever imagine having strong WiFi in every corner of your home? Well, WiFi heatmaps can make that dream come true. Here, I’ll break down everything you need to know about creating your very own WiFi heatmap.

By the end, you’ll know how to make a WiFi heatmap and use it to get a killer WiFi signal—perfect for browsing, HD streaming, or video chatting without a hitch.
Why Should You Make a WiFi Heatmap? 
Since the dawn of time, humans have mapped everything around them. Now, with most of our earth mapped out, WiFi networks and their signal landscapes are like the new frontier.
Whether you’ve got a sprawling house or a cozy apartment, you need WiFi to connect all your gadgets—laptops, smartphones, tablets, smart devices, you name it. Ideally, you’d want one WiFi network that blankets your entire home, so you can roam freely without constantly reconnecting.
Sounds simple, right? Well, not quite. Lots of things mess with WiFi signals—interference from other networks, physical obstacles (like walls), and even electronics like microwaves and security cameras.
Because of all these hurdles, getting perfect WiFi everywhere can feel unpredictable. But that’s where WiFi heatmaps step in, giving you the info you need for seamless coverage and top-notch speeds in each room.
How to Make a WiFi Heatmap with NetSpot? 
NetSpot makes creating a WiFi heatmap a breeze. Here’s how you can do it in just a few steps—shouldn’t take you more than 30 minutes!
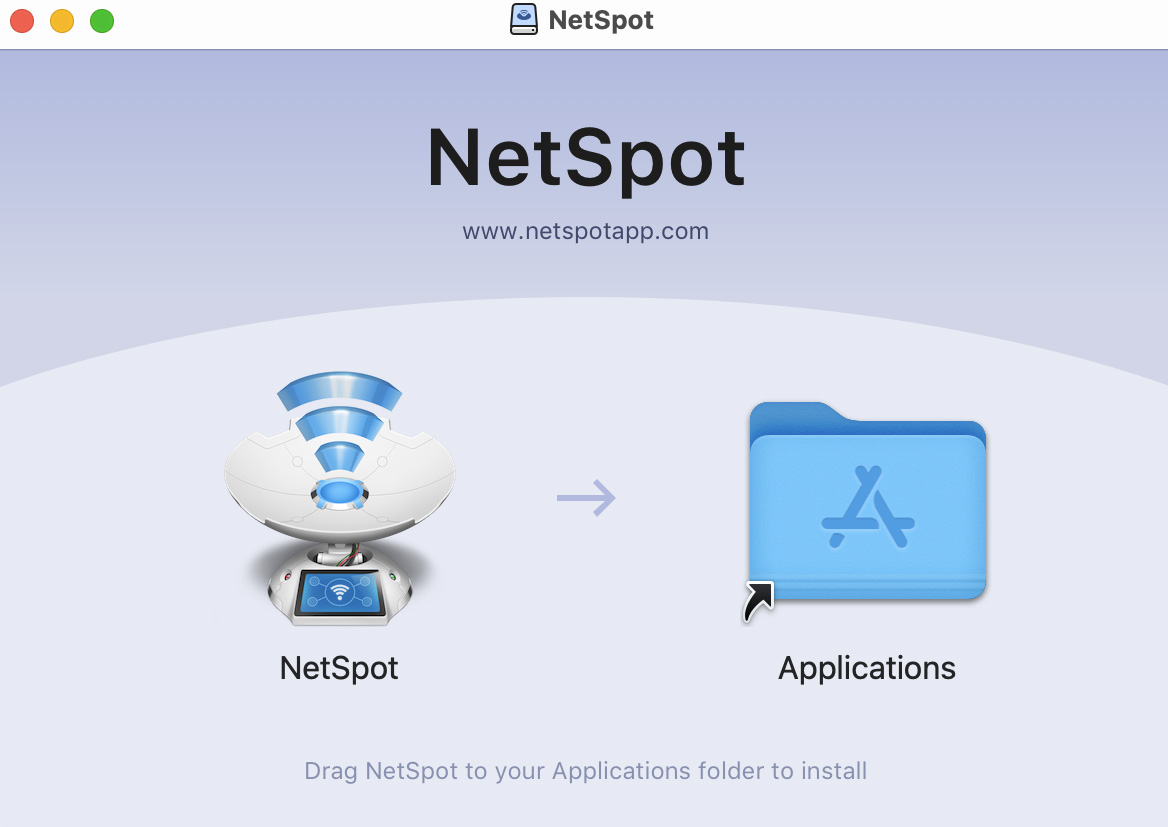
1. Install NetSpot on Your Laptop 
First off, download NetSpot from the official website and install it on your laptop. The free version is pretty solid for Mac users—offering WiFi site surveys, network planning, and troubleshooting. For all the bells and whistles, you might want to upgrade to NetSpot Home or PRO. There’s even an Enterprise option if you need it for up to 10 users.
2. Launch NetSpot and Start a New WiFi Heatmap 
Once installed, launch NetSpot like any other app. Switch to Survey mode and start a new WiFi survey. You’ll need to name the survey and specify the area type.
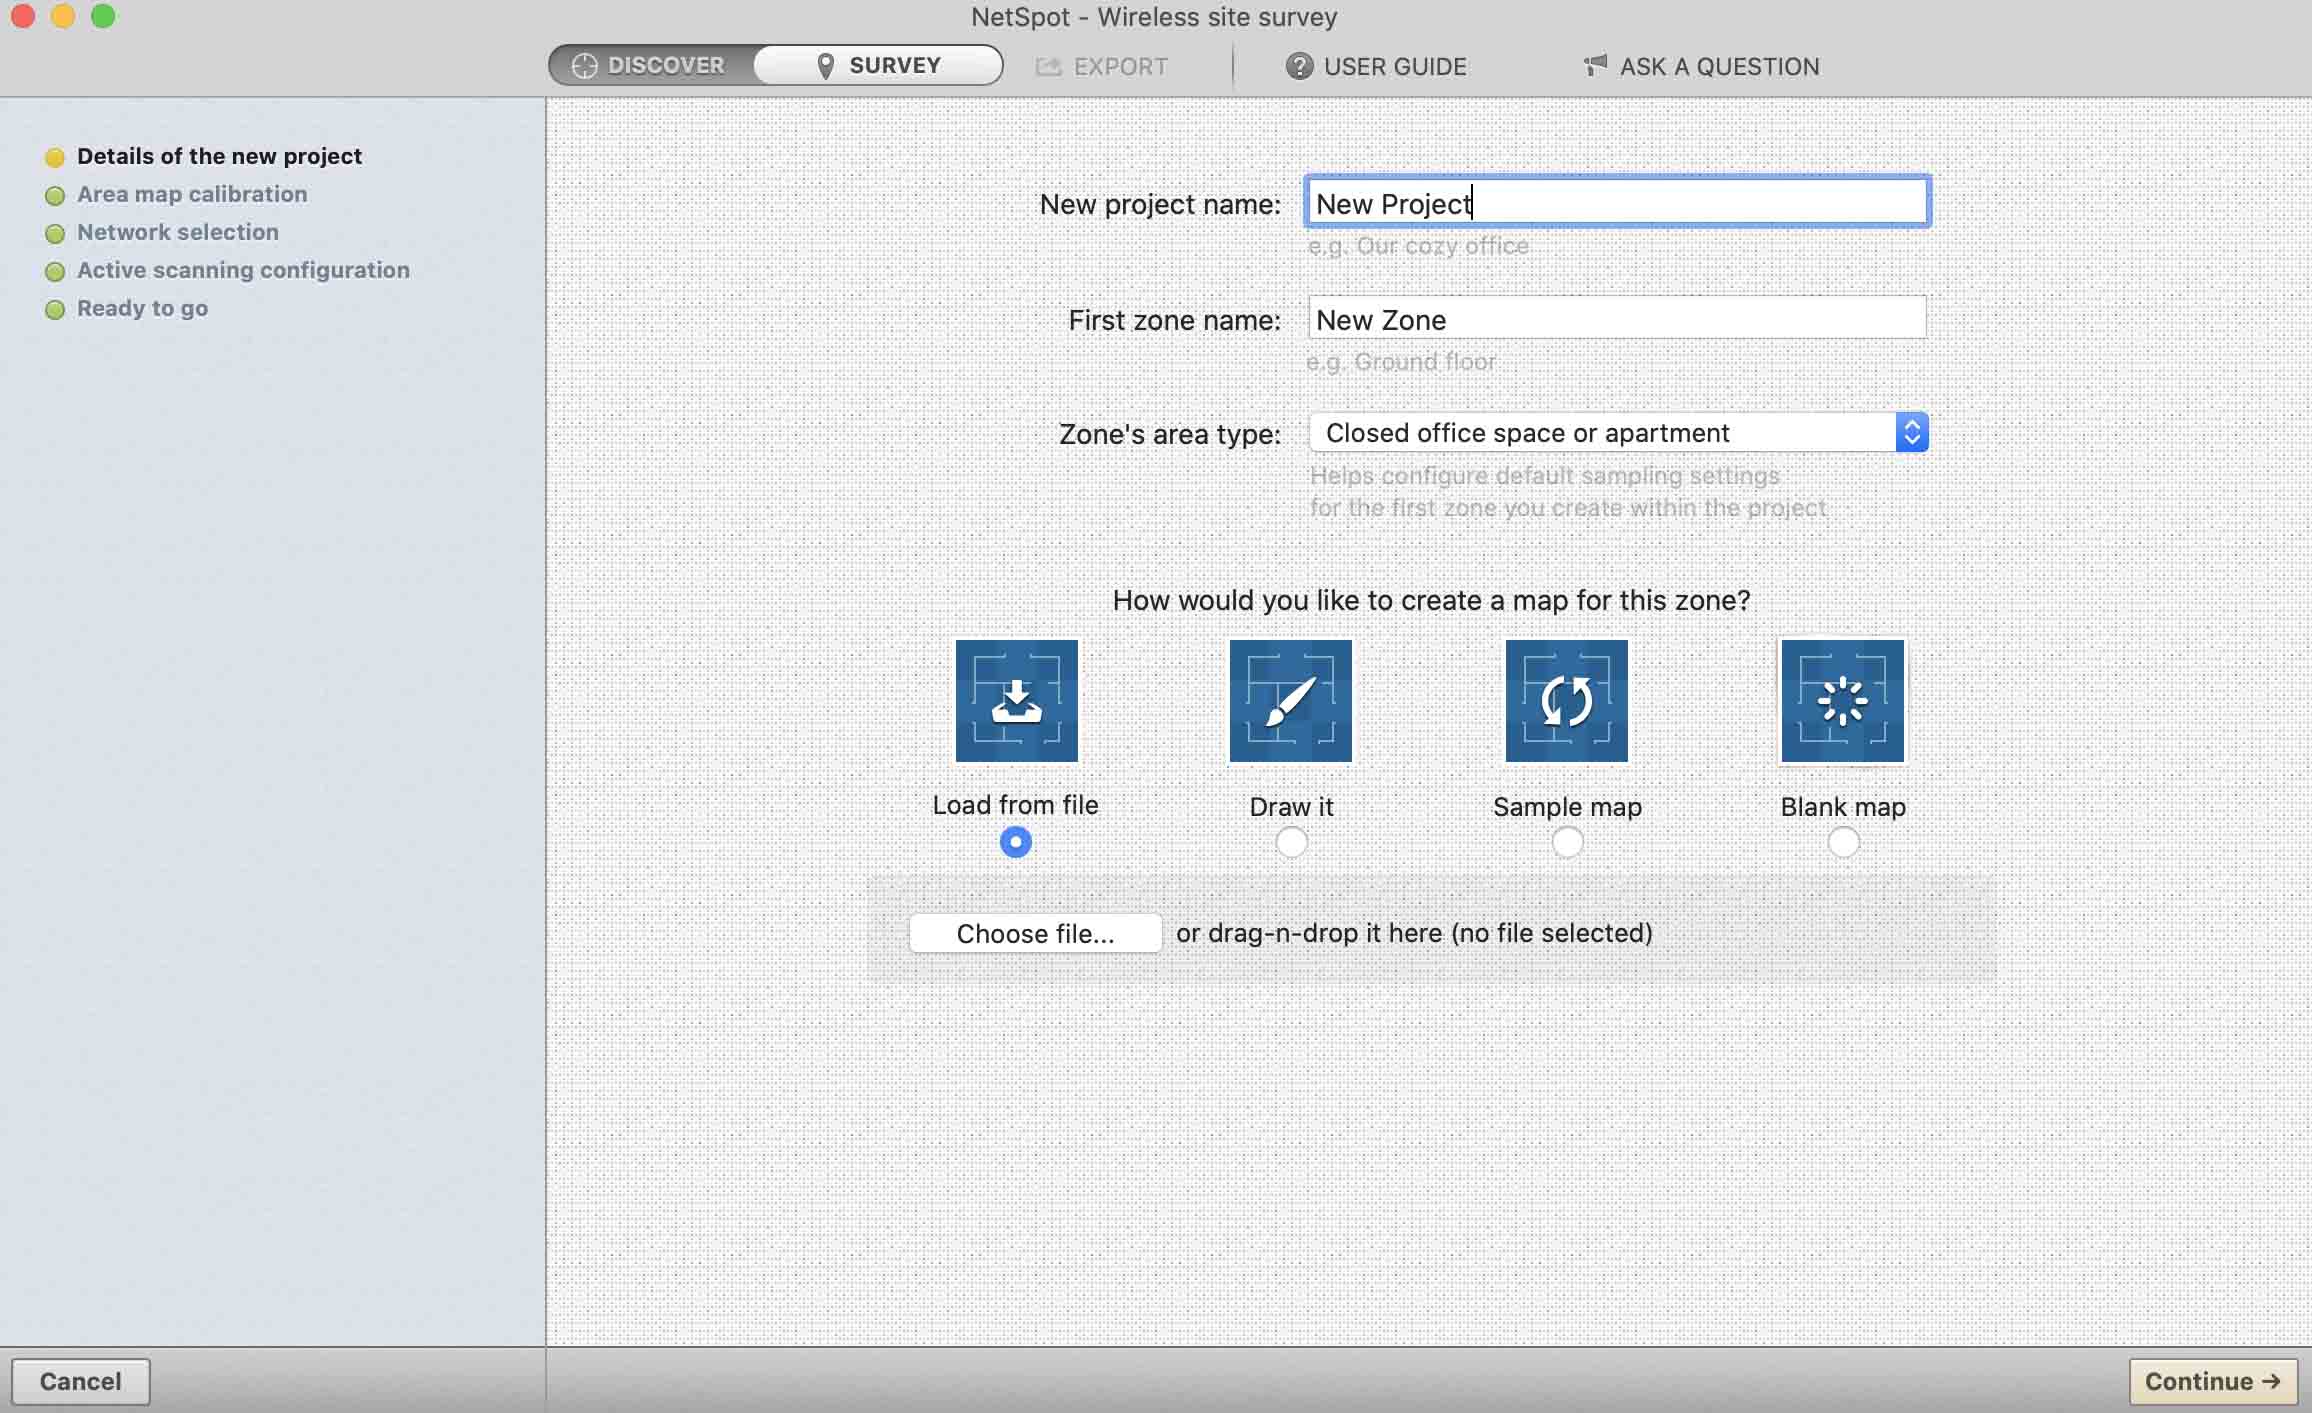
Before hitting Continue, you’ll need a map for your survey. Got a map of your place? Load it up. If not, start with a blank/sample map or use NetSpot’s built-in map editor to create one.
3. Start the WiFi Mapping Process 
Mapping WiFi is super straightforward—just carry your laptop around and take measurements at regular intervals until every room is covered.
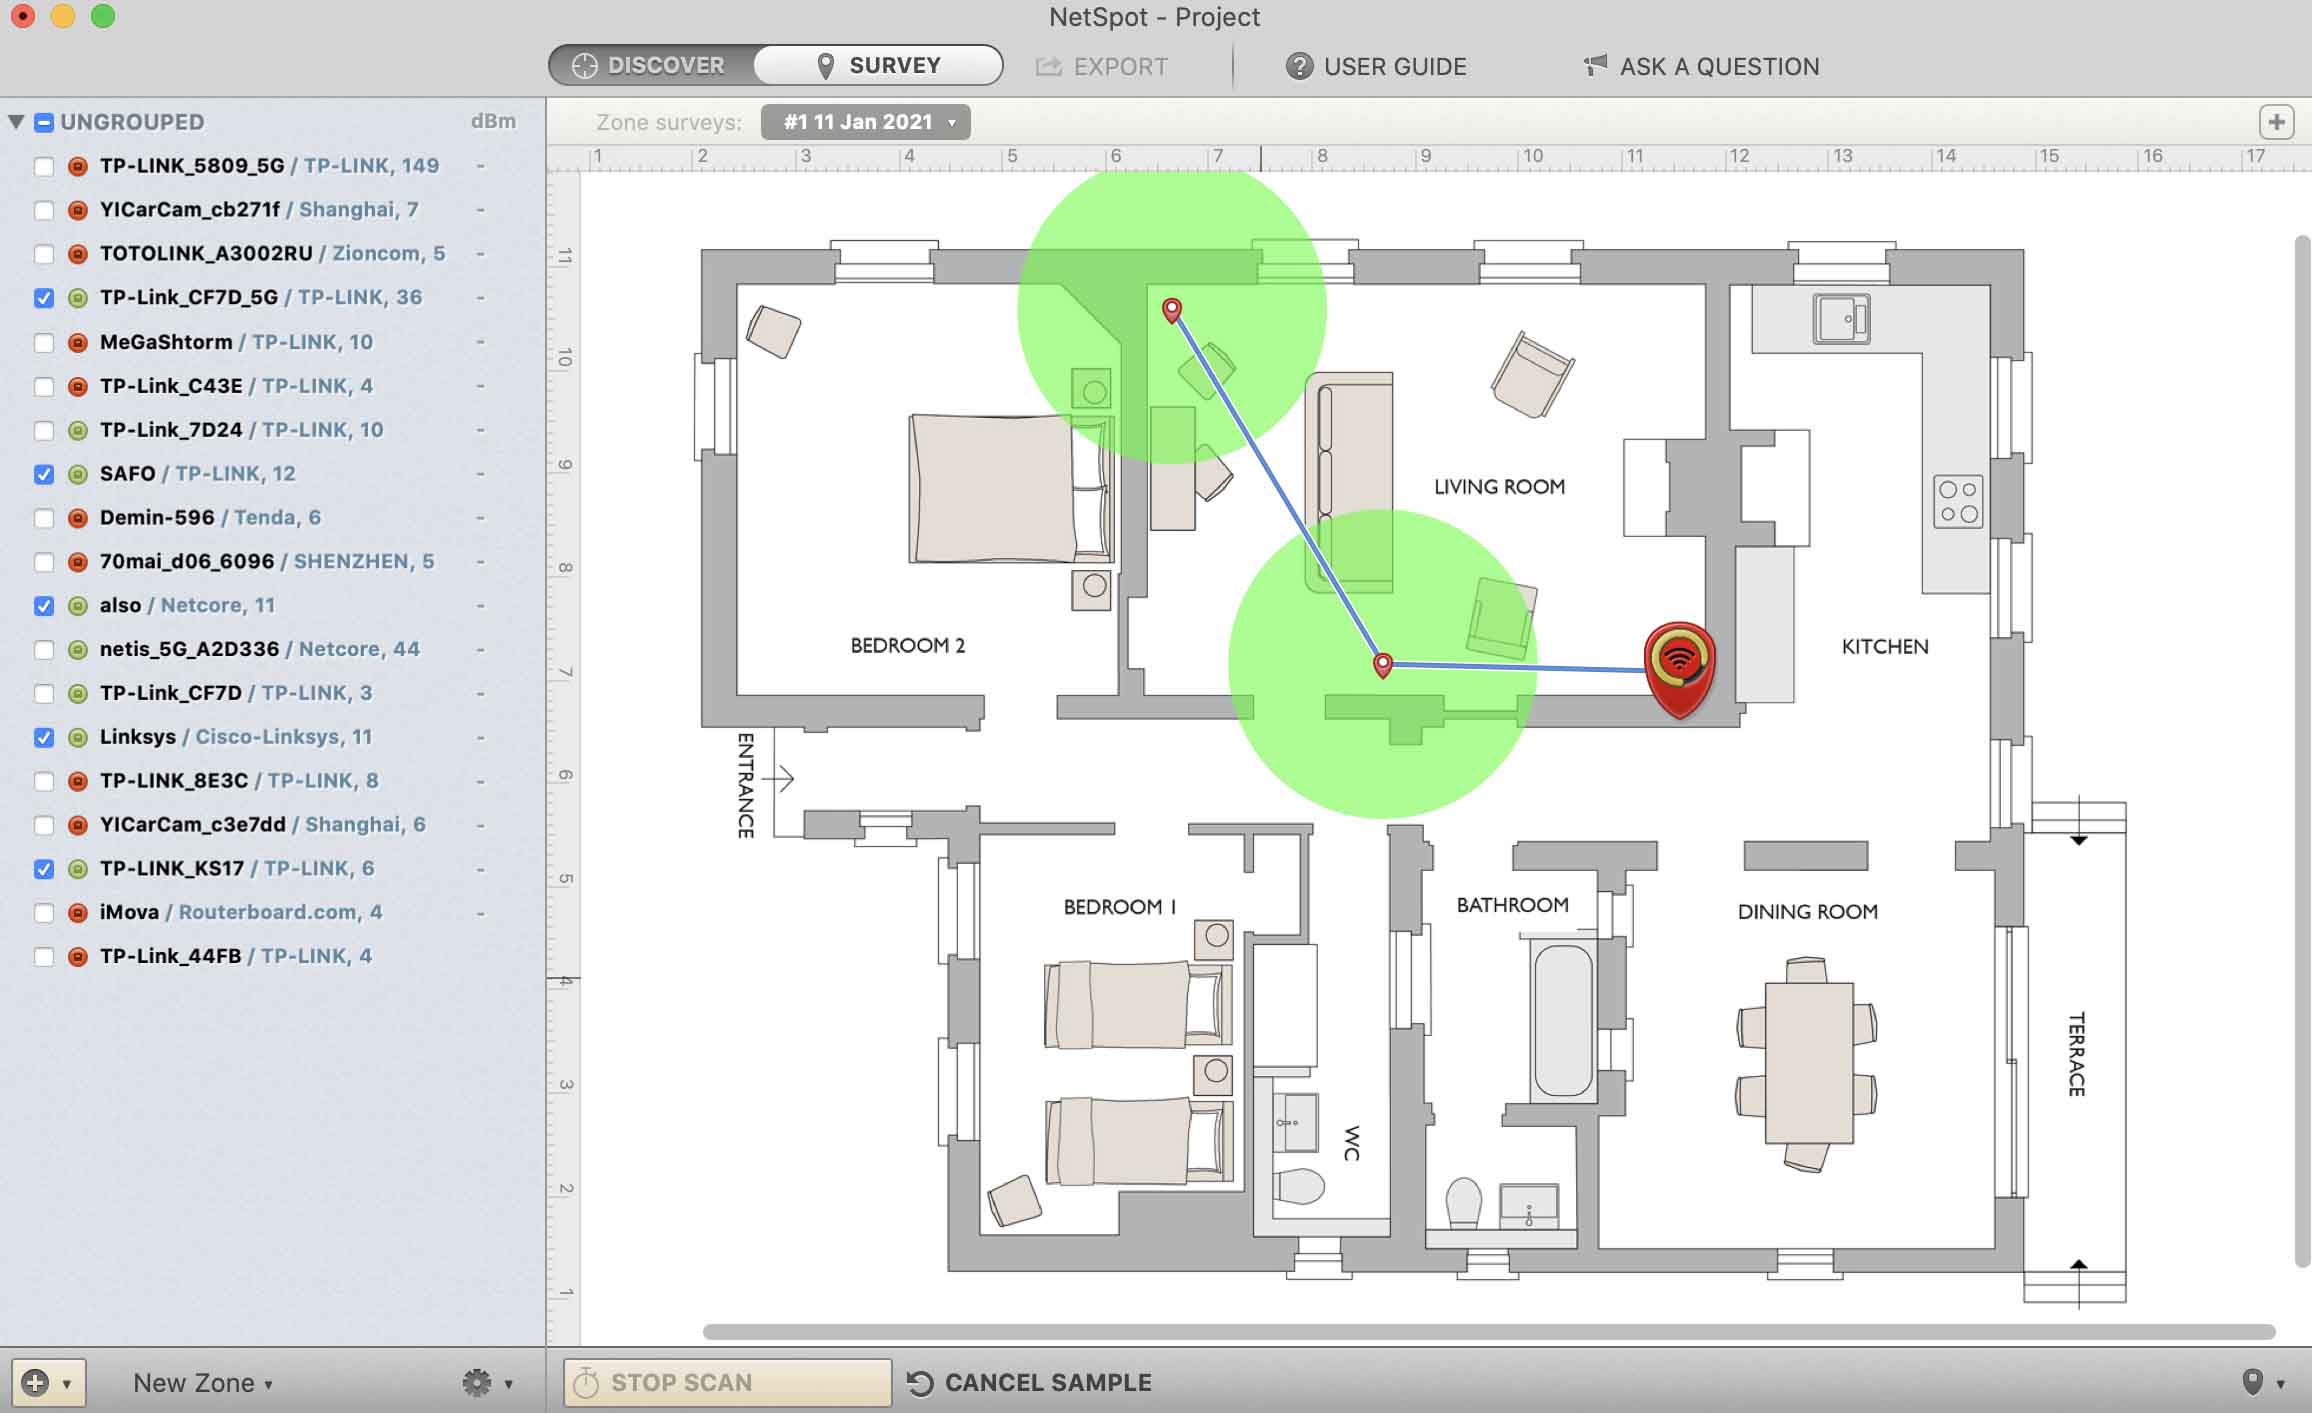
Each time you measure, NetSpot marks the spot with a red marker and shows a green circle around it, indicating the area measured. For the best accuracy, make sure those green circles overlap a bit.
4. Analyze the WiFi Heatmap 
Finally, click STOP SCAN and dive into your heatmap analysis. NetSpot can whip up over a dozen different heatmaps to provide a detailed overlook of your WiFi network’s performance.
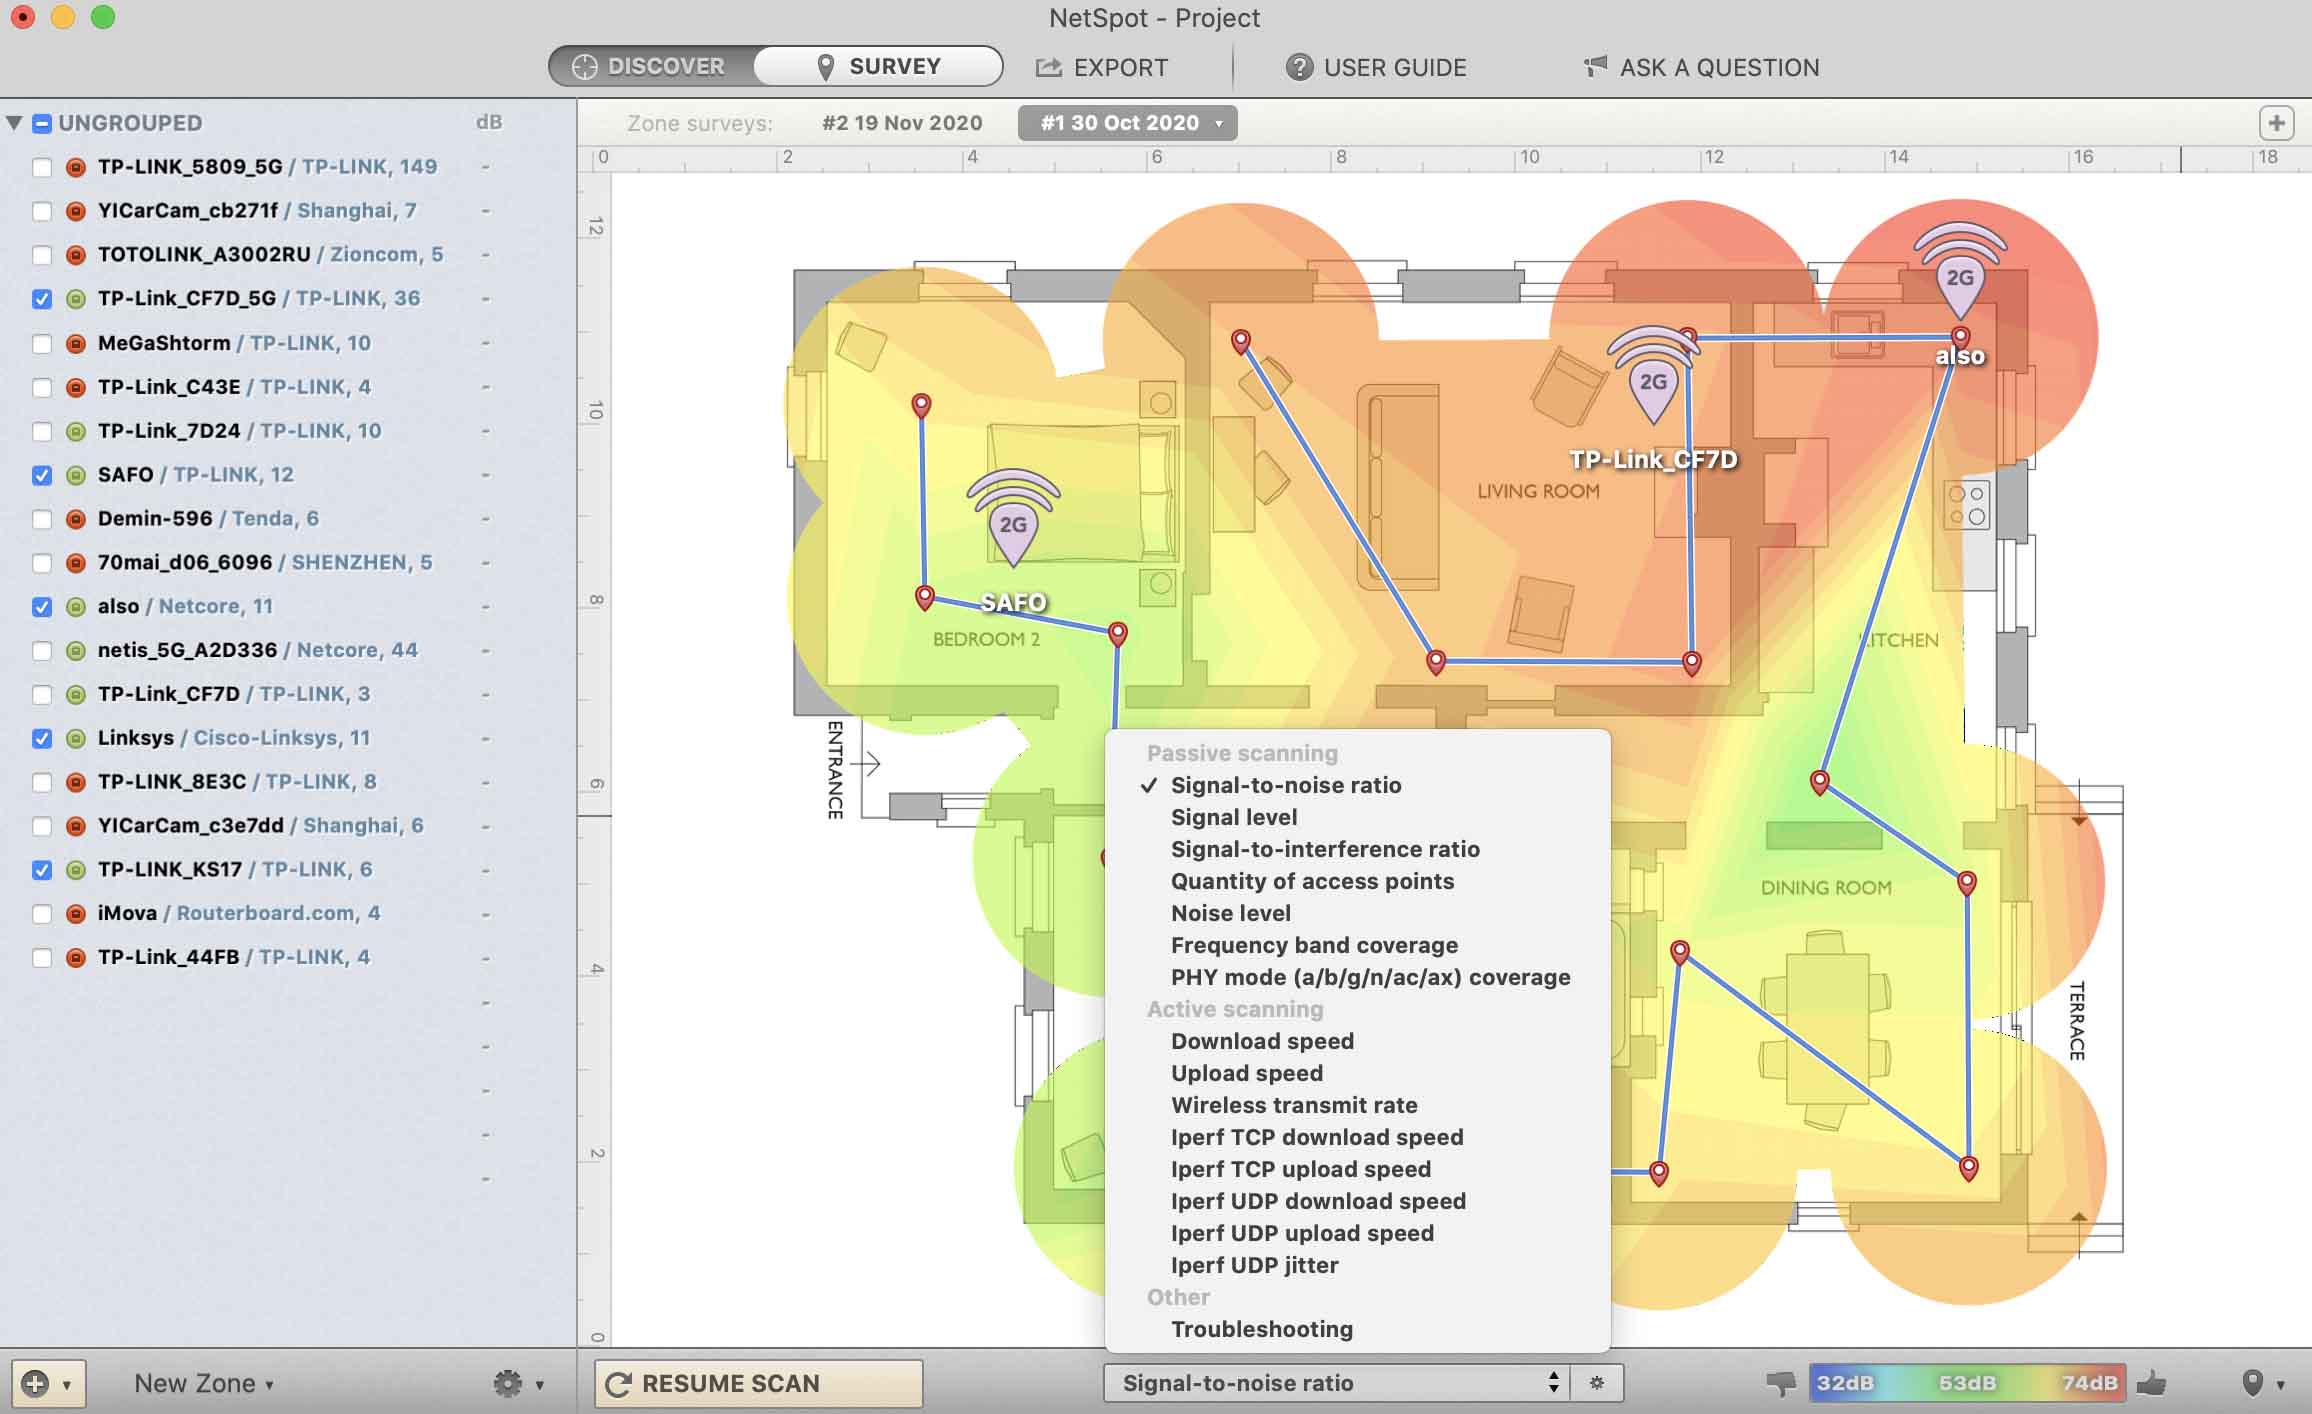
Here are some cool visualizations NetSpot offers:
- Signal-to-noise ratio: Compares WiFi signal levels to background noise.
- Signal level: Shows how strong your WiFi signal is.
- Frequency band coverage: Quickly visualize different frequencies.
- Noise level: Displays outside interference levels at each point.
So, ready to level up your WiFi game? Give WiFi heatmaps a shot and enjoy seamless, uber-fast connectivity in every room! ![]()
![]() Hey folks!
Hey folks! ![]() Just wanted to share some cool tips and tricks about WiFi heatmaps.
Just wanted to share some cool tips and tricks about WiFi heatmaps.
Imagine this: you’re relaxing in your living room and notice the WiFi signal is not so great. Ever wondered why? Or maybe you’re setting up a new router and want to find the sweet spot for the best coverage? That’s where WiFi heatmaps come in handy!
Understanding WiFi Heatmaps
WiFi heatmaps are visual tools that help you see where your signal is strong and where it’s weak in your place. Here are a few things you might see on a heatmap:
- High level of noise: Shows areas with a lot of background noise.
- Wireless transmit rate: Indicates the speed at which data moves from an access point (AP) to your device.
- Overlapping channels (SIR): Highlights zones where channels overlap.
Heads up, some of these visualizations are Mac-only features in NetSpot. ![]() You can learn more about them here.
You can learn more about them here.
What You Need to Create a WiFi Heatmap 
Here’s the awesome part: You don’t need fancy gear to create one! Just two things:
- A laptop with WiFi
 WiFi heatmap software
No laptop? No worries! Borrow one, and you can examine the results later on your desktop. Why a laptop, you ask? Because you need to move around a lot to map out your space, and that’s a pain with a desktop.
As for the software, there are quite a few options. One popular choice is NetSpot for MacBooks running macOS 10.10 or newer. With NetSpot, you can scan any network in the 2.4 GHz and 5 GHz bands with just a few clicks. No techy knowledge needed! ![]() Besides mapping, NetSpot also functions as a WiFi analyzer to gather all crucial details about nearby networks.
Besides mapping, NetSpot also functions as a WiFi analyzer to gather all crucial details about nearby networks.
Fixing WiFi Performance Issues Using the Heatmap 
Got your heatmap ready? Cool! Now, let’s fix those WiFi woes. Here are some fixes to try:
- Move Your Router to a Better Spot: Router placement is key. If your heatmap shows strong coverage only in half your place, try relocating the router to a more central spot.
- Switch to a Less Crowded Channel: The 2.4 GHz band has just 11 channels, making interference from neighboring routers common. Switch to a less crowded non-overlapping channel like 1, 6, or 11.
- Extend Your WiFi Network: Got a big place? Sometimes, a single router won’t cut it. You can extend your WiFi range with an extender or booster. Alternatively, consider a mesh WiFi system for broader coverage.
Hope these tips and WiFi mapping techniques help you eliminate dead zones and enjoy seamless internet throughout your space! ![]()
Got any questions or need more tips? Drop them below! ![]()