Replacing a file on a Mac can lead to data loss, but recovery is often possible because the system marks the original file as deleted rather than overwriting it. To recover the replaced file, you can use methods like Time Machine, iCloud, or data recovery software like Disk Drill. Time is of the essence as the deleted file can be overwritten by new data. Stay tuned for a detailed tutorial in the next forum post.
Hey everyone!
Ever replaced a file on your Mac and then panicked because it had the same name as another important file? It happens to the best of us, but don’t stress — there are ways to get that file back! Let’s dive into how you can recover those replaced files.
Can You Recover Replaced Files on Mac?
So, let’s clear things up: when you replace a file on your Mac, the old one doesn’t just vanish into thin air. Instead, the system marks it as deleted, and the new file goes into a different spot on your hard drive.
Since the new file doesn’t usually overwrite the old one, recovering replaced files on a Mac is often doable. ![]()
However, keep in mind that this recovery isn’t guaranteed. The longer the file stays replaced, the higher the chance it gets partially or completely overwritten by new data. This is especially true for large files, like videos, which take up more space and are more likely to get overwritten.
In short, time is of the essence. The sooner you get started on the recovery, the better your chances!
Methods to Recover Replaced Files on Mac
We’ve got a few tricks up our sleeves, three in fact, to help you recover those replaced files. Let’s chat about using Time Machine, iCloud, and some handy data recovery software like Disk Drill.
Method 1: Recover Replaced Files on Mac Using Time Machine
Time Machine is an awesome built-in feature on your Mac that backs up your data automatically, be it hourly, daily, or weekly. It keeps local snapshots of your files, so you can roll back to a previous version if needed.
Here’s how you can use Time Machine to get back your replaced files:
- First, open the folder where your replaced file was.
- Click the Time Machine icon on the Taskbar (it’s the clock with the arrow).
- Select Enter Time Machine.
- You’ll see a timeline of snapshots for that folder. Navigate through the versions using the arrow keys.
- Find the version you need, select the file, and click Restore.
- Boom! The file should reappear in the current version of the folder.


Method 2: Recover Replaced Files Using iCloud
No Time Machine backup? No problem! You might still be able to retrieve your file with iCloud, Apple’s cloud storage service.
Here’s how to do it:
- Head to the iCloud website and log in with your Apple ID.
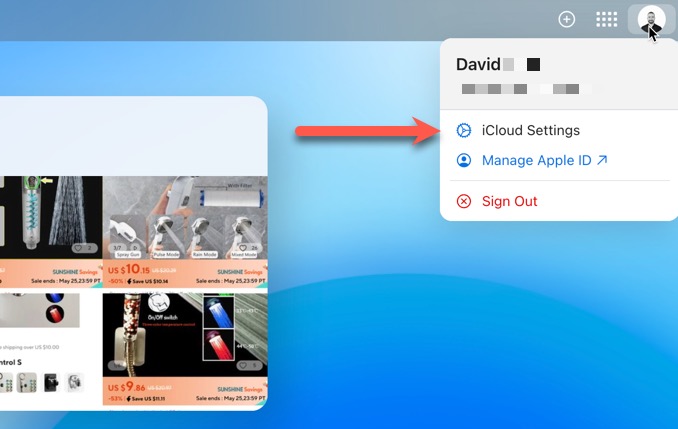
- Go to iCloud Settings.
- Navigate to the Data Recovery tab.
Continue the steps by following the prompts in the Data Recovery section. iCloud can sometimes store versions of your files that you might not have on your Mac anymore.
Method 3: Recover Replaced Files Using Data Recovery Software
If neither Time Machine nor iCloud works for you, data recovery software like Disk Drill can be a lifesaver. These tools scan your Mac for files marked as deleted and can often recover them even if they’ve been replaced.
Give it a shot:
- Download and install Disk Drill or similar software.
- Follow the on-screen instructions to scan your drive.
- Check the list of recoverable files and restore the ones you need.
Note: The sooner you use data recovery software, the better your chances of success, as new files might overwrite the ones you’re trying to recover.
Got any questions or tips of your own about file recovery? Let’s chat about it below! ![]() ###
### ![]() How to Get Back Replaced Files on Your Mac
How to Get Back Replaced Files on Your Mac
Hey folks! If you’ve ever accidentally replaced a file on your Mac, don’t freak out. There are actually a few solid methods to get it back. Let’s go through them, step-by-step, to make sure you’ve got all the options covered!
Method 2: Recover Files with iCloud 
Steps to recover replaced files with iCloud:
-
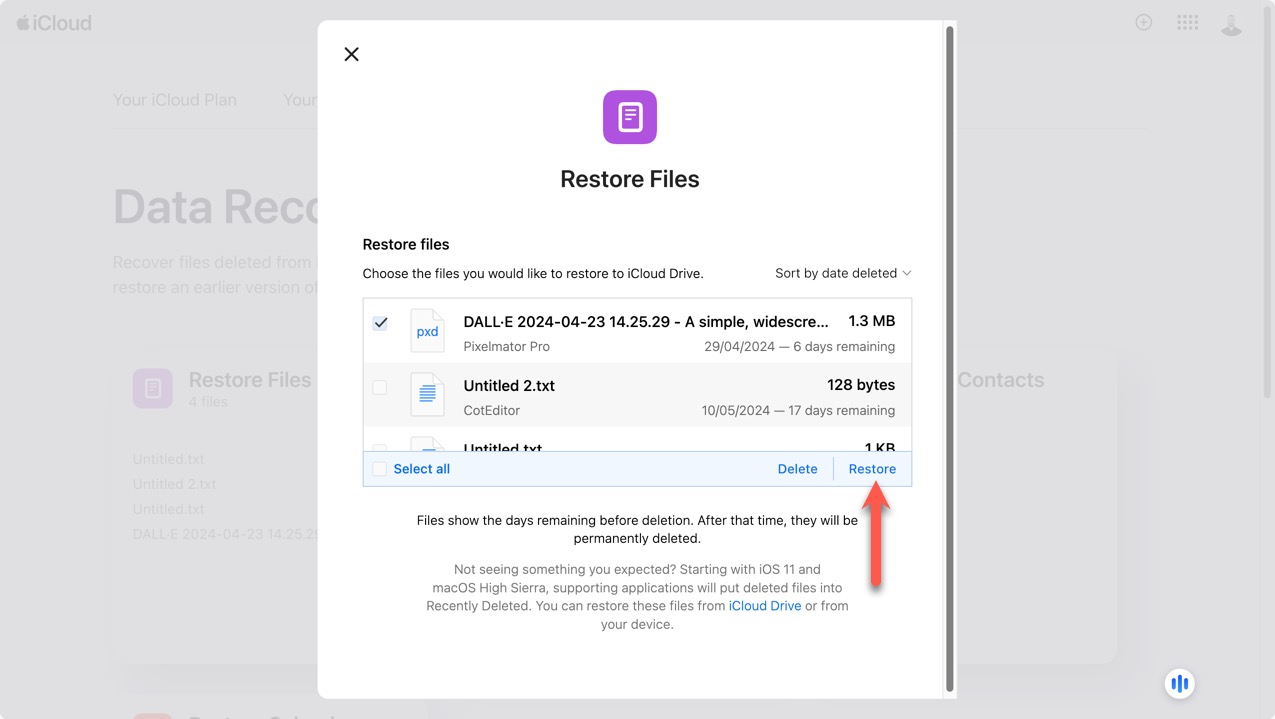
Click on Restore Files and select the replaced file.
-
Click Restore to complete the recovery process.

Important Note: This only works if you’ve got iCloud Drive enabled and the replaced file was in a synced folder. Plus, iCloud keeps previous versions of files for 30 days, so you gotta act fast!
Method 3: Use Data Recovery Software 
Sometimes, if the file hasn’t been overwritten by new data, data recovery software can save the day. Disk Drill is a good one to try out.
Here’s how you can use Disk Drill to bring back replaced files on your Mac:
-
Download Disk Drill from its official website. Note: The free version lets you preview files but you’ll need the Pro version to recover them.
-
Install it by double-clicking the Disk Drill image in your Downloads folder and dragging the app icon to your Applications folder.
-
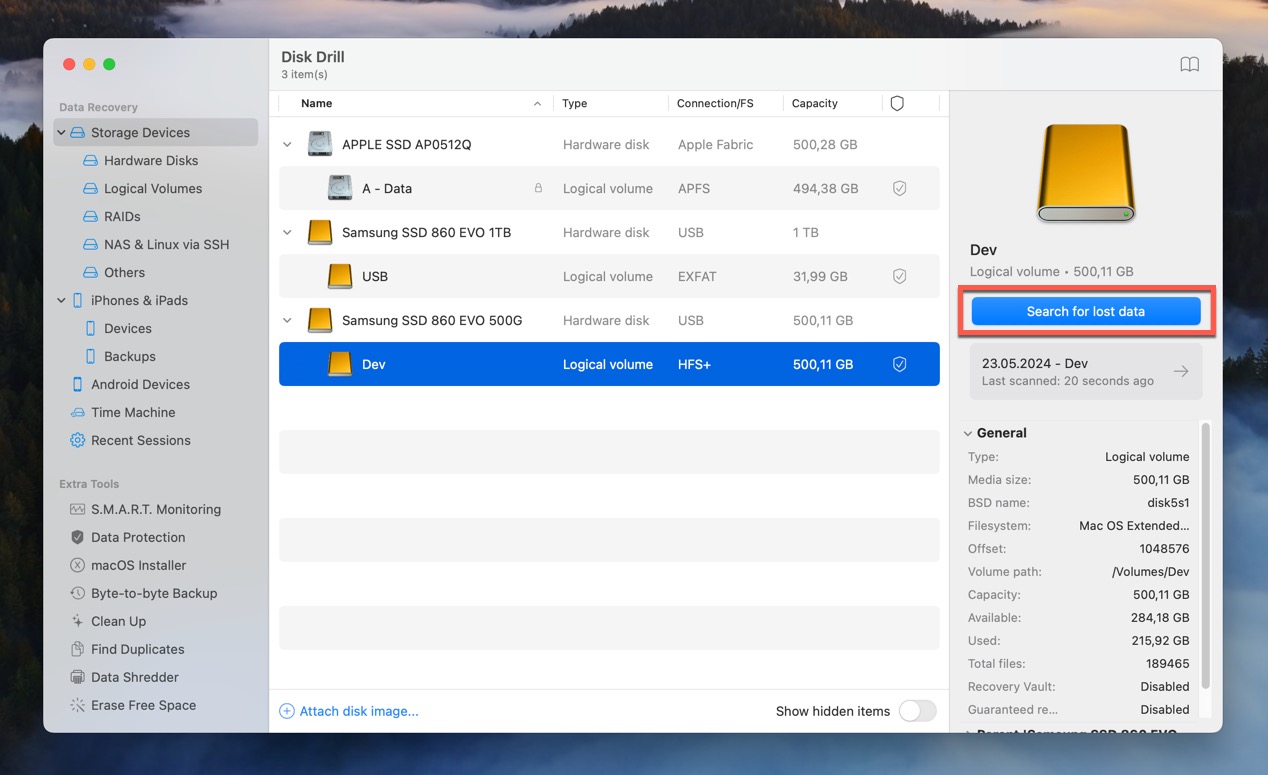
Open Disk Drill and select the drive with the replaced data. Click Search for lost data.
-
When the scan finishes, click Review found items.
-
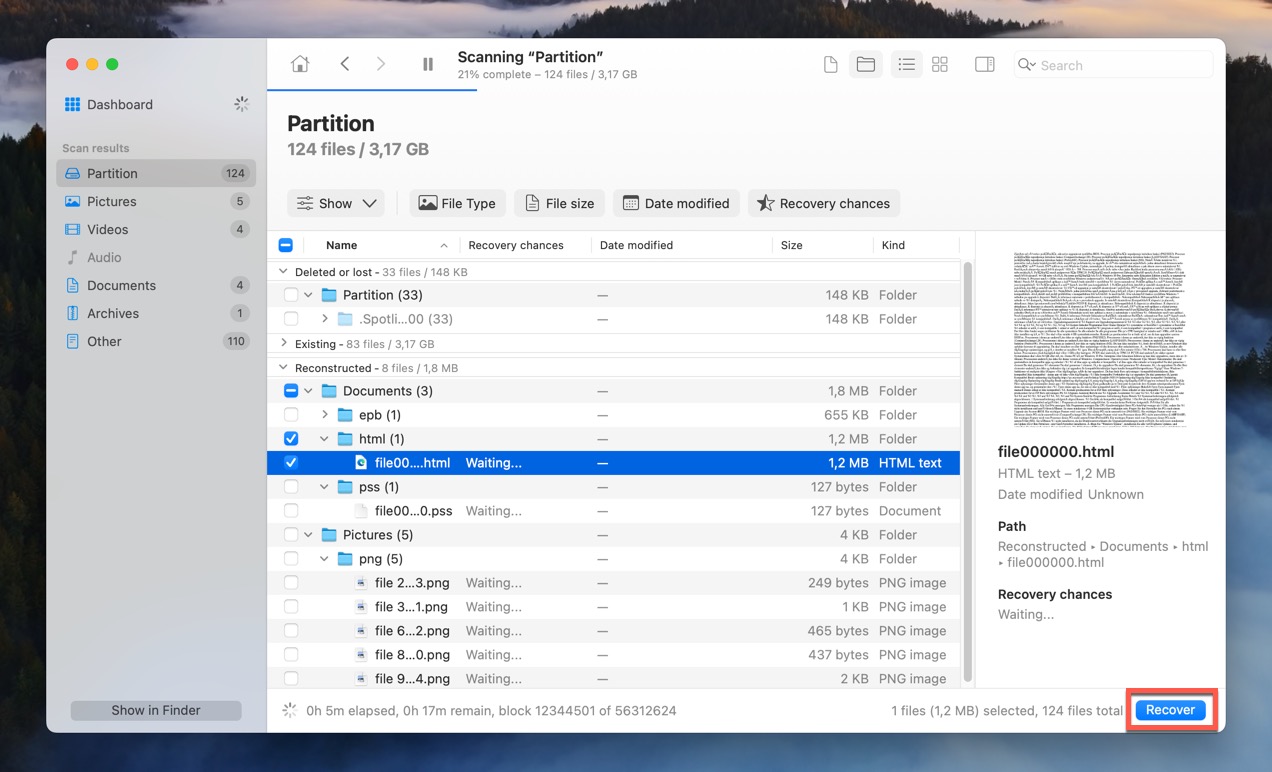
Find the replaced files you need. Use the search bar or filters to help locate them.
-
Hit the Recover button, choose where to save the file, and click Next. Make sure you’re saving it to a different partition or hard drive to avoid overwriting.


If you don’t see your files in the chosen location, you might have picked the wrong spot. No worries, Disk Drill makes it easy to retry the recovery process by resuming the last scan.
Conclusion 
Accidentally replacing a file on your Mac isn’t the end of the world! You’ve got several ways to recover it. Time Machine and iCloud are go-to methods, but if you didn’t have a backup, Disk Drill is a lifesaver. Just make sure the replaced files haven’t been overwritten with new data!
Got any questions or need more tips? Reply below! ![]()