How to Restore Trash on a Mac using Time Machine 
Hey everyone!  Ever accidentally emptied your Trash on your Mac and wished you could get those files back? No worries, I’m going to show you how to recover those files using Time Machine.
First off, you should know that Time Machine doesn’t back up the Trash folder itself. But here’s the trick: if you remember the name of the file and where it was before you trashed it, you can get it back! Here’s how:
- Connect your backup drive: Plug in the storage device with your Time Machine backup.
- Open Finder: Navigate to the folder where the deleted file was originally located.
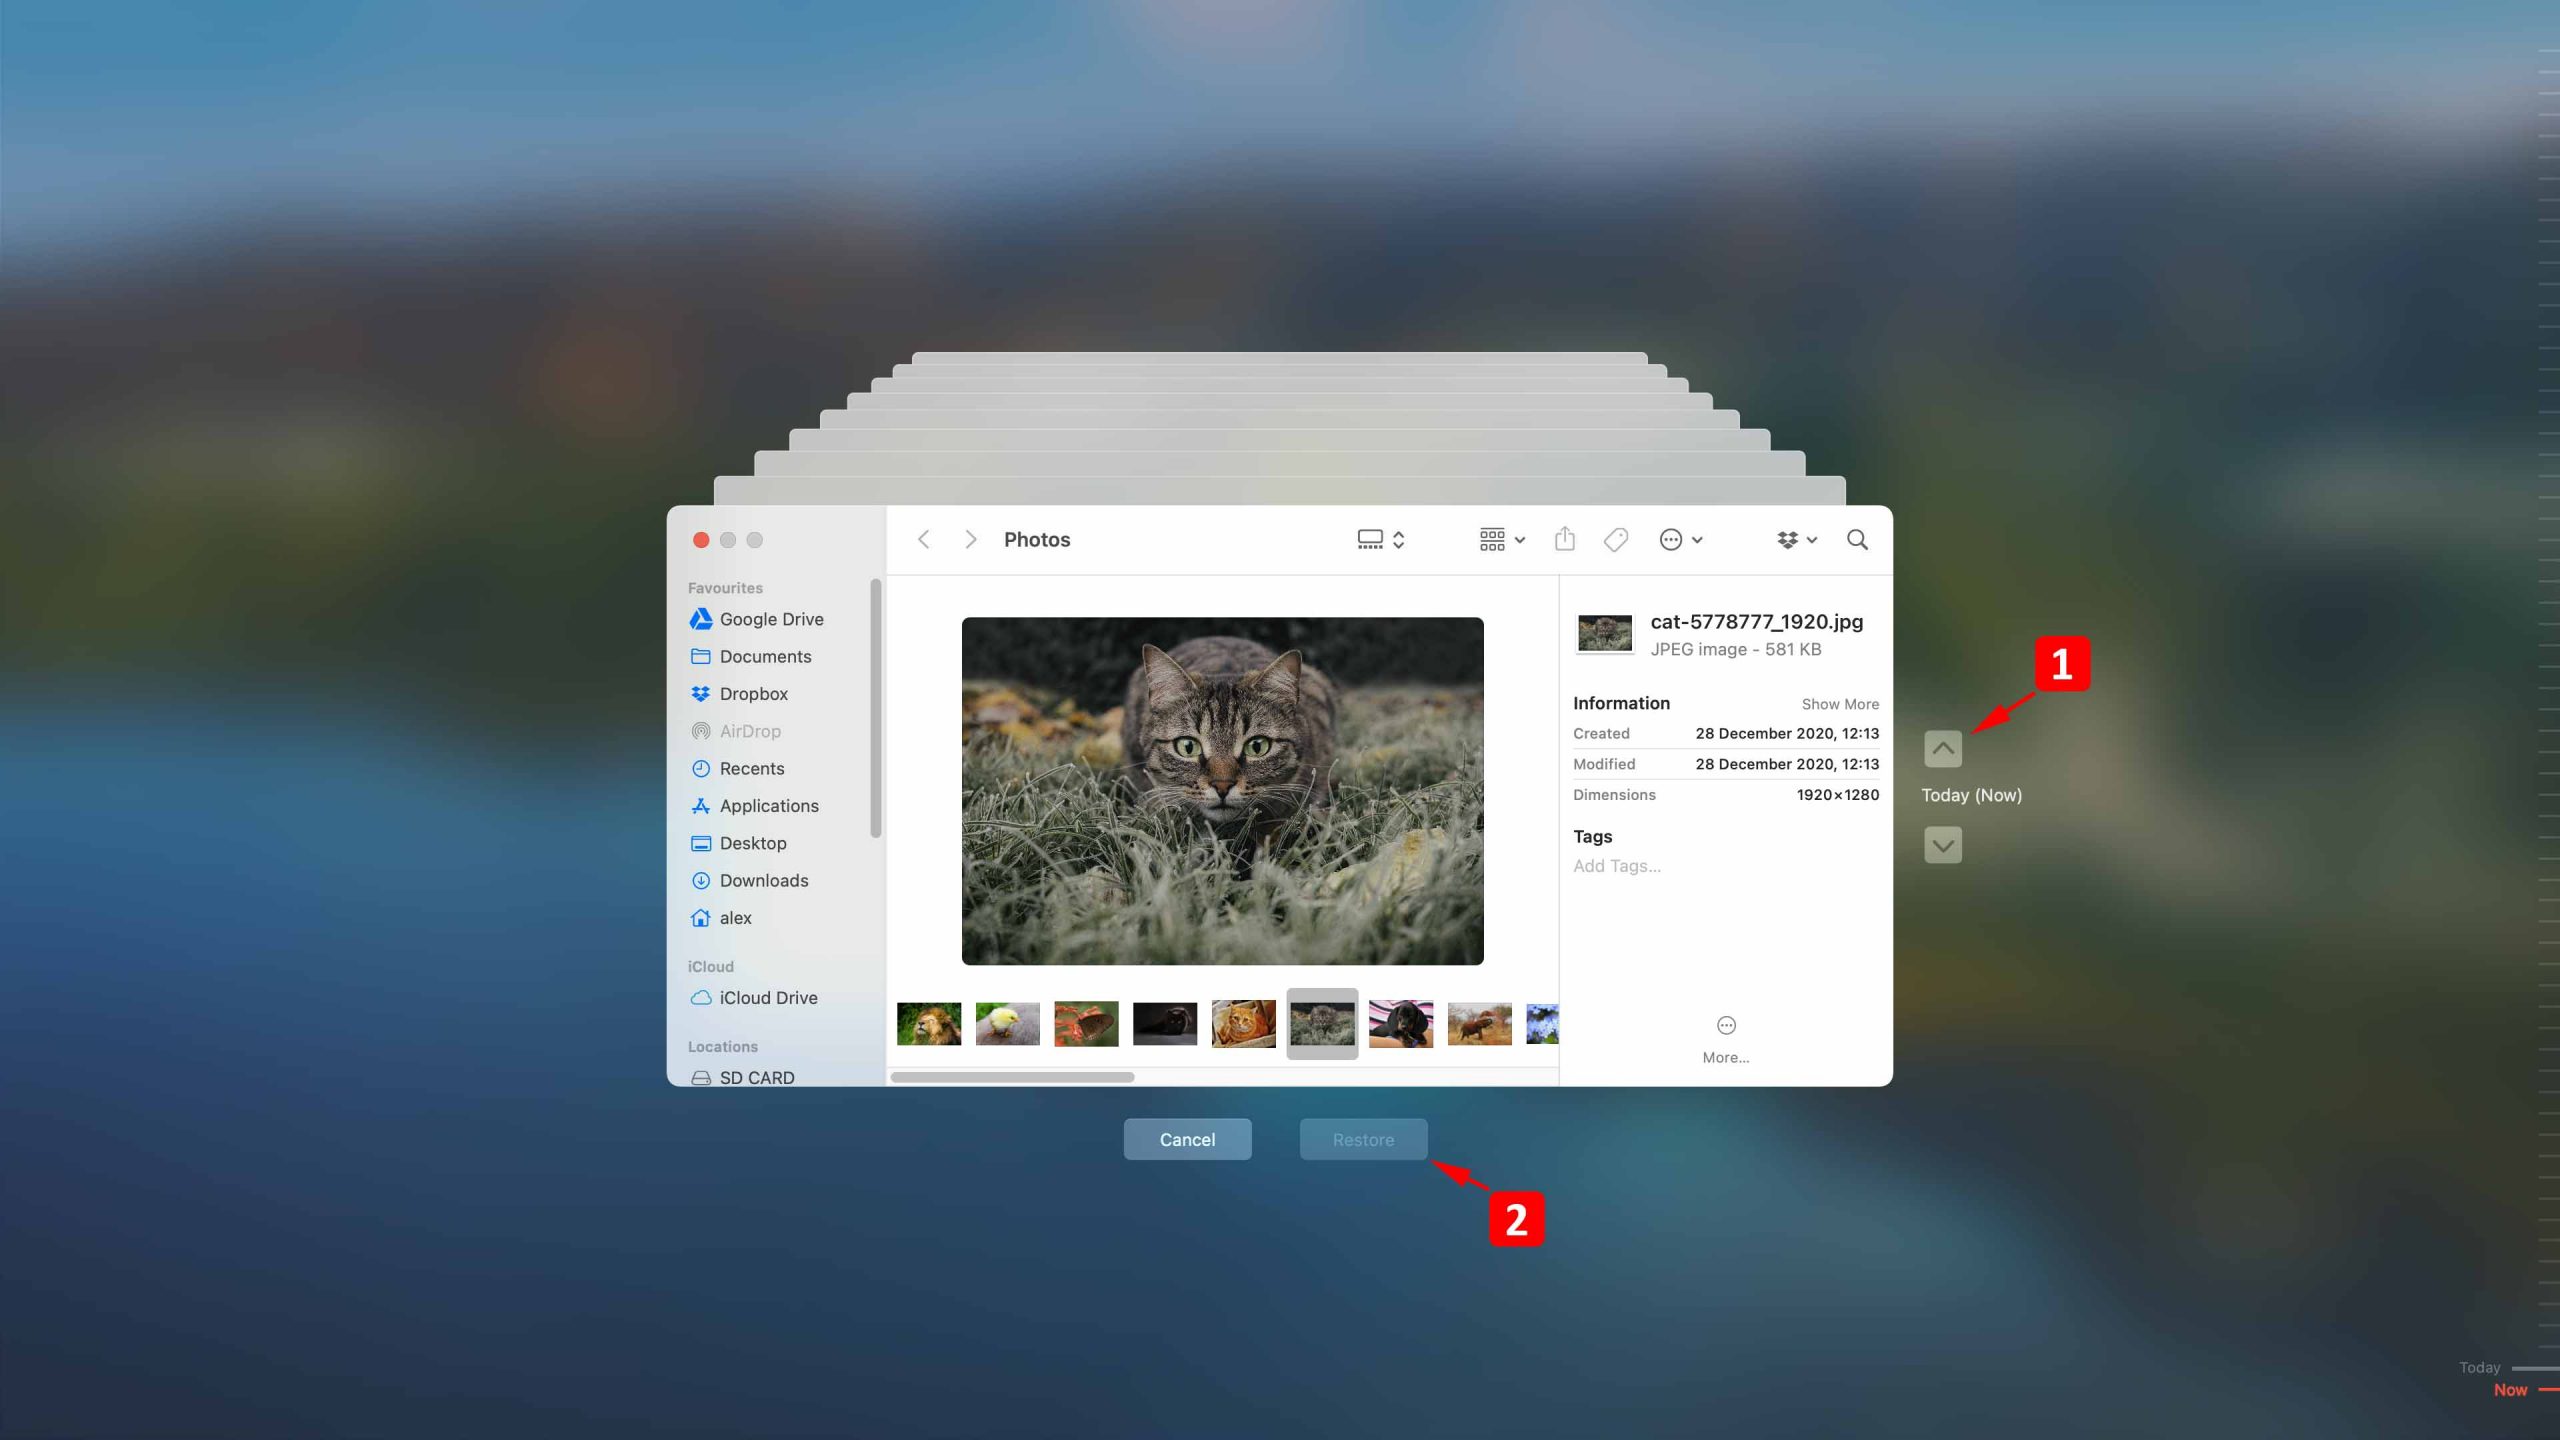
- Launch Time Machine: Click the clock icon in the Menu bar to open it.
- Find your file: Scroll through your backups with Time Machine’s navigation tools until you see the file you want.
- Preview the file: Hit the Space Bar to make sure it’s the right one.
- Restore it: Click Restore, and the file will be back in its original spot.
Here’s a visual aid to help you out:
How to Recover Files from Emptied Trash on Mac with Data Recovery Software 

Alright, Time Machine is cool, but what if you don’t have a backup? You can use data recovery software! This software can fix the ‘logical links’ (fancy words for file pointers) that macOS breaks when you delete stuff. Just make sure you do this ASAP before the file data gets overwritten.
We’ll use Disk Drill for this job because:
 User-friendly: It’s super easy to use.
 Supports over 400 file types: Almost anything can be recovered.
 Simple process: Click, scan, recover—done.
 Free tools included: Comes with some neat data protection extras.
 Affordable: Doesn’t cost an arm and a leg.
Here’s the step-by-step:
-
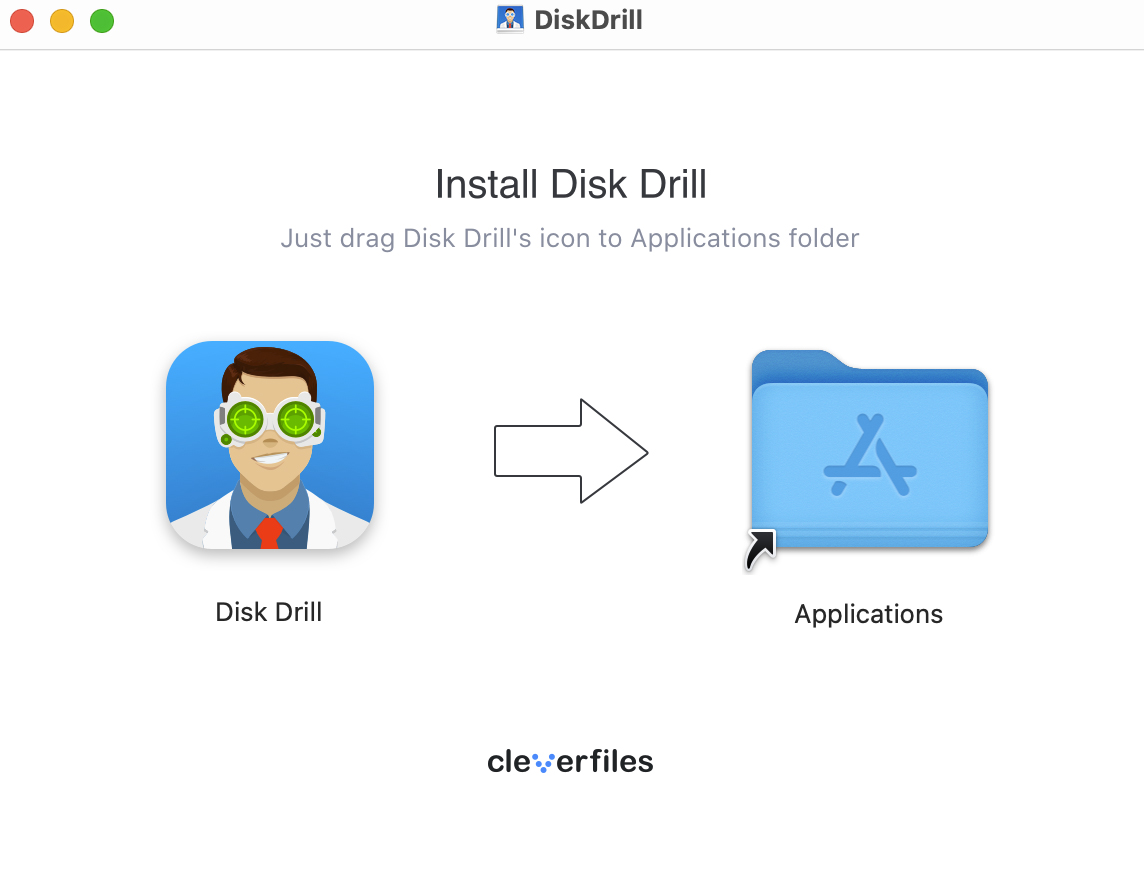
Download and install Disk Drill:
Grab it here! Install it on an external device to avoid overwriting the data you’re trying to recover.
-
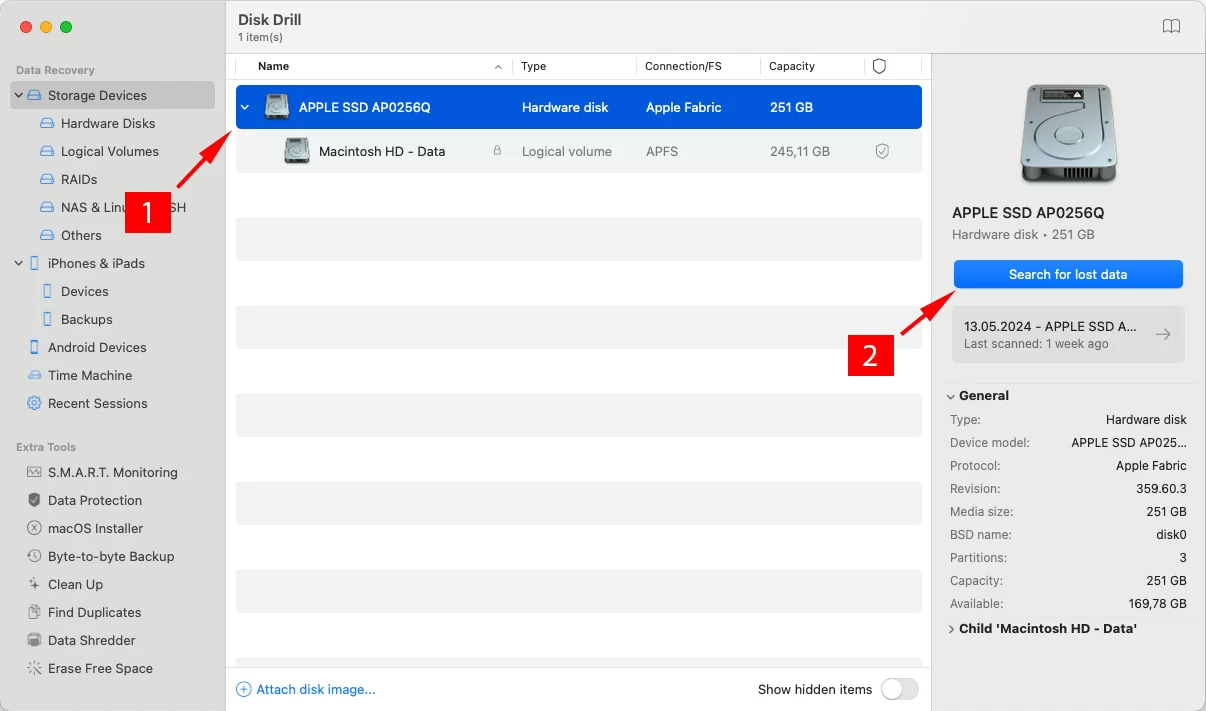
Launch Disk Drill: Open the app and select the disk with the lost file.
-
Start scanning: Click ‘Search for lost data’ to scan for recoverable files.
-
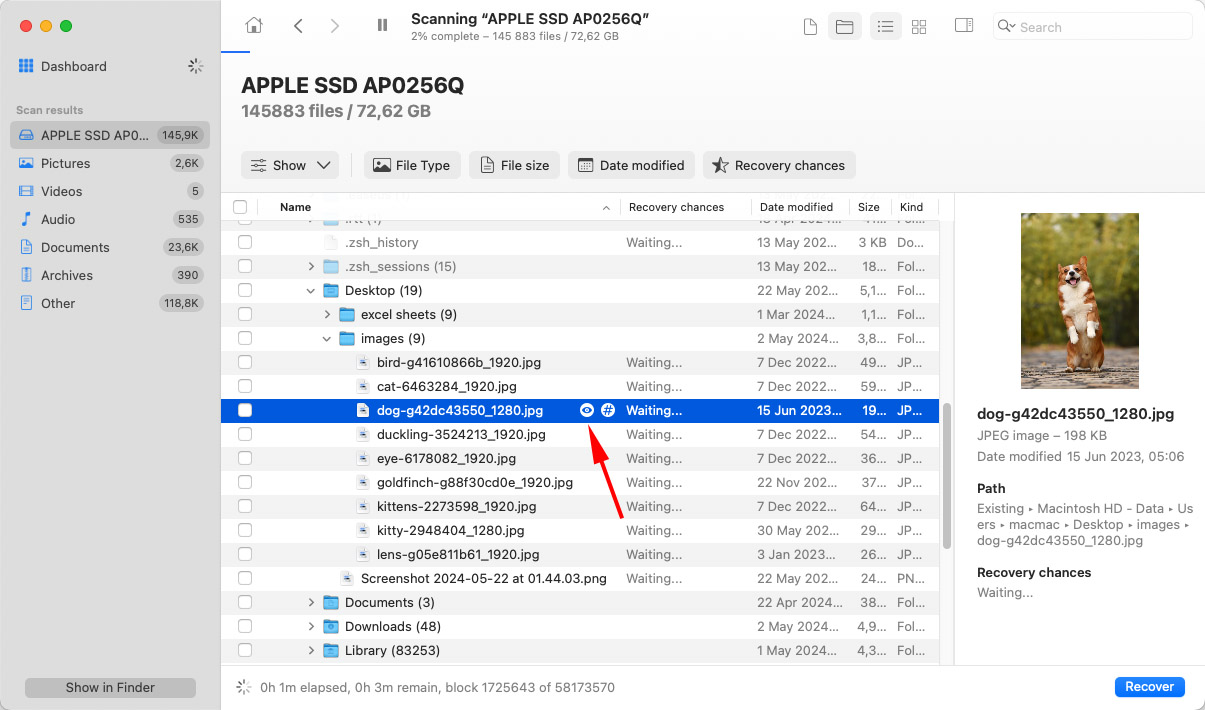
Review and preview: Look through the found files and preview them to make sure they’re what you need.
-
Select and recover: Choose the files you want to restore and click Recover.
Some Final Tips
- Always try to recover files as soon as possible to avoid data being overwritten.
- Keep your Time Machine backups up-to-date to have a safety net.
- Consider investing in professional-grade data recovery software like Disk Drill.
That’s it, folks! Hope this helps you rescue those files! 
 Hey everyone! If you’ve accidentally emptied your Trash on Mac and need to recover those files, don’t worry! I’m here to help with a step-by-step guide. Let’s dive right in!
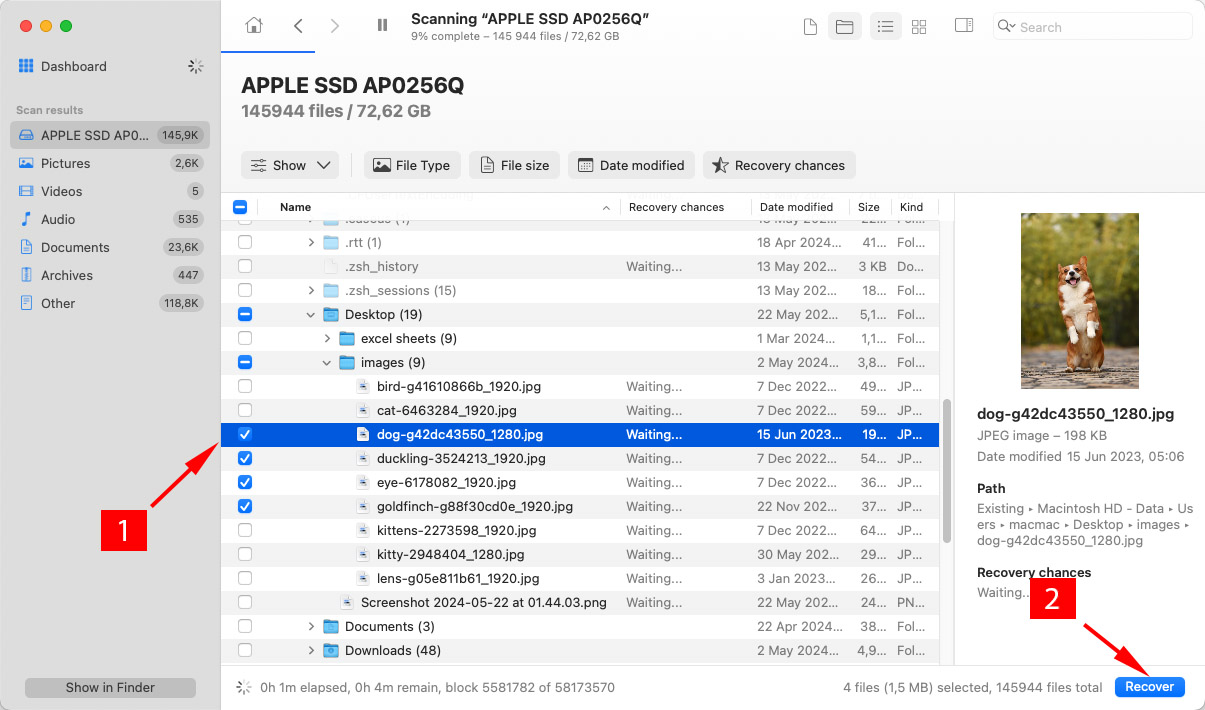
How to Recover Deleted Files on Mac 
Step 1: Click the Recover button to start the recovery process. You’ll be asked to pick a safe spot to save your recovered files.
Step 2: Choose the storage location and click Next. The recovered items will be saved to the location you chose.
 Important Tip: Stop using the storage device to avoid overwriting data, which can make recovery impossible.
Other Tools for Recovering Empty Trash 
Even though we love Disk Drill, there are other tools you can try. Here are two alternatives:
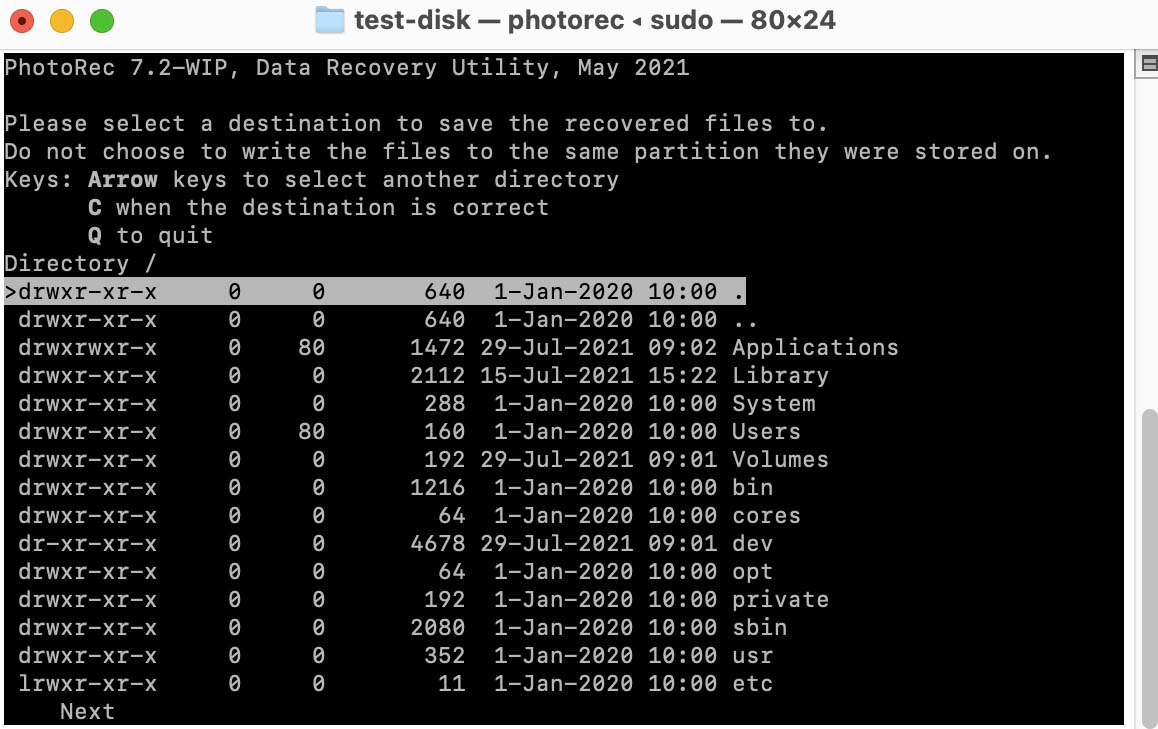
PhotoRec 
PhotoRec is a free tool that works on multiple operating systems, including macOS. Since it’s free, it doesn’t have all the bells and whistles you’d find in paid apps. It uses a command-line interface, so you need to be comfortable with entering commands and have some data recovery knowledge. This one’s perfect if you’re a bit tech-savvy.
R-Studio
R-Studio is a paid option that’s a bit easier to use. It’s packed with features, including RAID recovery (which you might not need). The home version is reasonably priced, and it can recover files from an emptied Trash bin. It may seem a bit complex at first, but it definitely gets the job done.
Retrieve Files from an Emptied Trash on Mac with iCloud Backup 
If you’ve got backups on iCloud, here’s how you can use them to recover files:
-
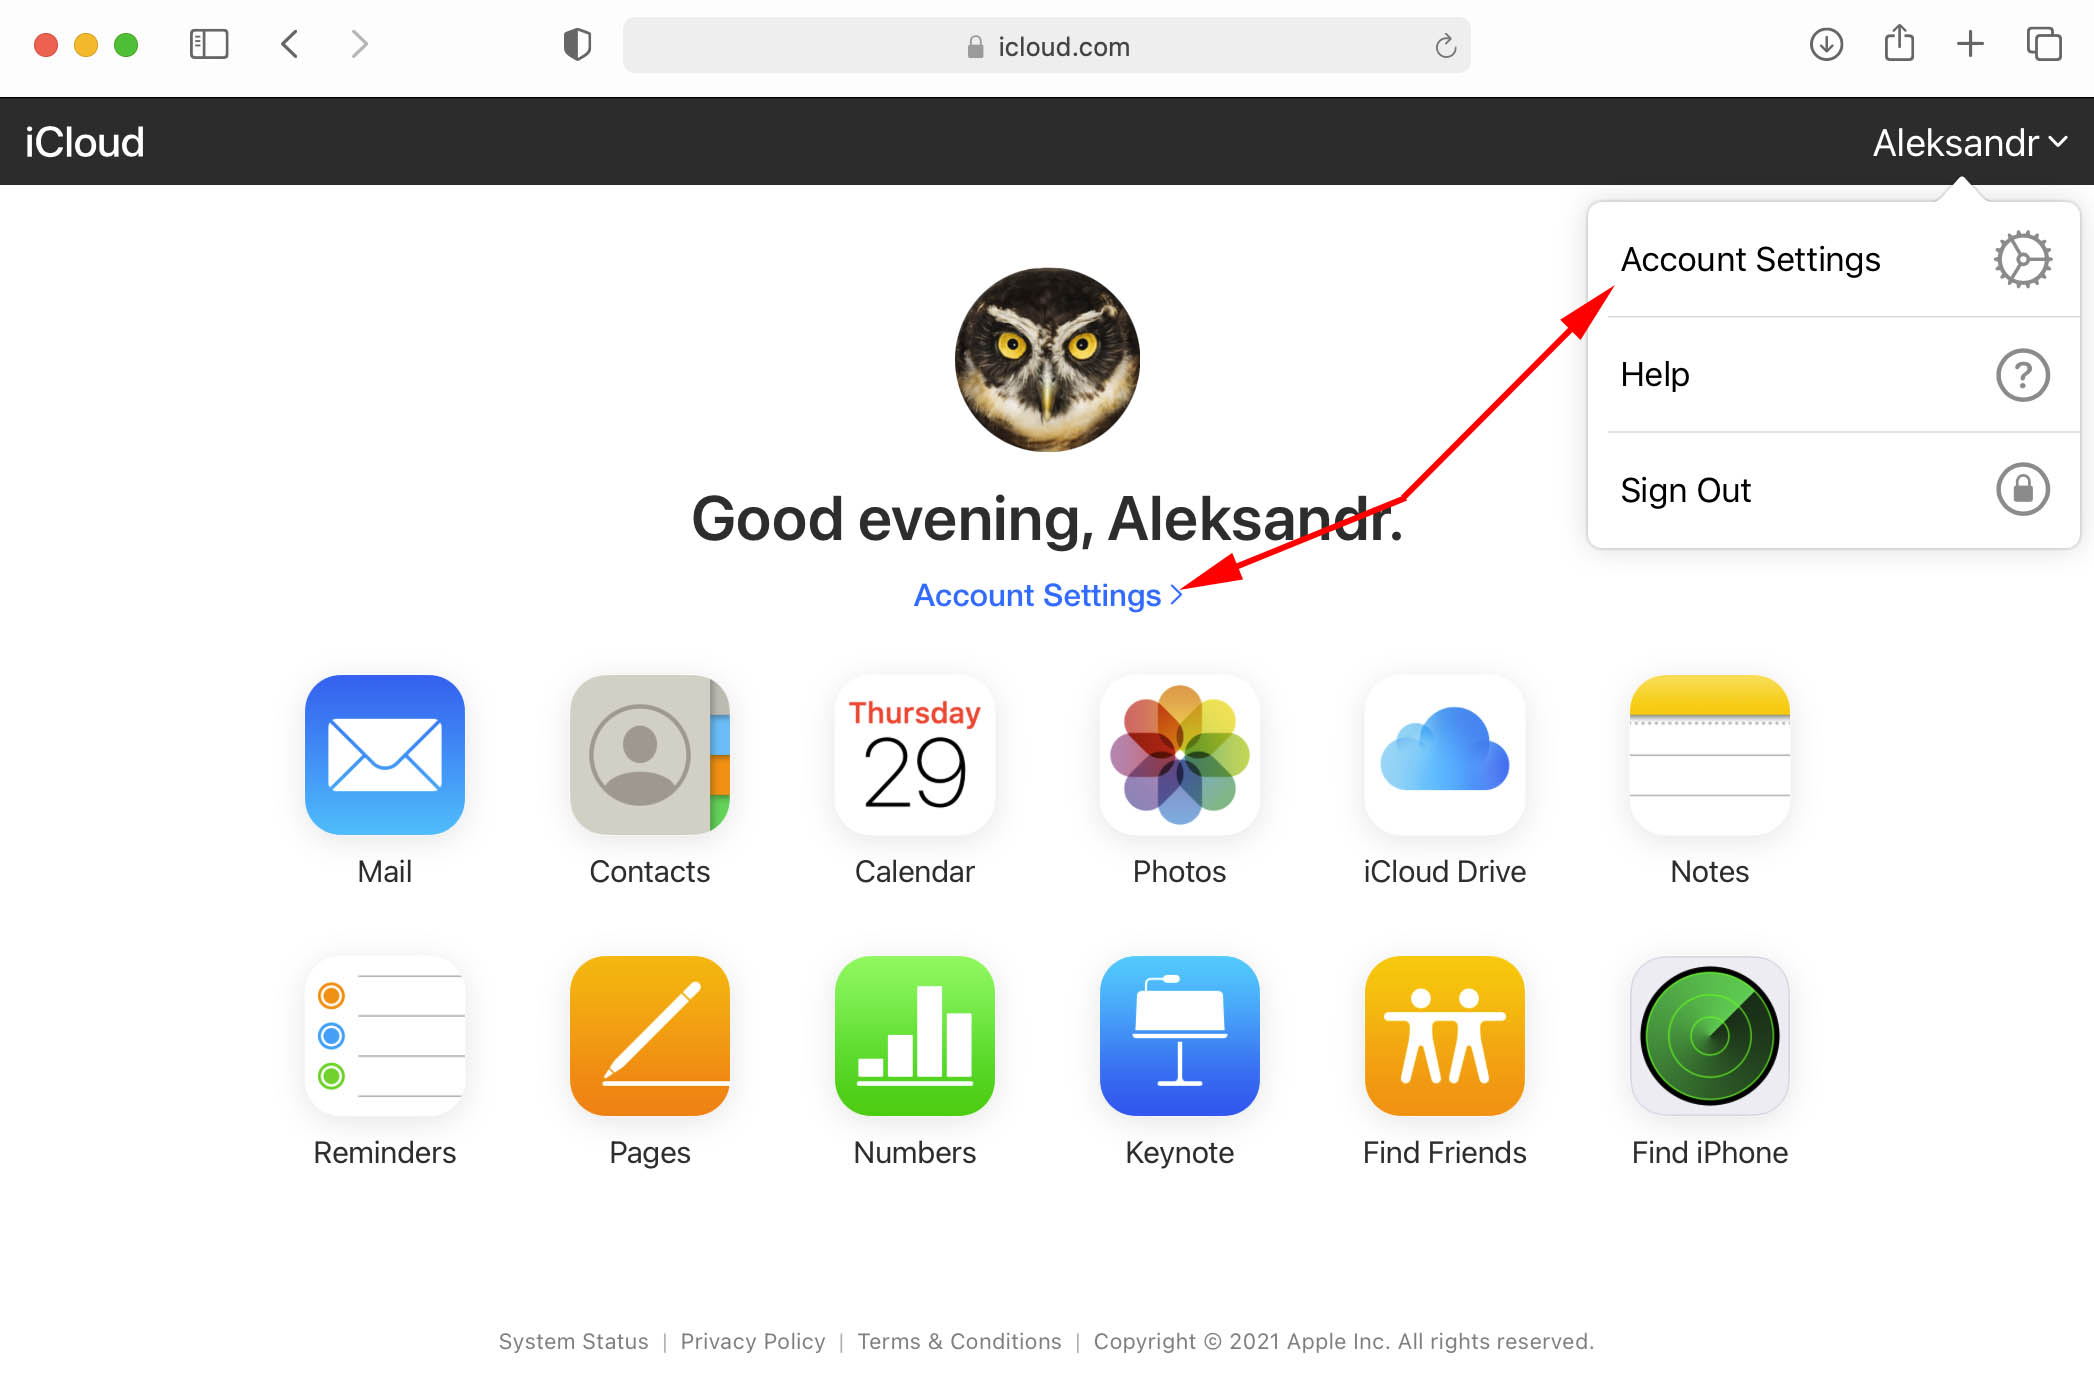
Go to icloud.com and log in with your credentials.
-
Click on Settings.
-
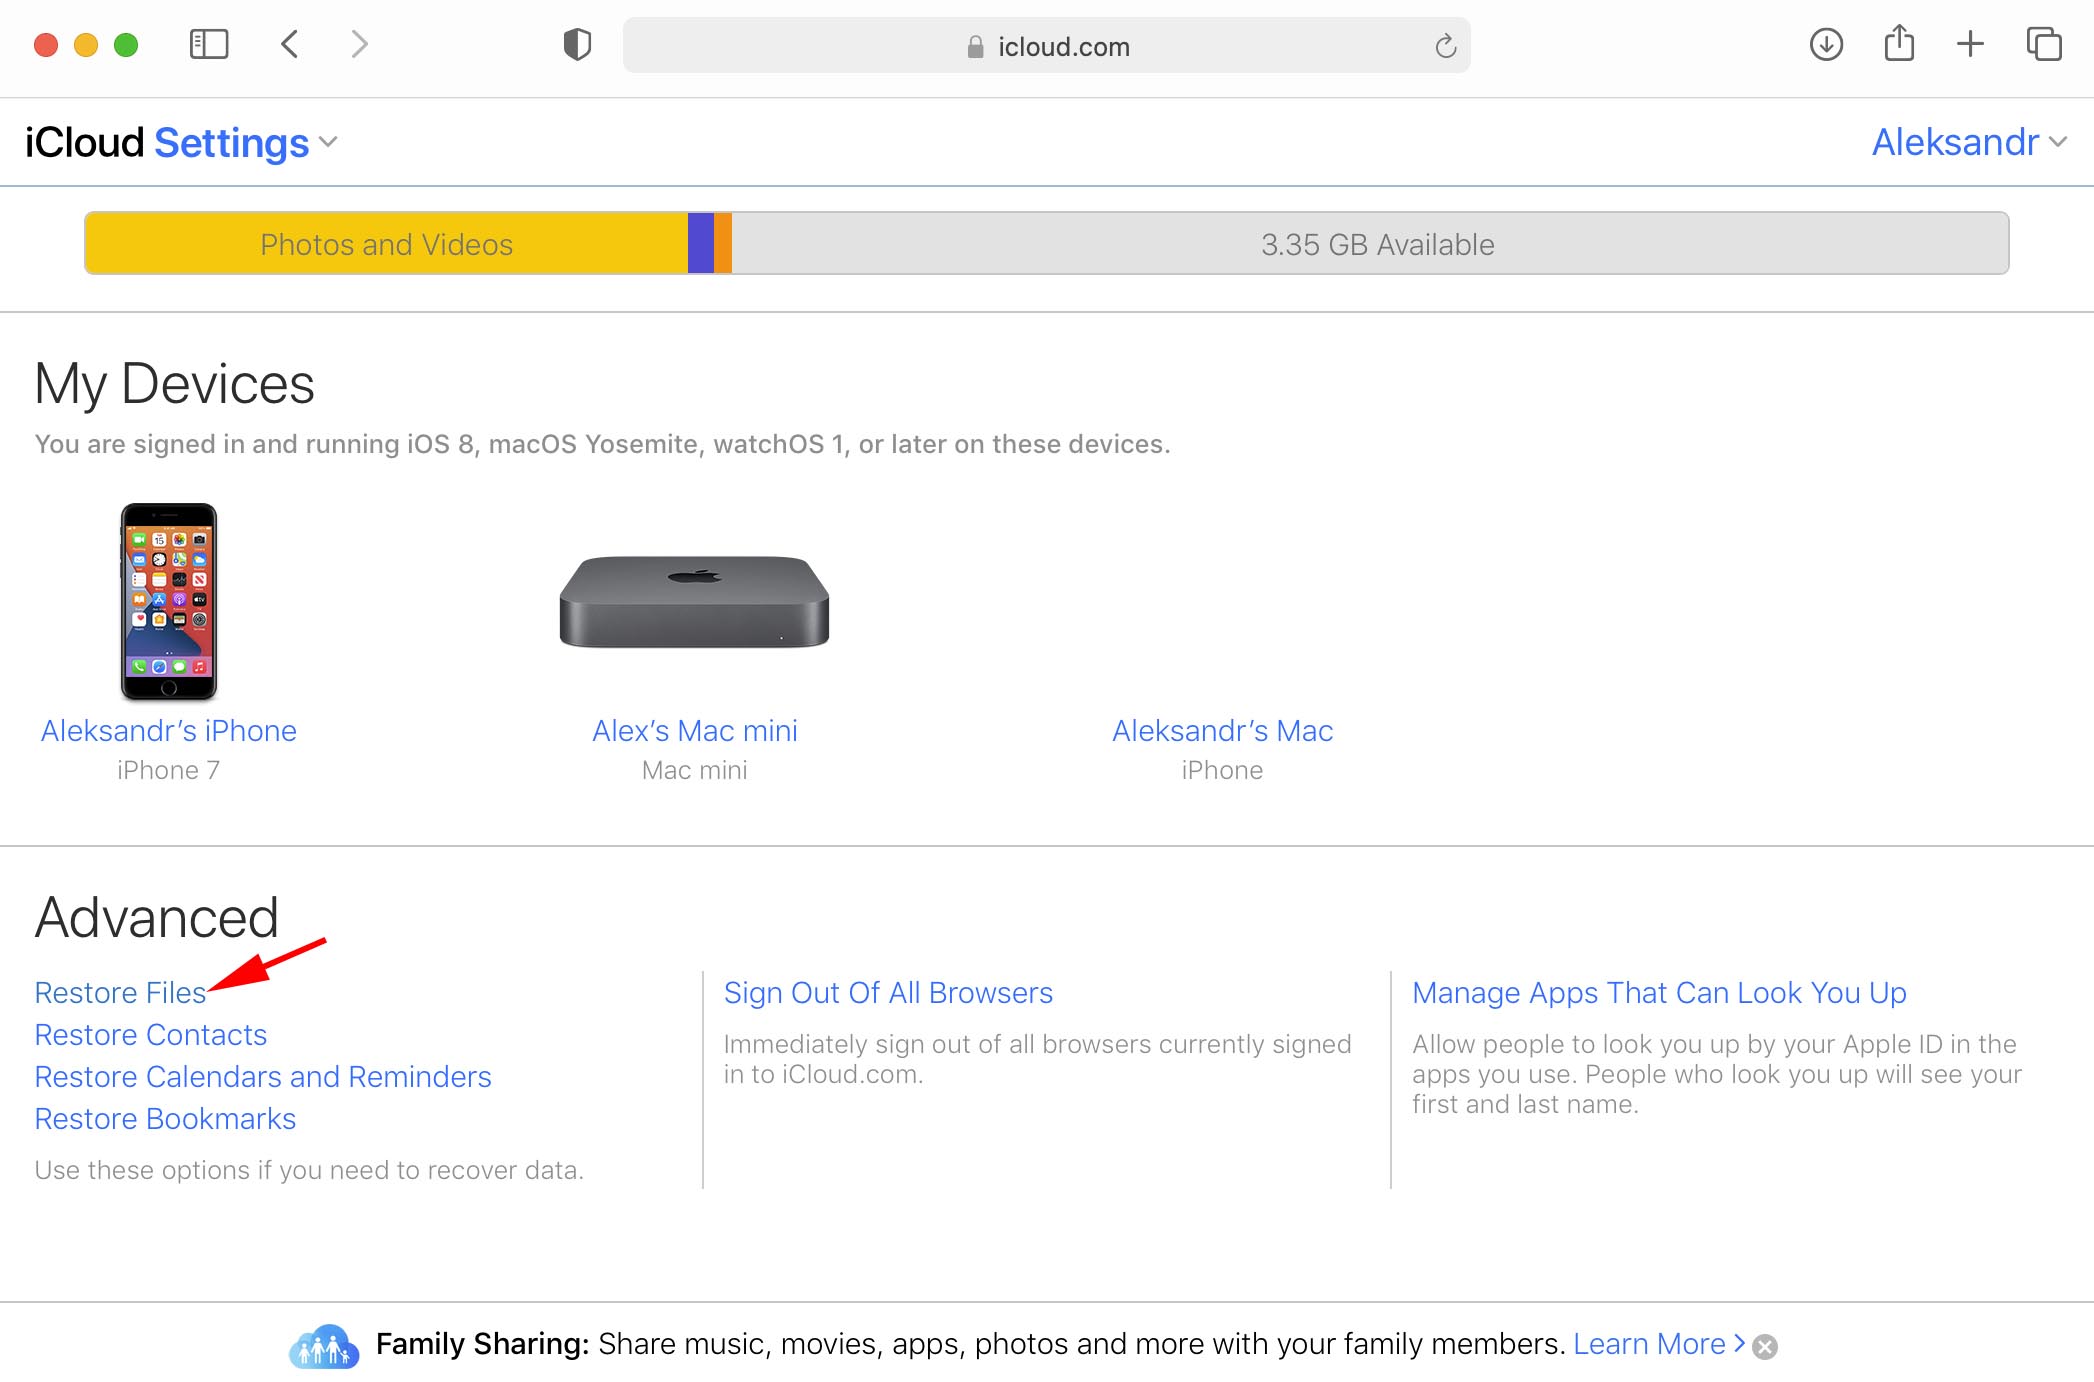
Scroll to the bottom-left under the Advanced tab and click Restore Files.
-
Find the files you want to recover, check the boxes next to their names, or hit Select All to grab everything.
-
Click Restore Files.
Conclusion 
Got files in the Trash you need to get back? You’ve got a few options:
- Use backups that you already have, knowing the file’s name and location.
- Act quickly with data recovery software before new information overwrites those deleted files.
Hope this helps, and feel free to ask if you have any questions or need more details!