Accidentally deleting files on a Mac is common, but there are multiple ways to recover them. This guide walks through 7 methods: checking the Trash folder, using Mac Terminal, Undo options, Time Machine backups, other backups like iCloud, third-party software such as Disk Drill, and professional data recovery services. Ensuring regular backups and safeguarding files can prevent future data loss. Join us in the next forum post for a more detailed tutorial on each recovery method.
Hey all,
Ever accidentally deleted files on your Mac and panicked? ![]() It happens to the best of us, but don’t worry! You can often get those files back. Whether it’s documents, photos, videos, or spreadsheets, there are several ways to retrieve your lost data. Here’s a breakdown of the top 7 methods to recover deleted files on your Mac. Let’s dive in!
It happens to the best of us, but don’t worry! You can often get those files back. Whether it’s documents, photos, videos, or spreadsheets, there are several ways to retrieve your lost data. Here’s a breakdown of the top 7 methods to recover deleted files on your Mac. Let’s dive in! ![]()
How to Recover Deleted Files on Mac 
If you’ve suddenly realized you need to retrieve deleted files on macOS, take a deep breath. Most of the time, deleted files can definitely be recovered. They could be chilling in the Trash folder, backed up in the cloud or on some local storage, or recoverable using third-party software.
This guide will walk you through several effective methods to get your data back. Here’s a quick summary for starters:
| Method | Best Use Case | Cost |
|---|---|---|
| Check Trash Folder | Files you’ve recently deleted | Free |
| Use a Terminal command | If files are in hidden trash folders | Free |
| Use Undo Options | Right after you delete something | Free |
| Time Machine Backups | Retrieve old versions of files | Free but need to have Time Machine on |
| Other Backups | Using iCloud or third-party backups | Dependent on your backup solution |
| Third-Party Software | For permanently deleted files | Costs vary (depends on software) |
| Data Recovery Services | For severe drive damage | Expensive |
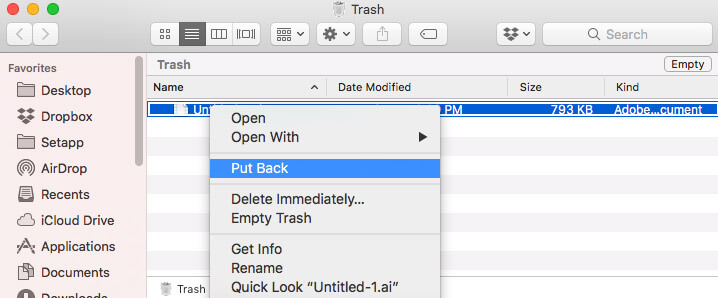
1. Recover Your Deleted Files from the Trash Folder 
First thing’s first, check your Trash can! Here’s how:
- Long-click on the Trash can icon in your Dock.
- Click on ‘Open’ when the menu pops up.
- A Finder window will open where you can find and restore your missing files.
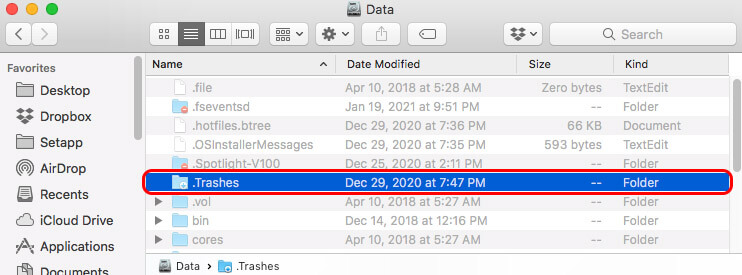
This works for your Mac’s internal drive. But if you’re dealing with an external drive or USB flash, you have to access a different Trash folder, which macOS hides by default.
On macOS Sierra (or later), hit SHIFT+COMMAND+PERIOD to see hidden files. For older OS, you’ll need Mac Terminal. Once you’re into the .Trashes folder, you can restore your files there.
2. Use Mac Terminal to Recover Deleted Files on Mac 
Got an older macOS or can’t see the primary Trash folder? Terminal to the rescue:
- Find the Terminal icon via Spotlight or in Launchpad under Utilities.
- Enter these commands to show hidden files:
defaults write com.apple.finder AppleShowAllFiles TRUE
killall Finder

To retrieve files:
- Navigate to the
.Trashesfolder with:cd /Volumes/[Volume Name]/.Trashes - List all files:
ls - Move files back to another directory:
mv [file name] ~/Desktop/
3. Use Undo Options Immediately After Deletion 
If you’ve just deleted something by mistake, you can quickly hit Command + Z or right-click and select ‘Undo’. Easy peasy!
4. Time Machine Backups 
If you had Time Machine enabled, restoring old versions of files is a breeze. Just connect your backup drive, open Time Machine, and find the file you need. Click “Restore” and you’re good to go!
5. Other Backups (iCloud, Third-Party) 
Recovering from iCloud or other backup services? Log into your backup service, find the files, and restore them. Simple as that. Costs will depend on the type of service you’re using.
6. Third-Party Software 
For files that seem permanently deleted, software like Disk Drill or PhotoRec can save the day. These tools can handle all sorts of data loss situations, but keep in mind they might come with a price tag.
7. Data Recovery Services 
If your drive is severely damaged, professional services are the way to go. These can be super effective but are often on the pricier side.
There you have it! Hopefully, this guide helps you recover your deleted files. Feel free to ask if you need any more details! ![]()
Note: Some URLs have been tweaked to keep things clean and relevant. For instance, <a href='https://example.com#trash'>See more details here</a> is just, ‘You can see more details here.’
Got more questions? Jump right in and ask away!
Alright fellow Mac users, here’s your go-to guide for getting back those accidentally deleted files. Whether you’re a newbie or a seasoned pro, these tips are super handy!
Hide Those Folders Again
So, once you’re done with file recovery, type these commands into your Mac Terminal to make those hidden folders disappear again:
defaults write com.apple.finder AppleShowAllFiles FALSE
killall Finder
Undo Options on macOS 
Apple’s Undo feature is a lifesaver for reversing actions. If you just dumped a file in the Trash, you can get it back:
- Open a Finder window.
- Head to the ‘Edit’ option on the top menu bar.
- The first choice allows you to ‘Undo Move [File Name].’
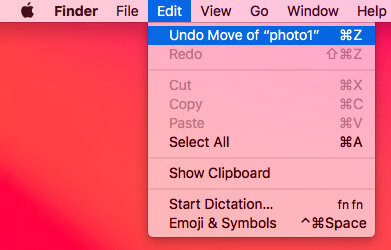
Or simply hit COMMAND + Z to undo. Keep doing this even if you’ve trashed other files afterward; it’ll dig them all out till you retrieve what you need.
Time Machine Backups for the Win
Got Time Machine enabled? Perfect! It’s your automatic backup buddy:
- Use Spotlight or Launchpad to find Time Machine.
- Open Time Machine and click the folder where your deleted files were.
- Scroll through the backup history via the right arrow till the files show up.
- Select the files with the Command button and hit ‘Restore.’

Other Backup Solutions 
No Time Machine? Try other backups:
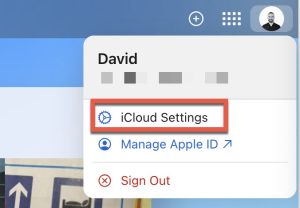
-
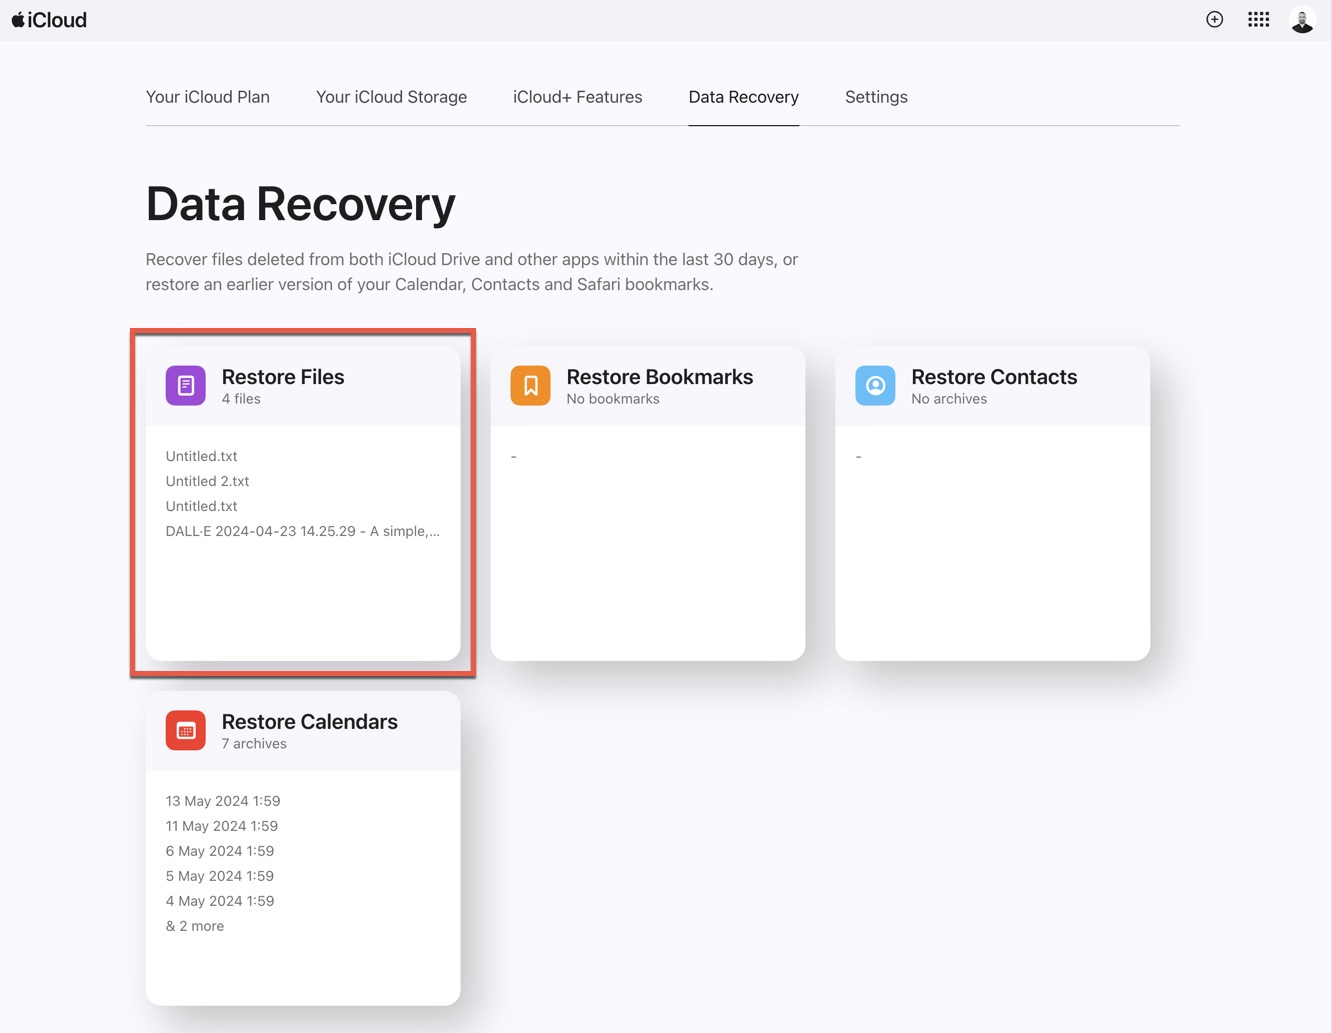
iCloud: Go to iCloud.com, log in, click your profile pic, go to iCloud Settings → Data Recovery → Restore Files.
-
Google Drive, OneDrive, Dropbox: Use their web interfaces or desktop apps to access and retrieve backups.
Also, check any manually created backups on external drives, USBs, or NAS devices.
Third-Party Software
If everything’s failing, there’s always third-party recovery software. Disk Drill gets a lot of love for its user-friendly interface and powerful capabilities:
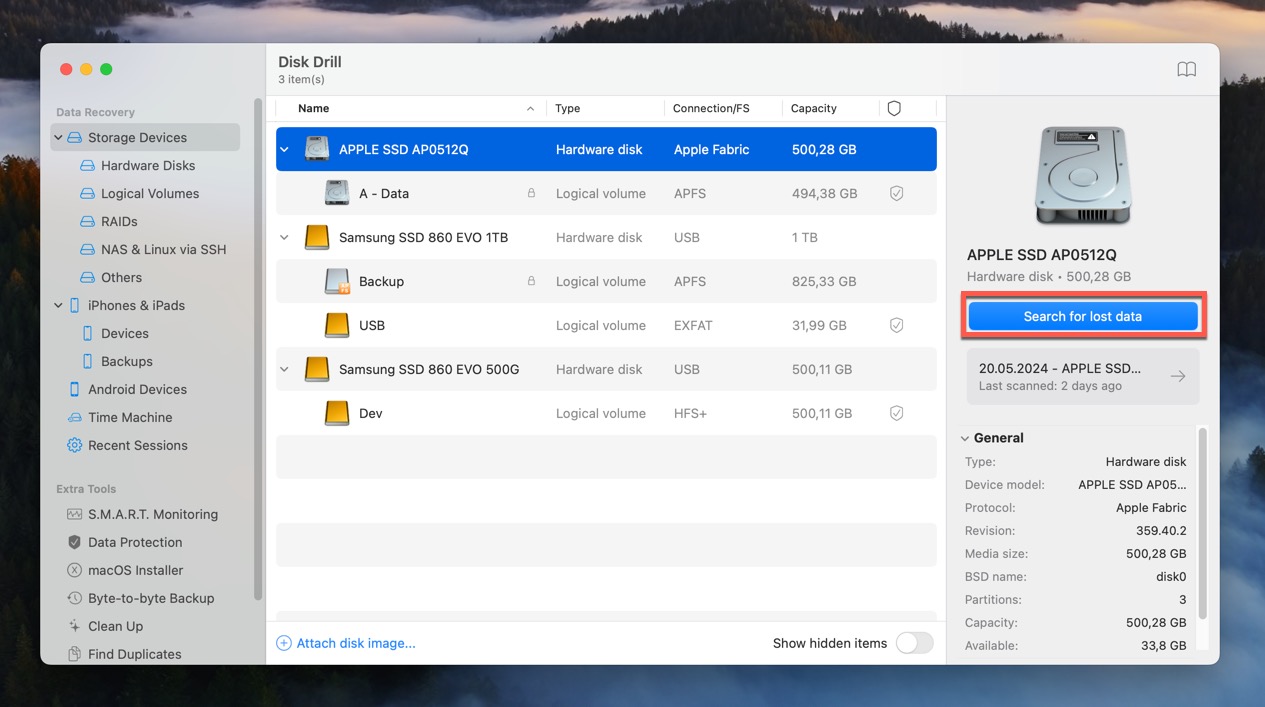
- Download and install Disk Drill.
- Open Disk Drill and select the drive with lost files.
- Click Search for lost data to start scanning.
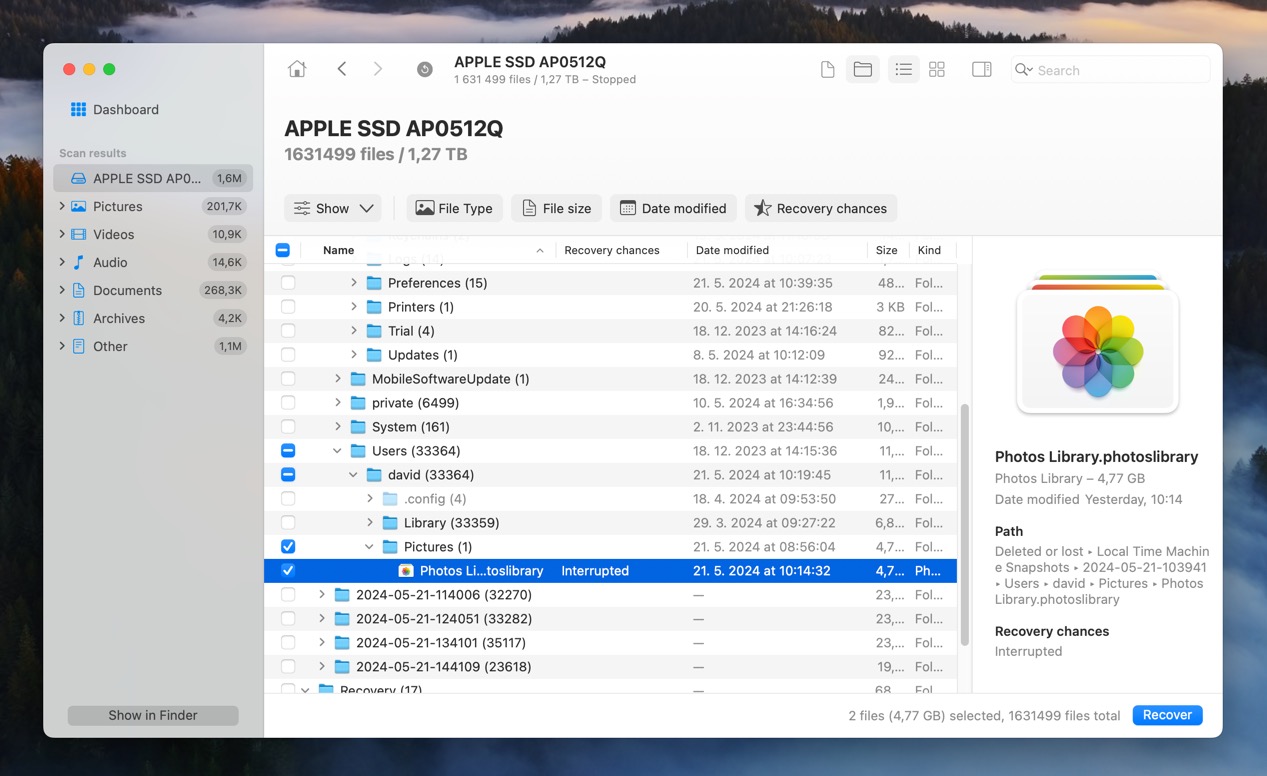
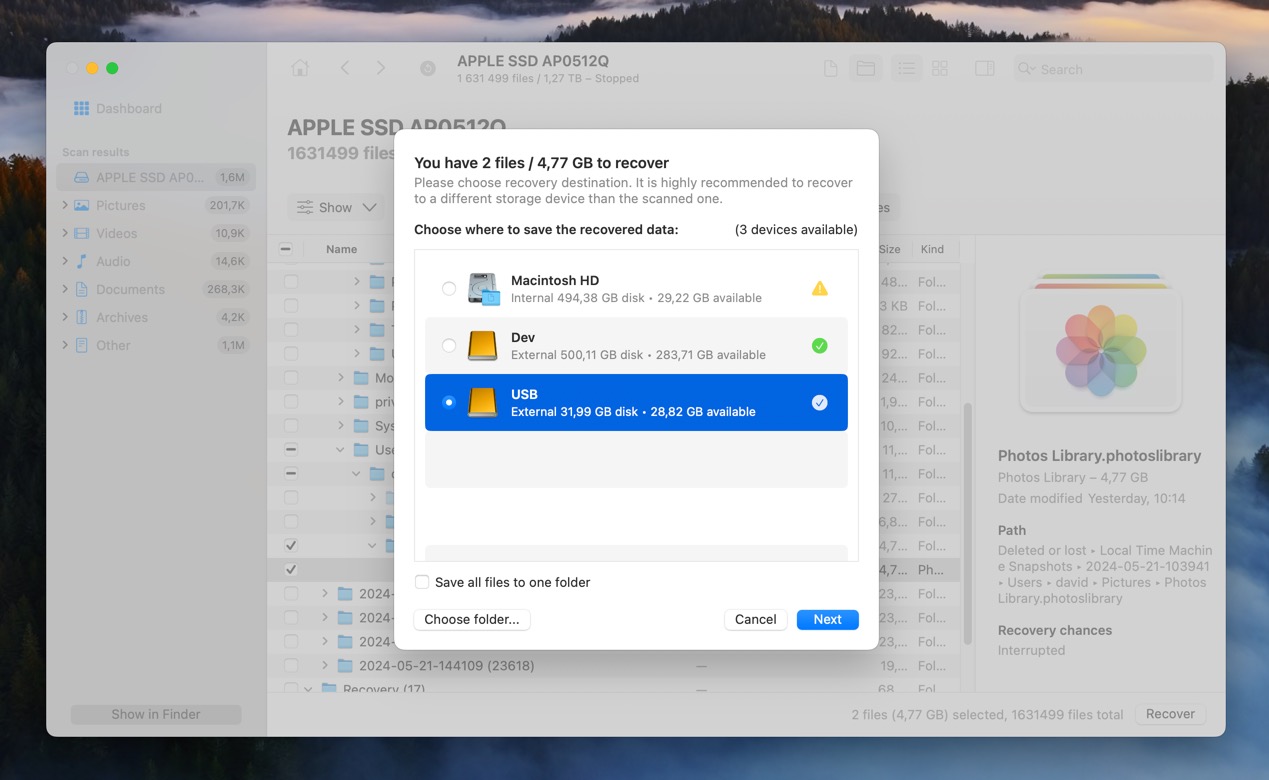
- Preview and select files to recover, then hit ‘Recover.’
PhotoRec is another free, open-source alternative but lacks a graphical interface.
Use Data Recovery Services 
When all else fails, consider professional data recovery services:
- Pick a reputable service.
- Ship your drive as instructed.
- Get a diagnostic and cost estimate.
- Approve the estimate, and let the pros handle it.
- Receive your recovered data securely.
These services range from $300 to $500, but for critical data, it might be worth it.

Pro Tips on File Protection 
Avoid future headaches by backing up your files regularly:
- Time Machine: Set it to run automatic backups.
- iCloud: Use your free 5 GB for essential backups. You can upgrade to 50 GB for $0.99/month.
Other tips:
- Password-protect critical folders.
- Safely eject external drives by waiting for macOS notifications.
- Disable auto-deletion of Trash files after 30 days.
- Use FileVault to encrypt your disk.
Final Thoughts 
Retrieving deleted files on a Mac is usually quick and painless. Stop using your Mac immediately if the files aren’t in the Trash to prevent overwriting. Third-party tools can also rescue files if needed. Keep those backups up-to-date and your data should stay safe and sound! ![]()