Learn how to recover deleted files on a Mac without downloading extra software. This guide covers six methods: using the Trash Bin “Put Back” option, iCloud Drive, Time Machine backups, Mac Terminal commands, the Undo command, and professional data recovery services. Additionally, it outlines how to prevent data loss using built-in tools like Time Machine or third-party software like Disk Drill. Stay tuned for our next forum post, where we’ll provide a detailed step-by-step tutorial to further help you recover your precious files.
So, you’ve accidentally deleted important files on your Mac? Don’t panic! You might be able to get them back without any fancy data recovery software. ![]()
This guide will show you how to recover those deleted files with six solid methods that don’t require any extra software. Plus, we’ll go over two methods to prevent data loss on your Mac in the future (spoiler: the best defense is a good offense).
How to Recover Deleted Files on a Mac Without Software
Whether you’ve lost nostalgic family photos, crucial tax docs, or favorite videos, here are six ways you can recover those files on your Mac or MacBook Pro. And guess what? No need to download any additional software! ![]()
1. Use the “Put Back” Option
The easiest way to recover deleted files is right from the Trash Bin on your Mac.
This folder stores files until you decide to empty it completely, giving you an extra safeguard before they’re gone forever. Haven’t emptied the Trash in a while? Your file might still be there!
Here’s how to use the “Put Back” option:
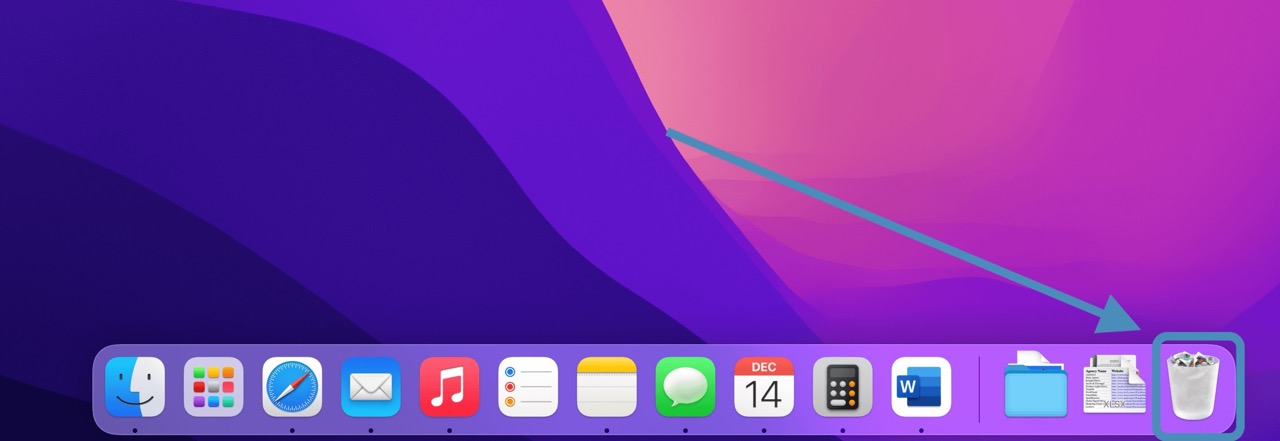
- Open the Trash: Click the Trash Bin icon in your dock.
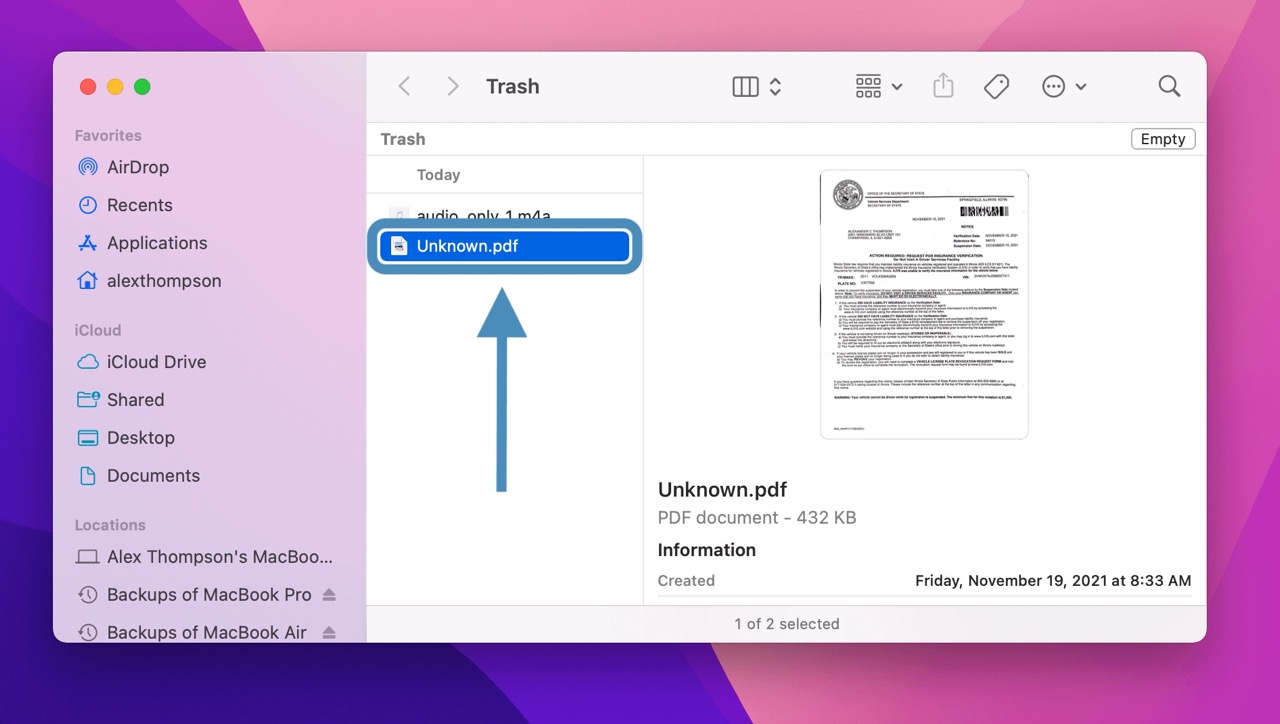
- Find Your File: Search for the missing file in the open Trash folder.
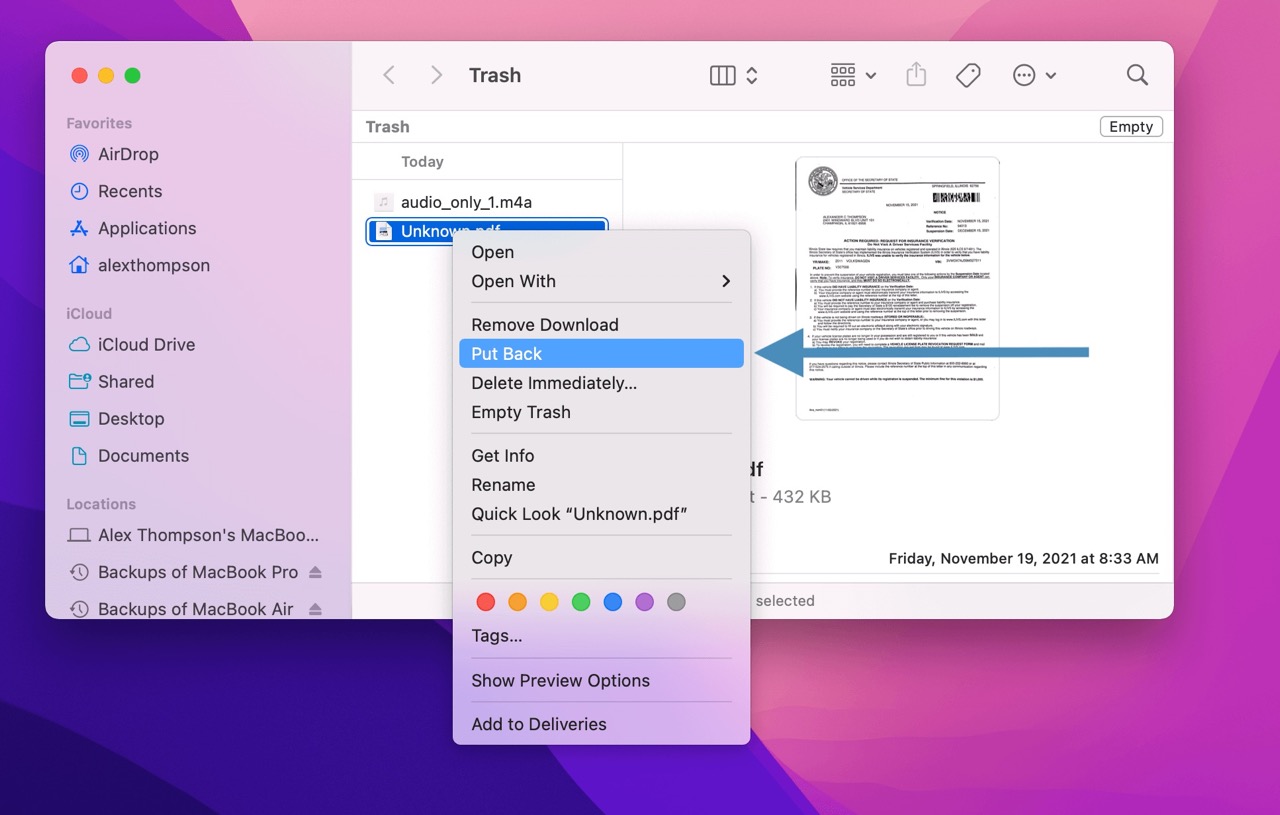
- Select and Restore: Right-click the file and choose “Put Back.”
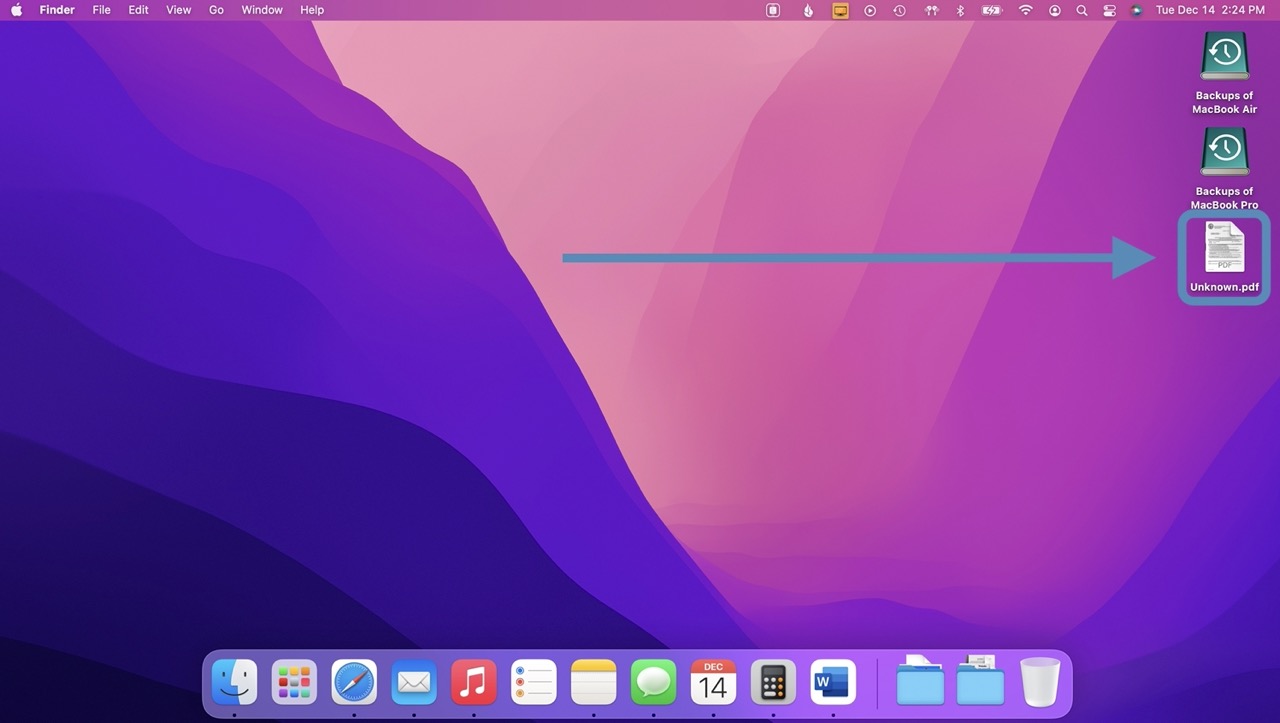
- Voila!: Your file will be restored to its original location.
2. Retrieve from iCloud Drive
If you’re using iCloud Drive, it’s another great way to recover deleted files.
iCloud Drive syncs your files and folders across your Apple devices. Changes made on one device reflect everywhere. Here’s how you can get those files back:
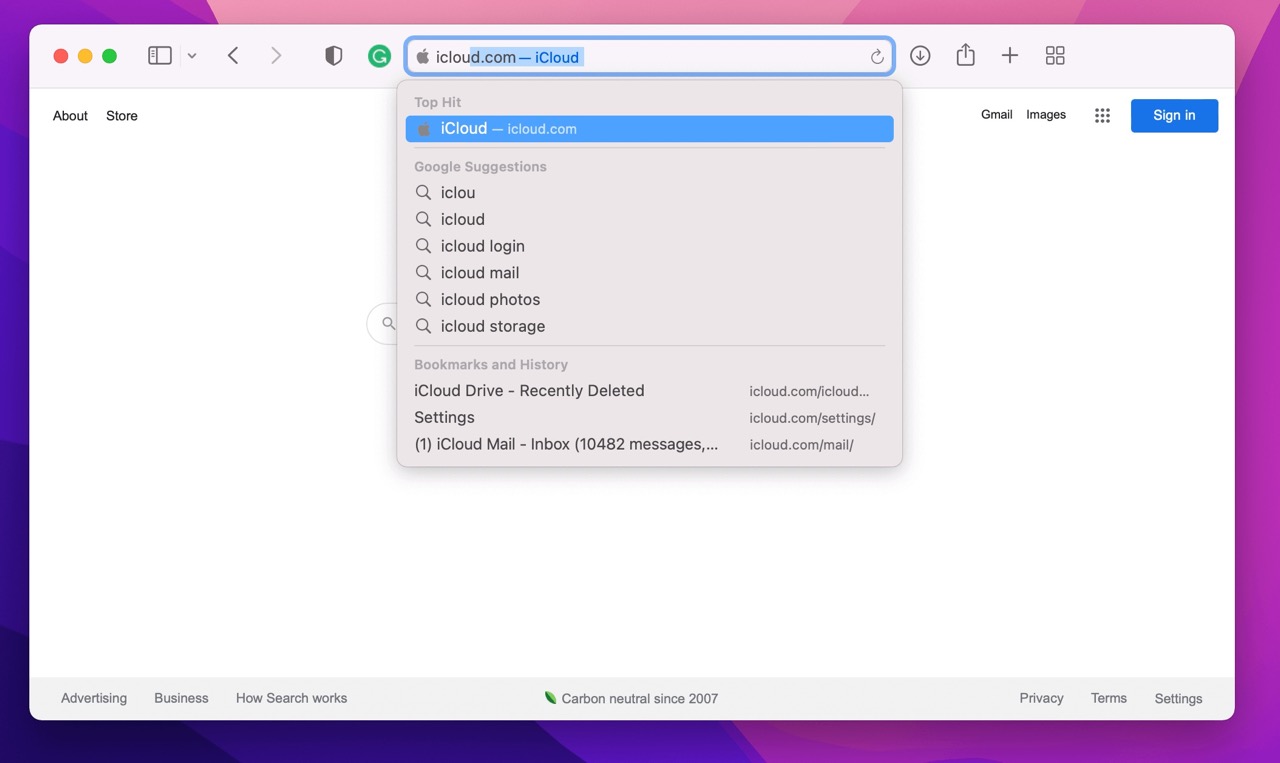
- Login to iCloud: Head to iCloud.com and log in with your Apple ID.
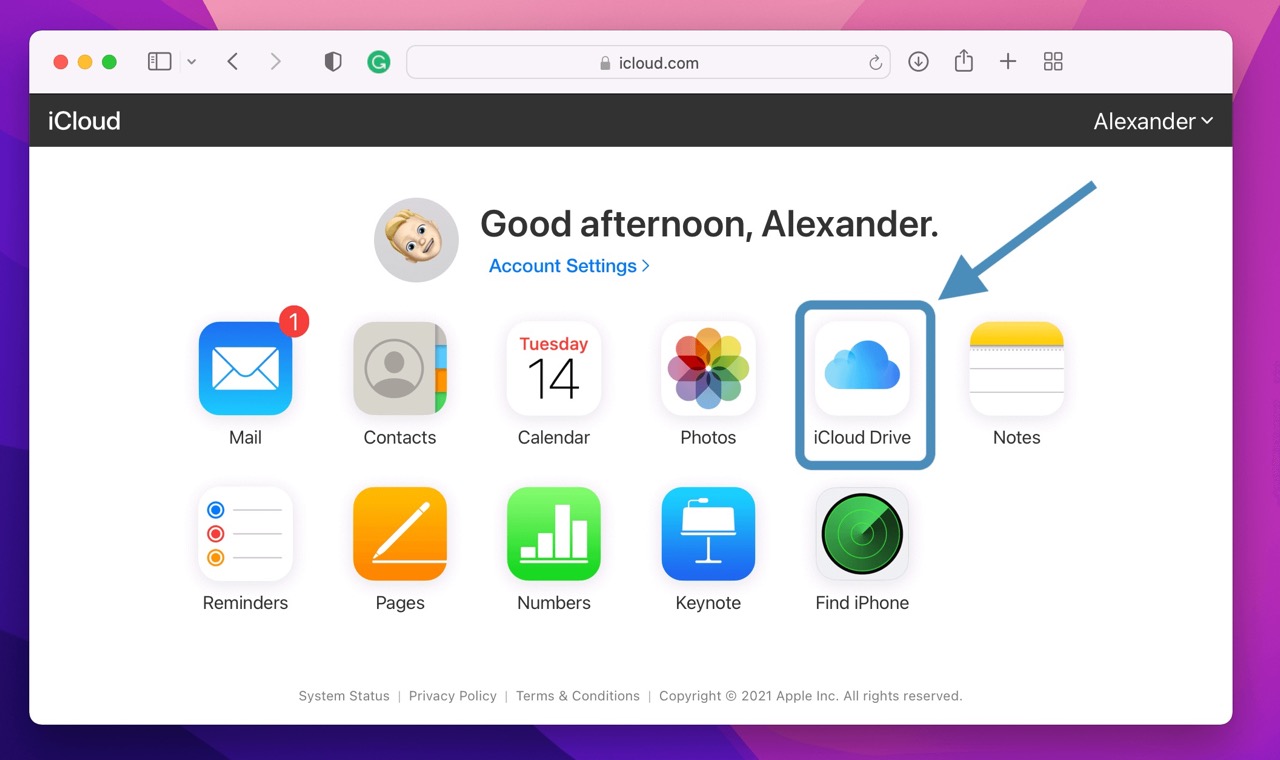
- Go to iCloud Drive: Click on iCloud Drive once logged in.
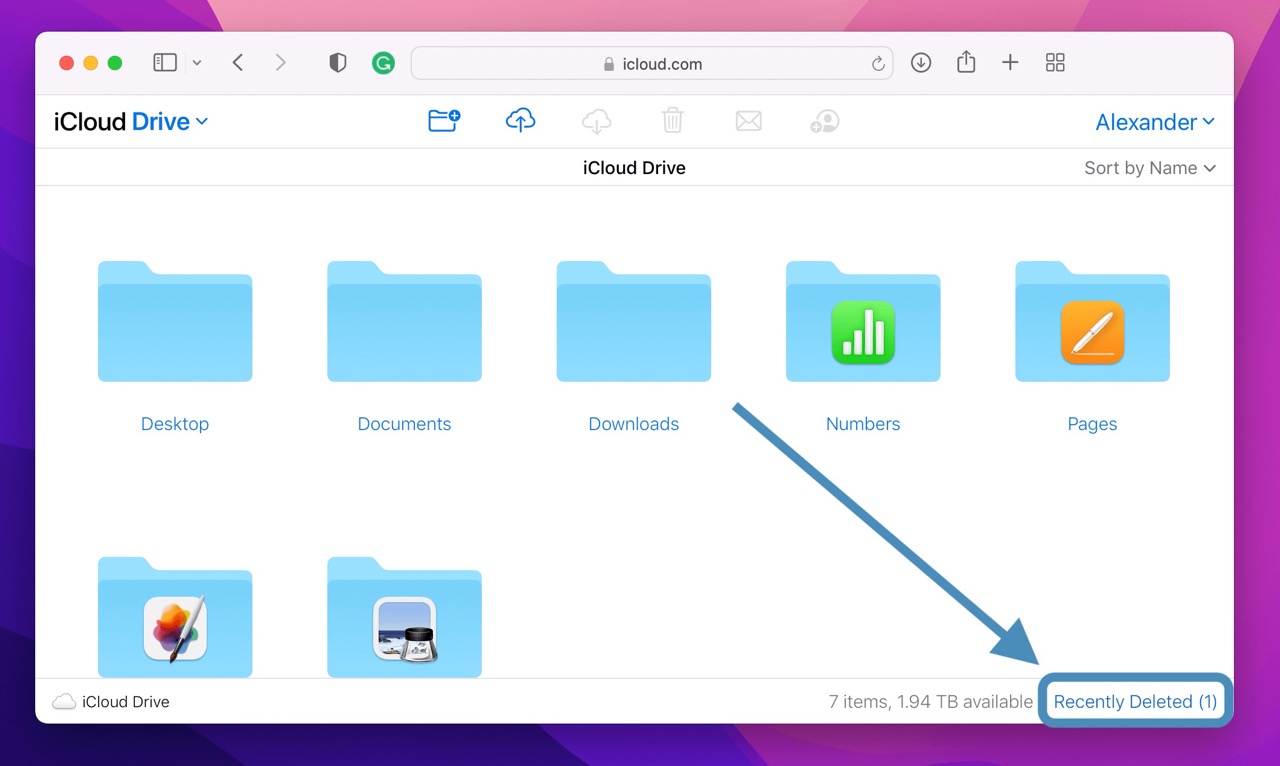
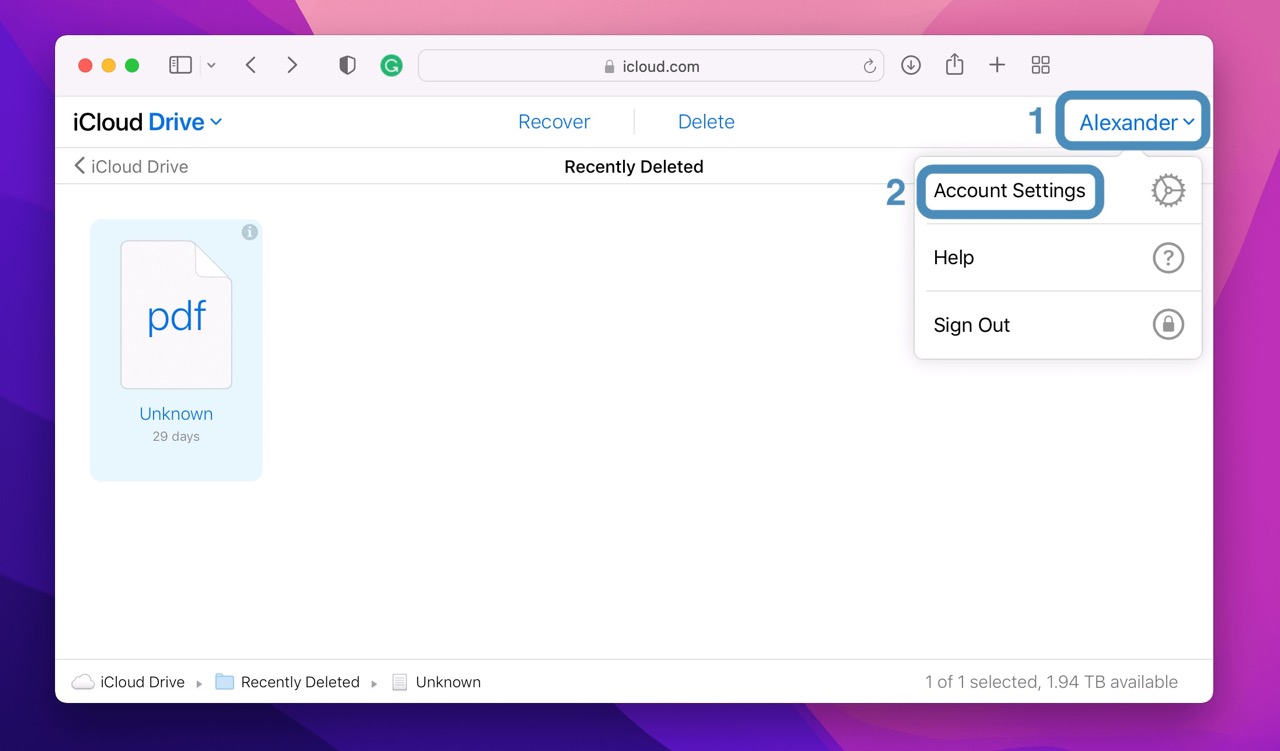
- Recently Deleted: Find the “Recently Deleted” section in the lower right.
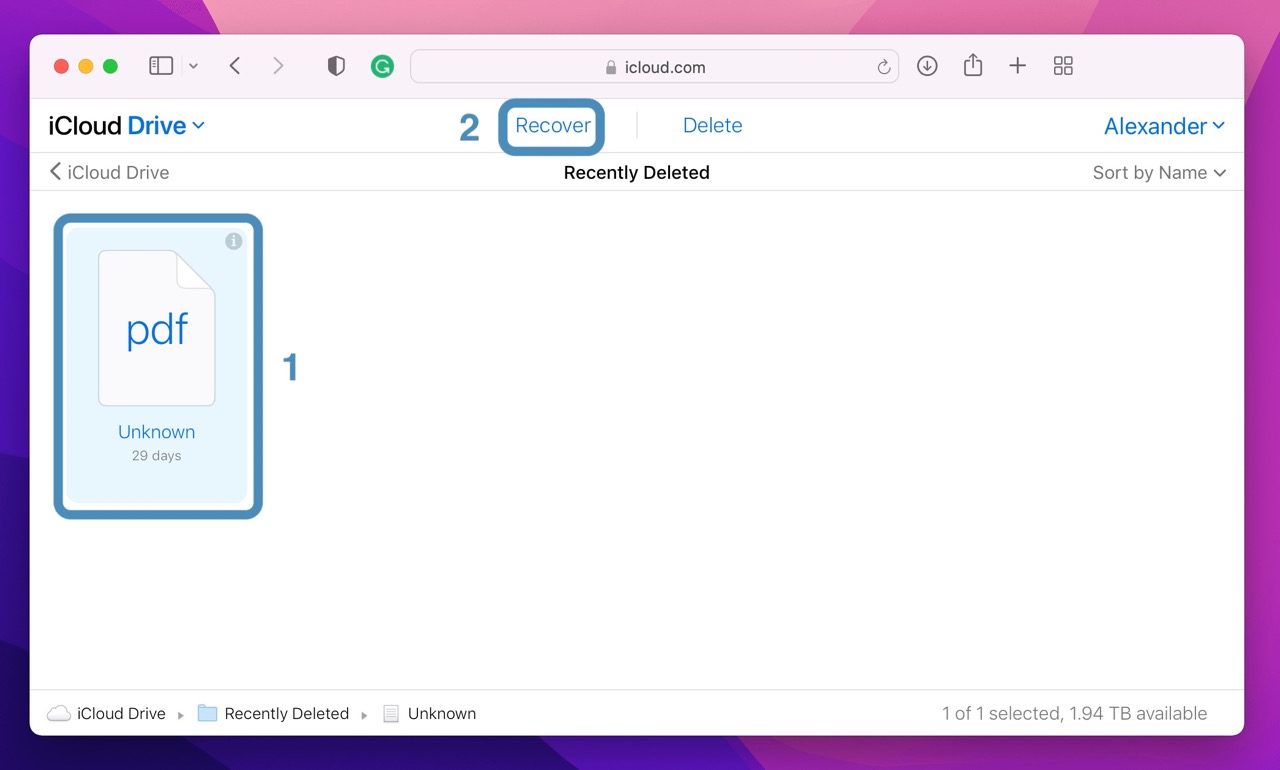
- Restore Files: Select the files you wanna get back and click “Recover.”
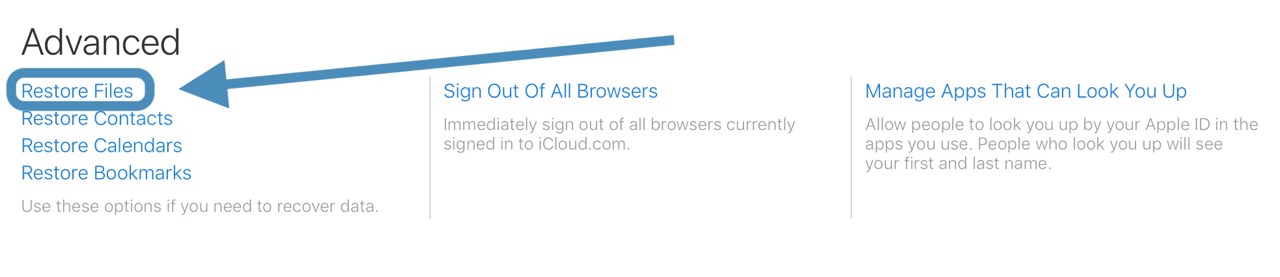
- App Deletions: For files deleted in an app, go to Profile > Account Settings.
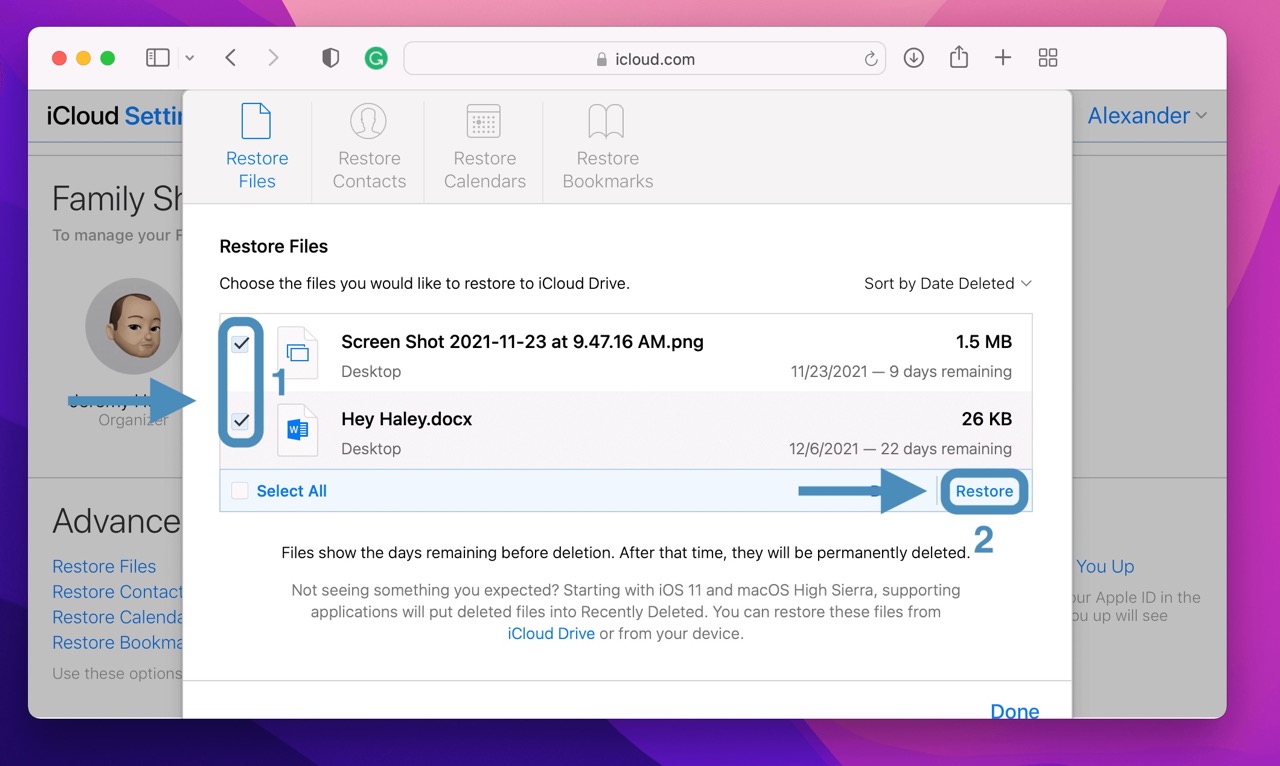
- Restore in Settings: Click “Restore Files” in the lower left.
- Click Recover: Select and restore your files.
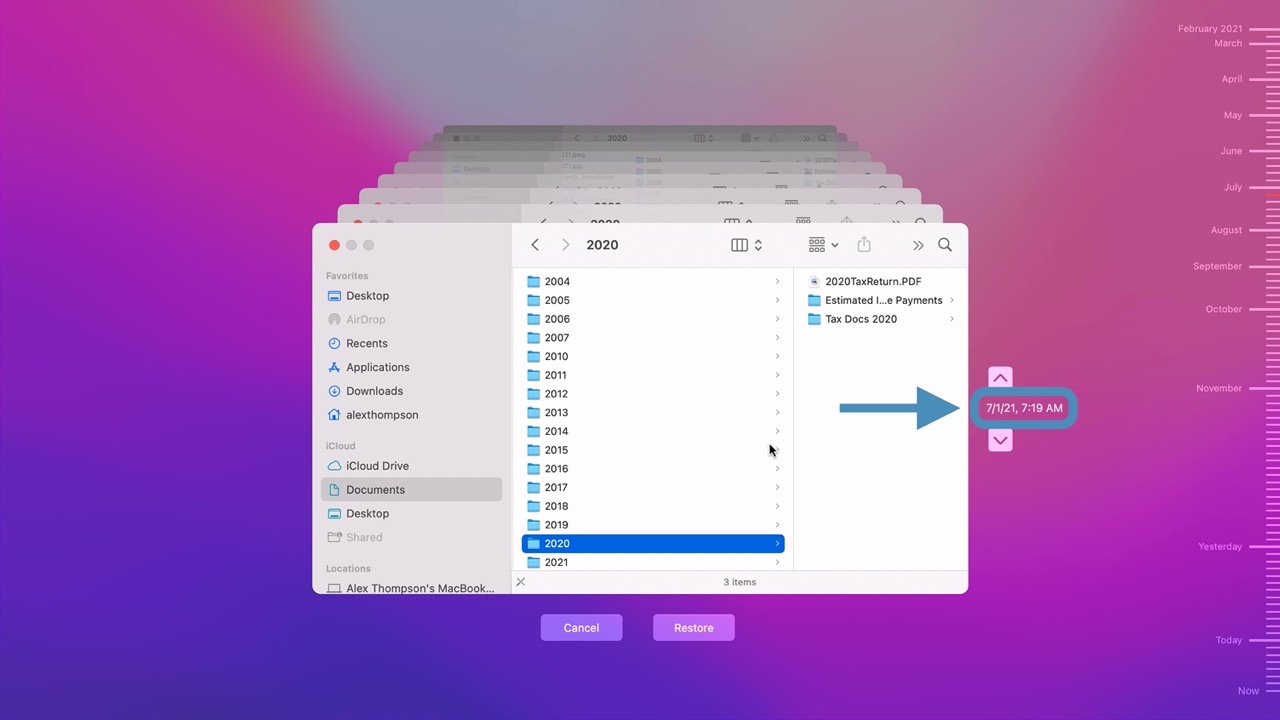
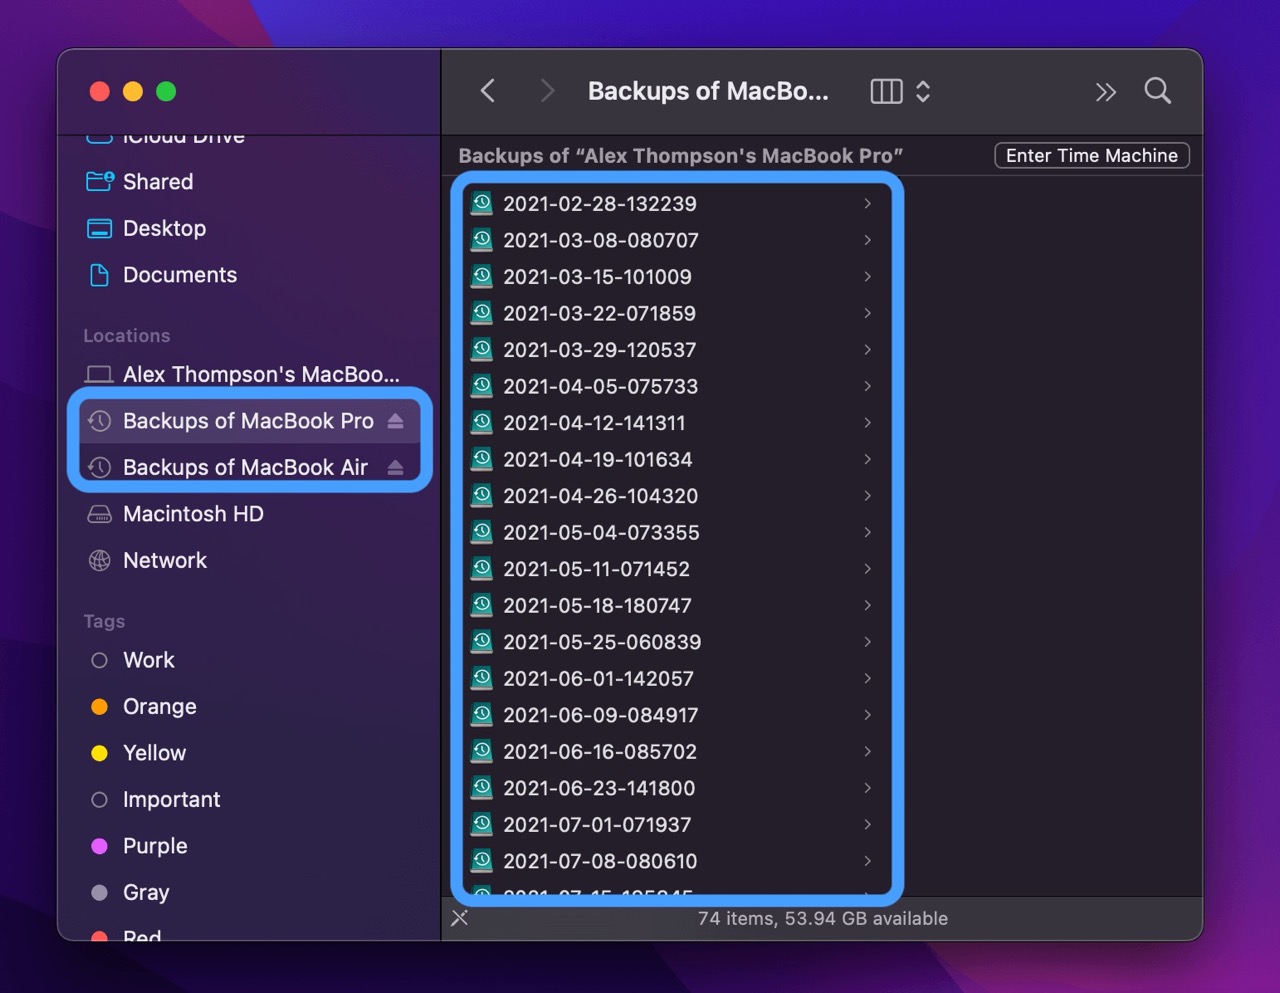
3. Restore Your Lost Files from a Time Machine Backup
Time Machine is Mac’s built-in backup tool that continually backs up your data. It’s an awesome way to retrieve lost files if you’ve been keeping backups.
To restore from a Time Machine backup:
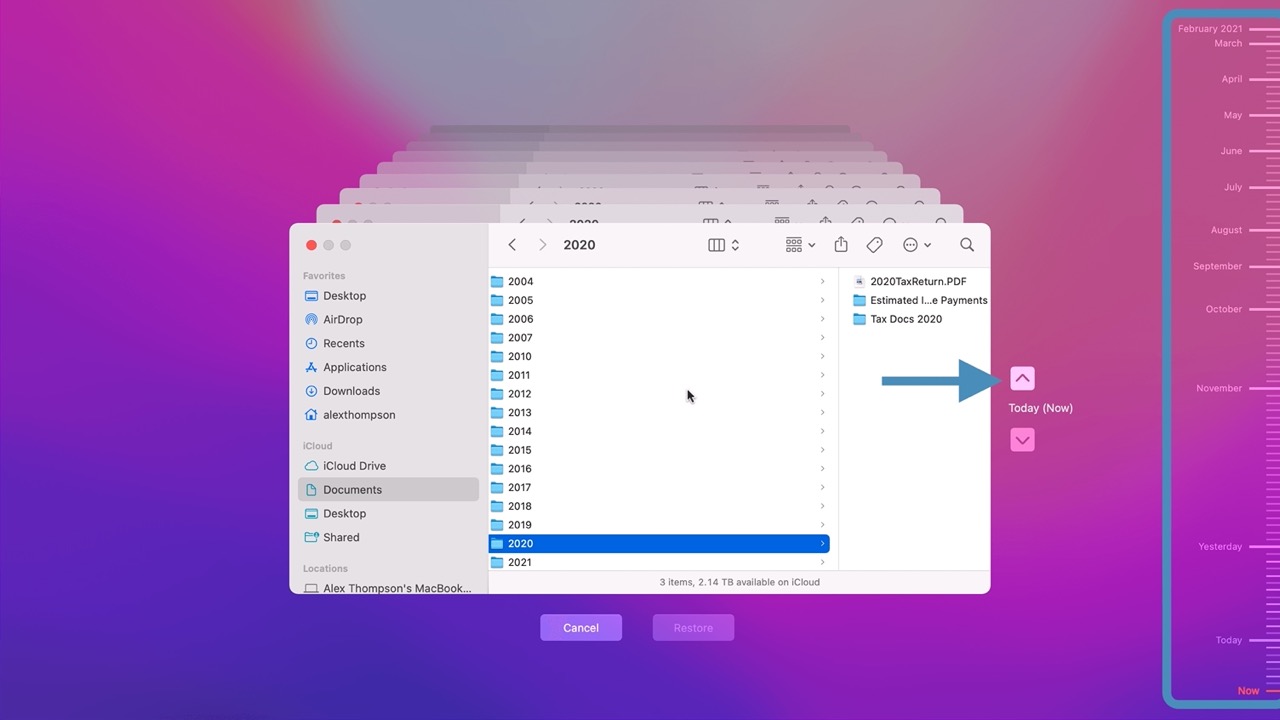
- Open Finder Window: Locate where the file was originally. Open Time Machine from the menu bar.
- Scroll Through Backups: Use the arrows or the timeline to navigate through backups.
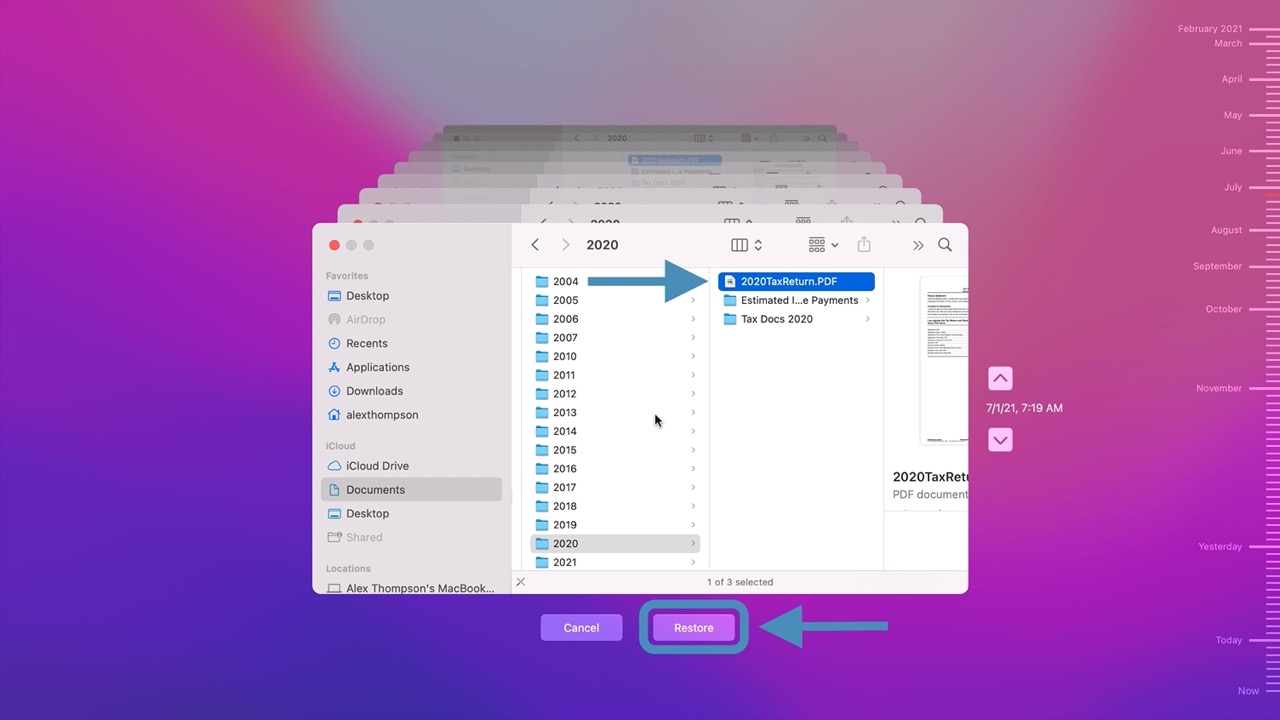
- Find Your File: Look for the backup with your file before it got deleted. Use the date/time for guidance.
- Restore: Click “Restore” to return the file to its original spot.

4. Use the Mac Terminal to Recover Your Files
You can also use Terminal to recover files from the Trash if you’re finding Finder difficult to navigate.
To recover files with Terminal:
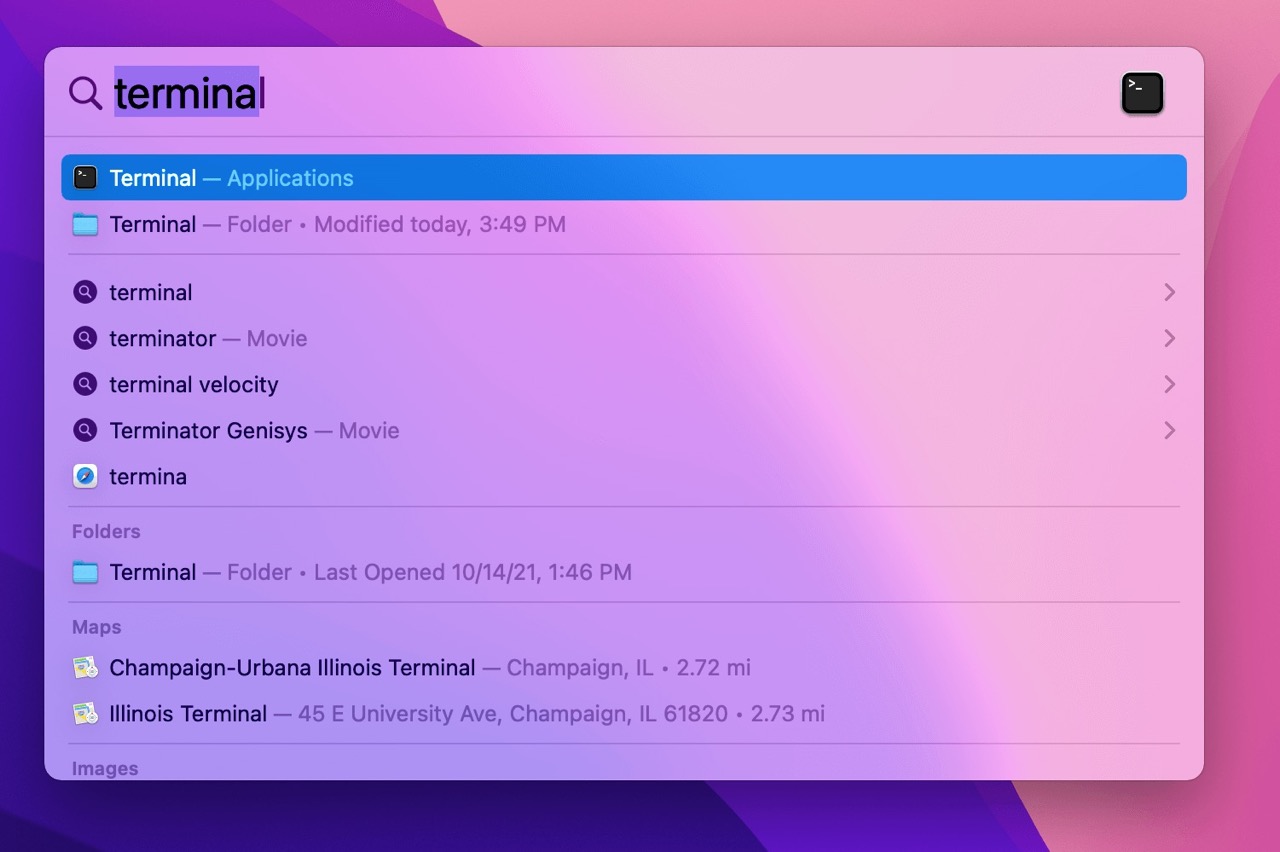
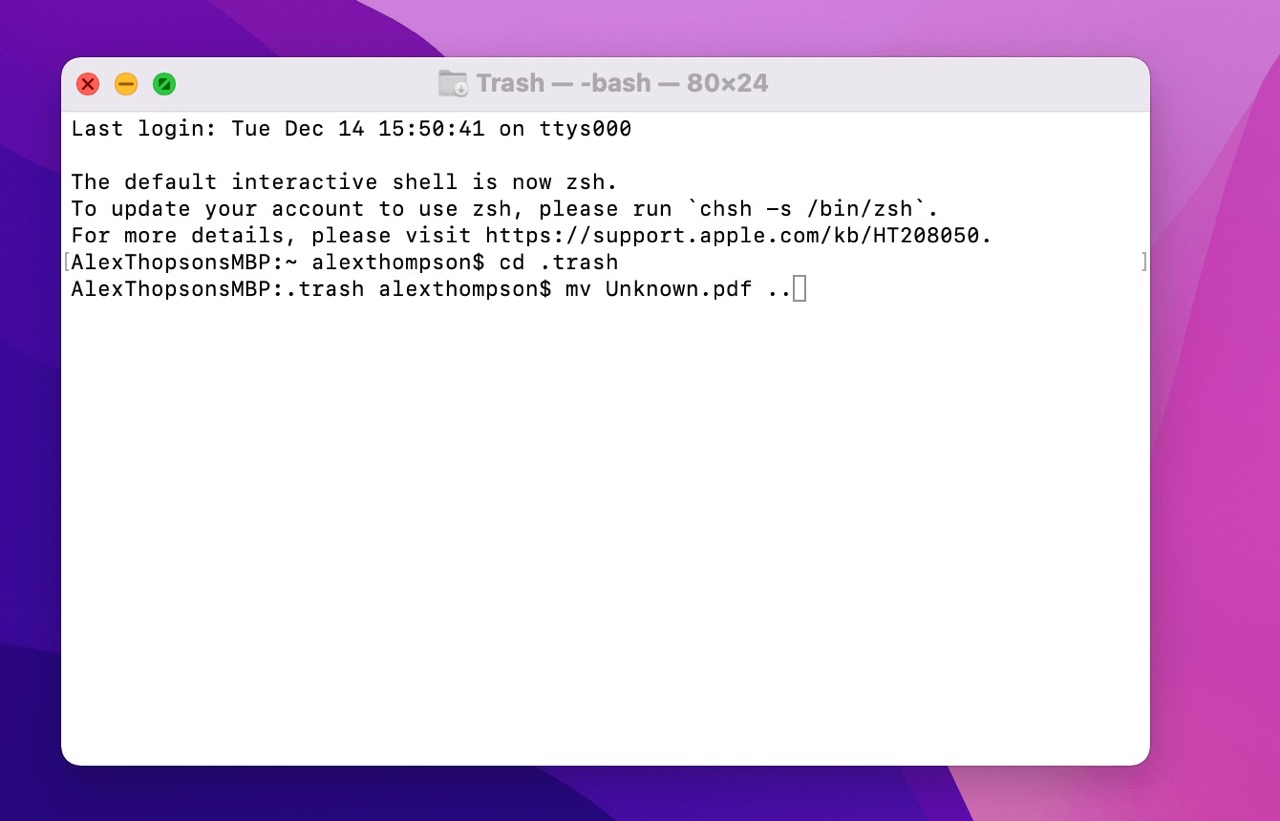
- Open Terminal: Use Spotlight (Command + Space) or find it in Finder.
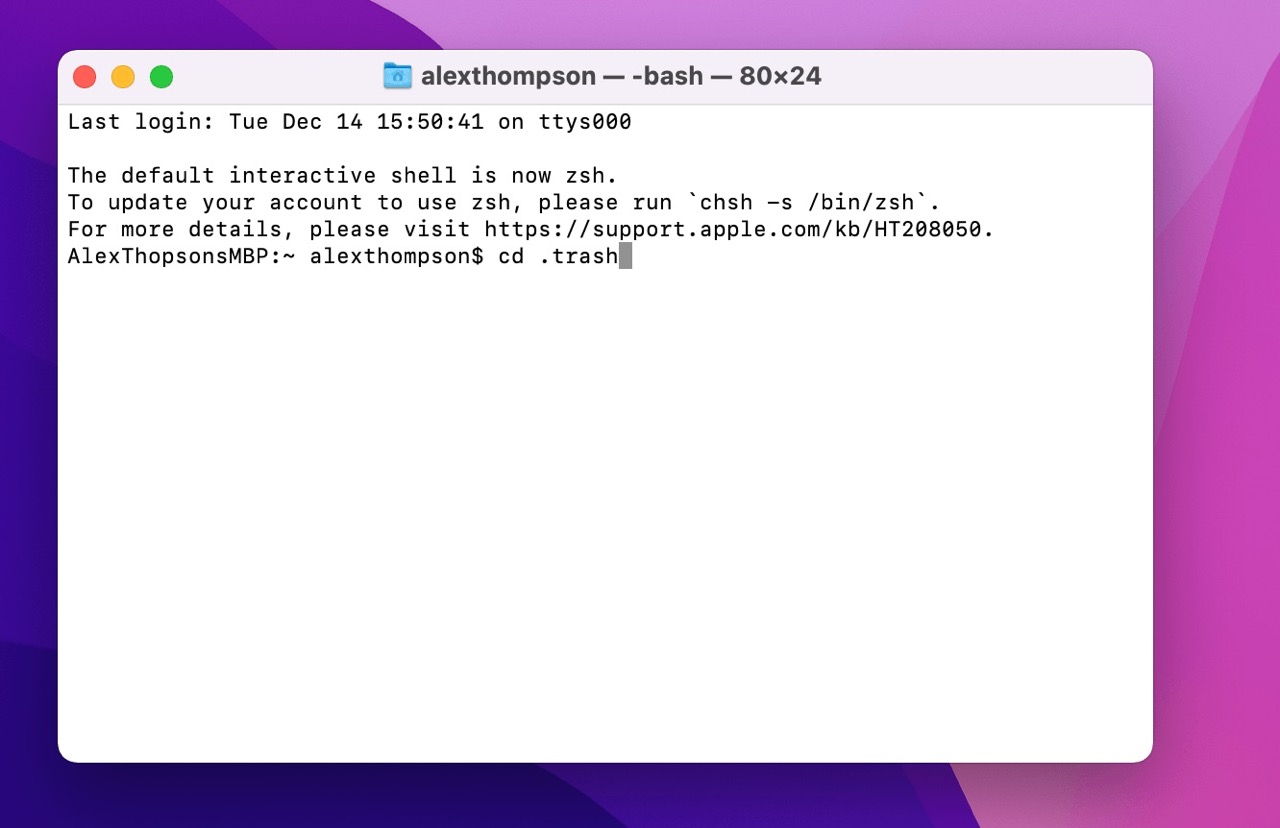
- Navigate to Trash: In Terminal, type:
cd .Trash
- Move Command: Use the
mvcommand to move your files. Example to move ‘Unknown.pdf’ to Home folder:
mv Unknown.pdf ../
- Wildcard Restore: Use
mv * ../to restore all files, ormv *.jpg ../to restore all .jpg files at once.
5. Use the “Undo” Command
Apple’s ‘Undo’ command can reverse the last action if you catch your mistake quickly. Keep in mind, the number of Undos depends on the app.
Remember, these methods work for various types of files, and using them can save you a lot of headaches without needing special software! ![]() Need to Undo a Mistake? Here’s How to Restore Files on a Mac using Undo:
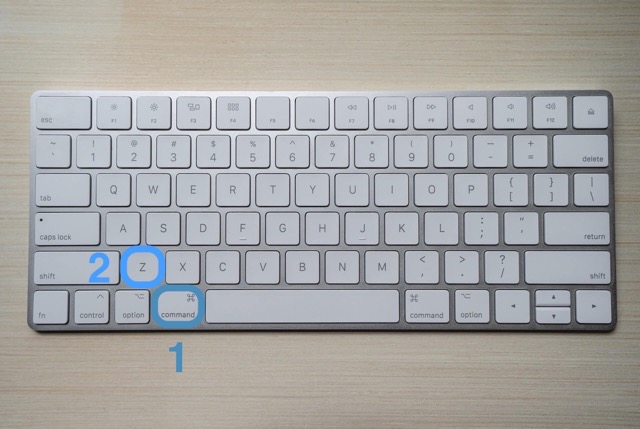
Need to Undo a Mistake? Here’s How to Restore Files on a Mac using Undo:
Hey folks! If you’ve unintentionally messed up a file, don’t panic. Here’s a quick way to undo your mistake:
-
Head back to the app where the error happened.
-
Just hit Command + Z to undo what you just did. Boom, you’re back on track!
 6. Professional Data Recovery Services to the Rescue
Okay, if software isn’t cutting it, consider going the pro route. Data recovery services can save the day, especially if you’re dealing with some serious disk issues or accidental overwrites. These experts are your best bet when you can’t DIY your way out of data loss.
Sure, it can be pricey, and you might be waiting around for a bit, but it’s often worth it.
 How to Keep Your Data Safe on a Mac
Want to avoid data loss headaches? Regular backups are your best friend. Ideally, you should back up every day, but if you’re working with super-sensitive info, more frequent backups might be the way to go.
Two great tools for this: Time Machine and Disk Drill. Here’s how you can set these up:
 Using Time Machine to Save the Day
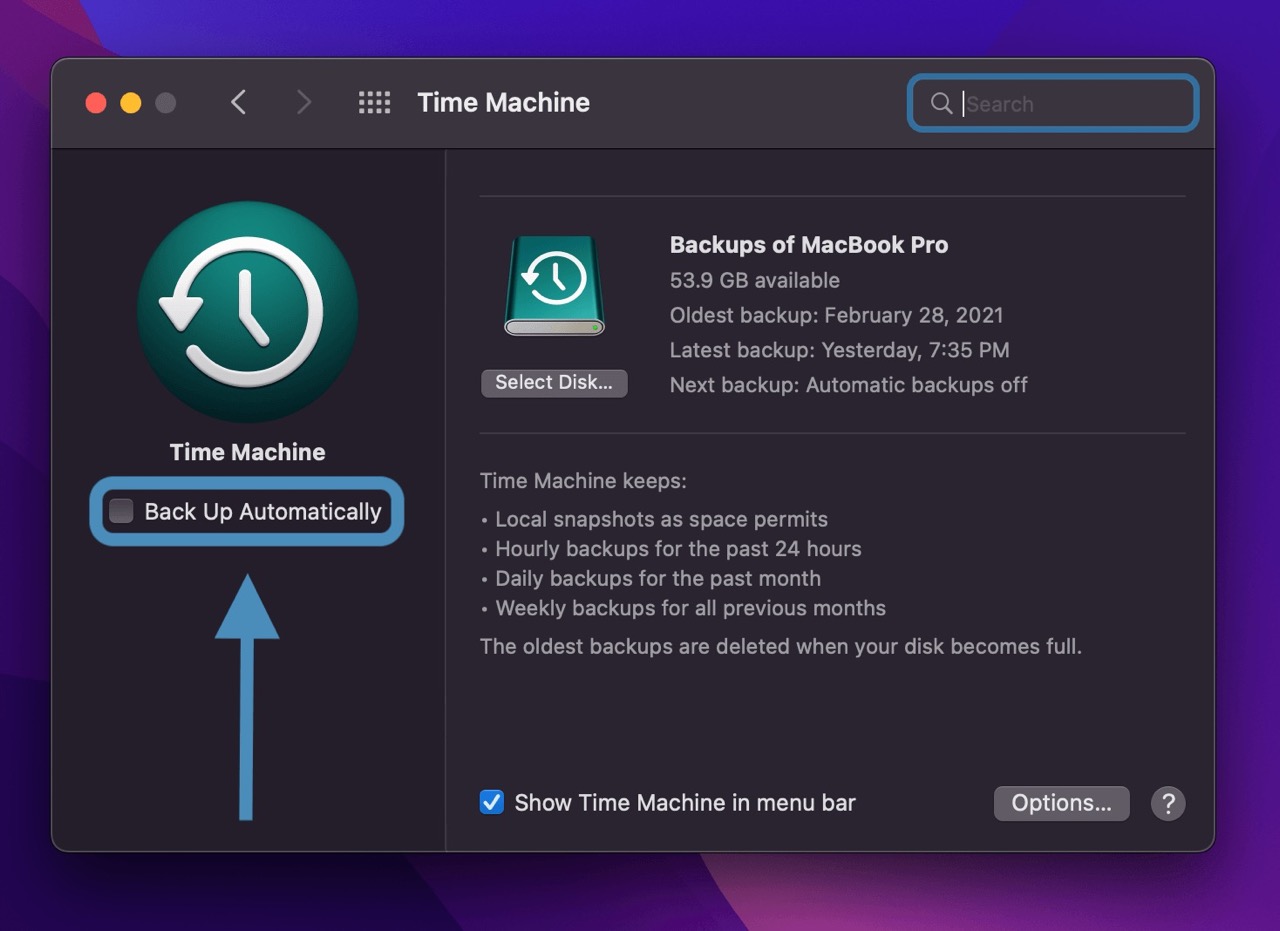
Apple’s Time Machine is a lifesaver for automatic and continuous backups. Here’s what it does:
- Hourly backups for the last 24 hours
- Daily backups for the past month
- Weekly backups for all earlier months
Plus, it keeps hourly local snapshots as long as there’s space. These are saved directly to your Mac, not your backup drive. Just make sure to enable automatic backups!
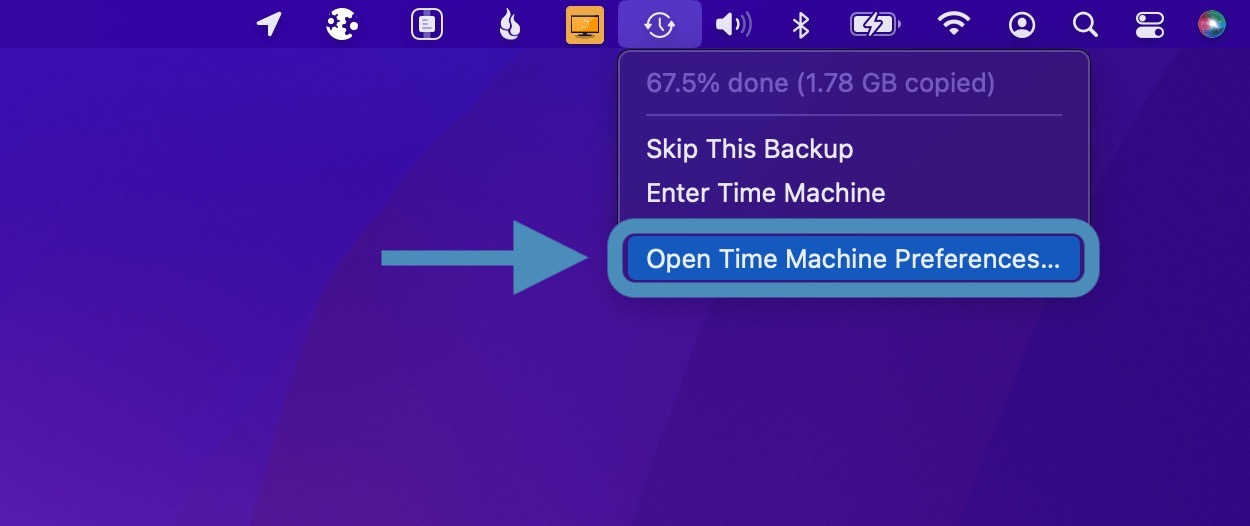
Steps to enable Time Machine:
-
Click on the Time Machine icon in the toolbar.
-
Open Time Machine preferences.
-
Turn on automatic backups.
-
Keep your backup drive connected for those hourly backups.
 Using Disk Drill for Data Protection
Disk Drill is a powerful, user-friendly software for recovering deleted files on Mac, and it offers great features to keep your data safe.
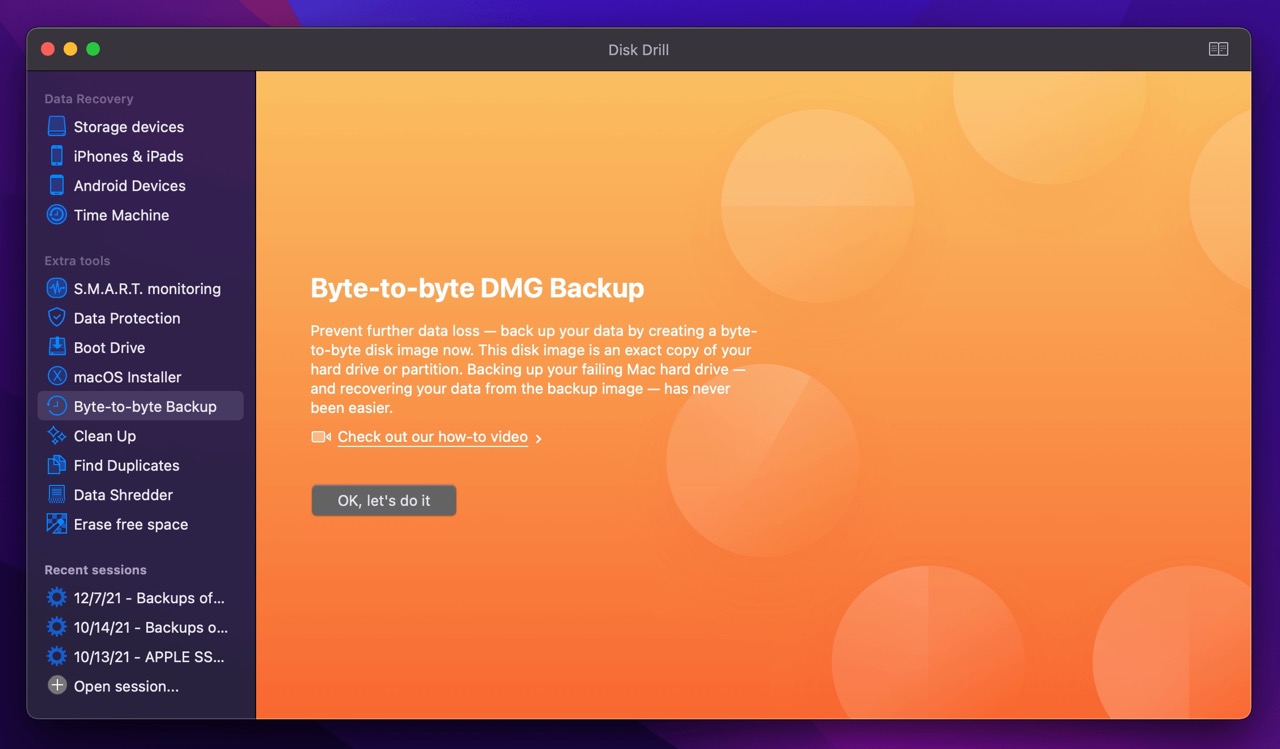
Beyond recovery, Disk Drill also has Byte-to-byte Backup, which creates a disk image (DMG file) of your drive. If your disk is damaged, you can recover from the image instead of the faulty disk, preventing permanent data loss. Super handy, right?
Steps to use Disk Drill:
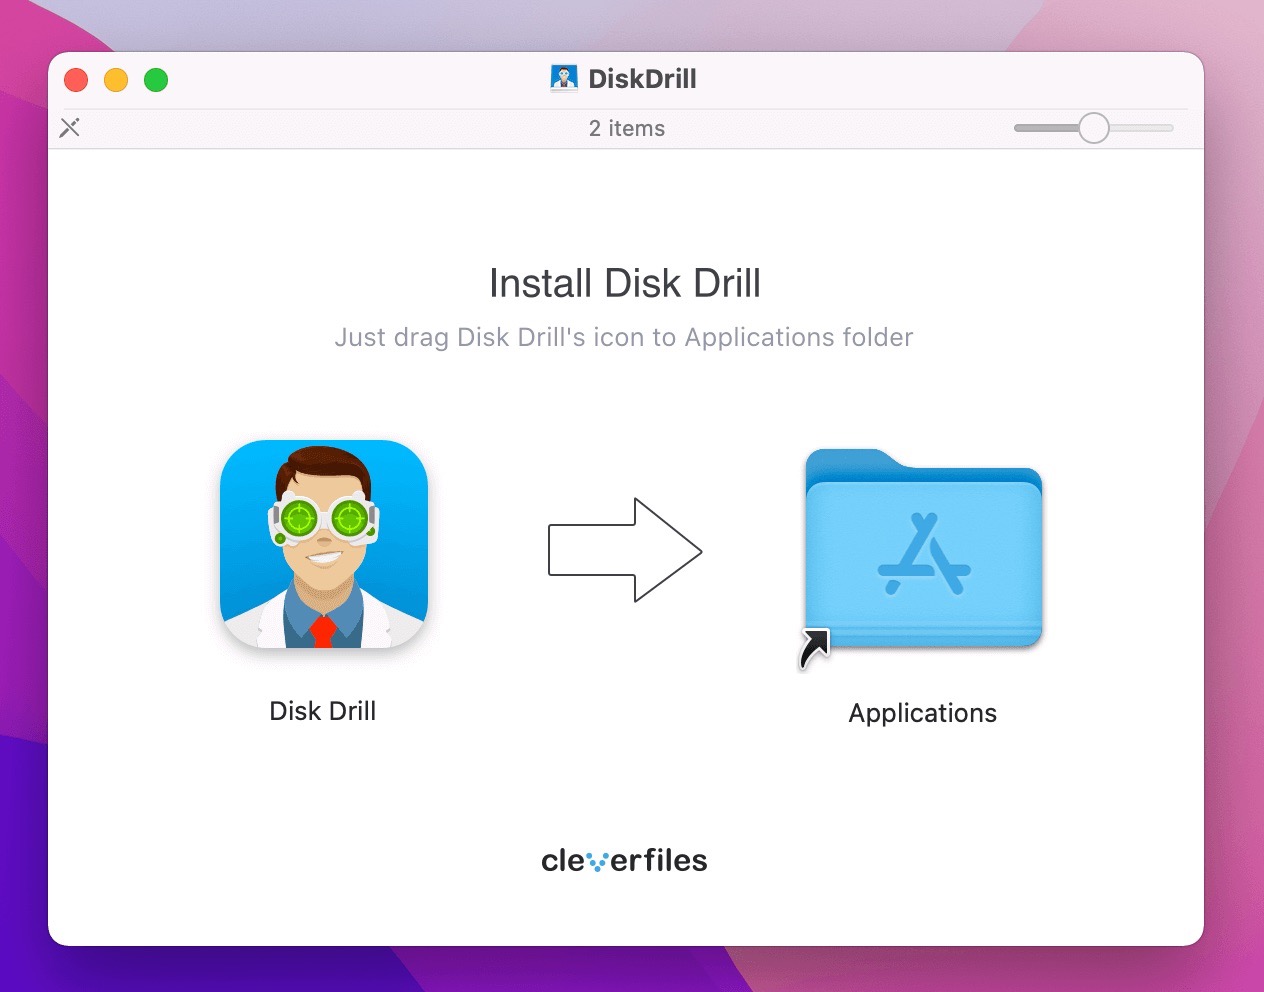
-
Download Disk Drill and install it.
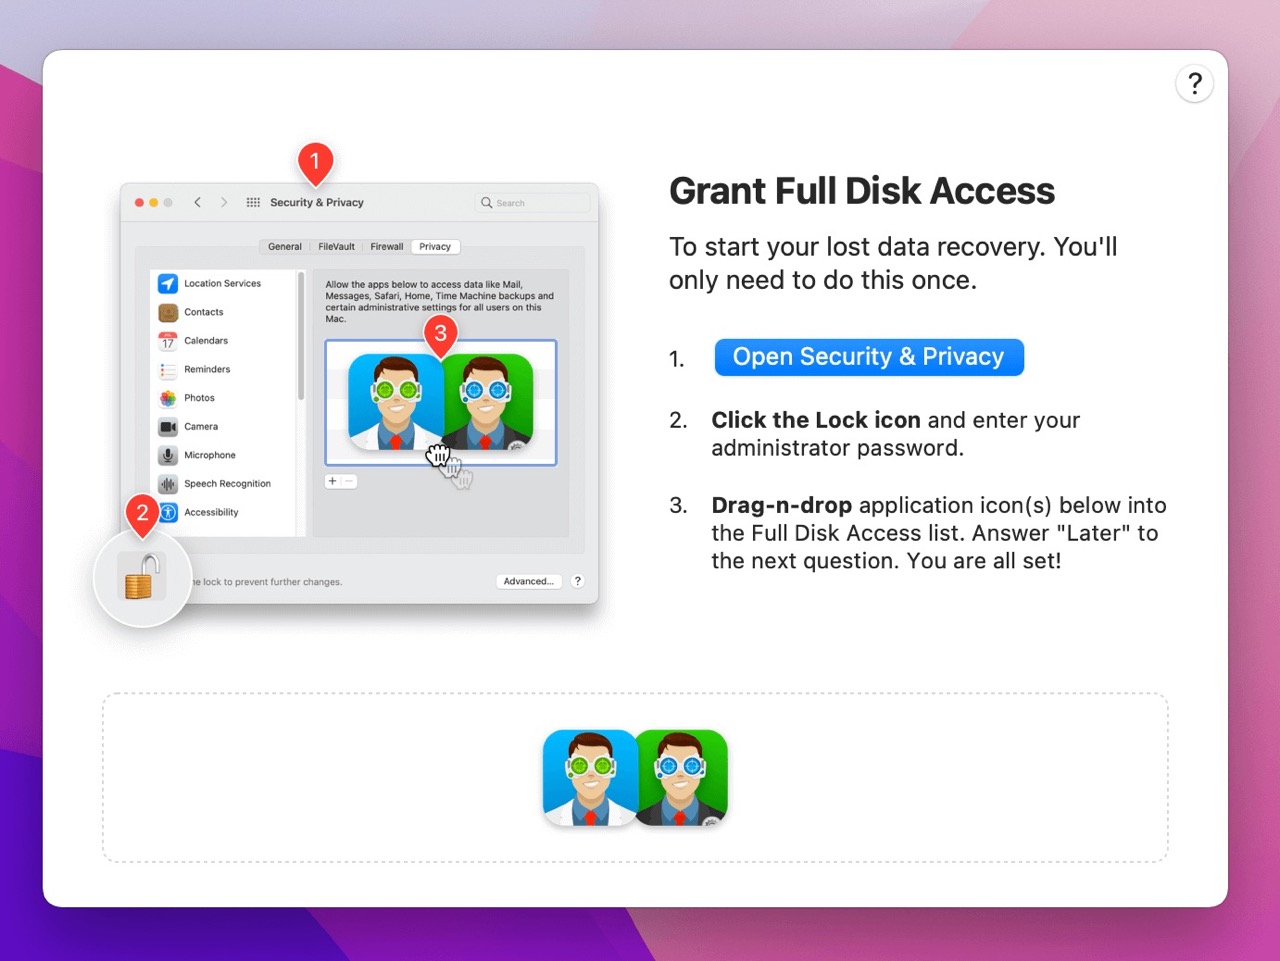
-
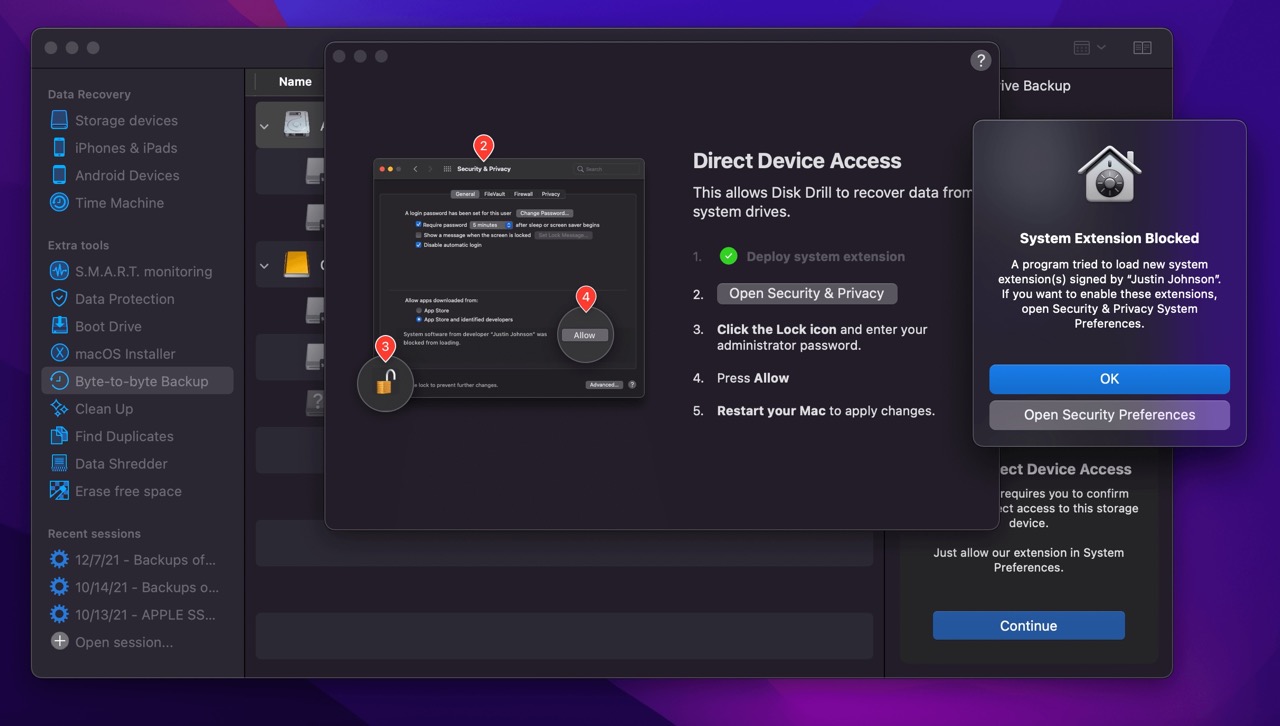
Grant Disk Drill access to your disk drives.
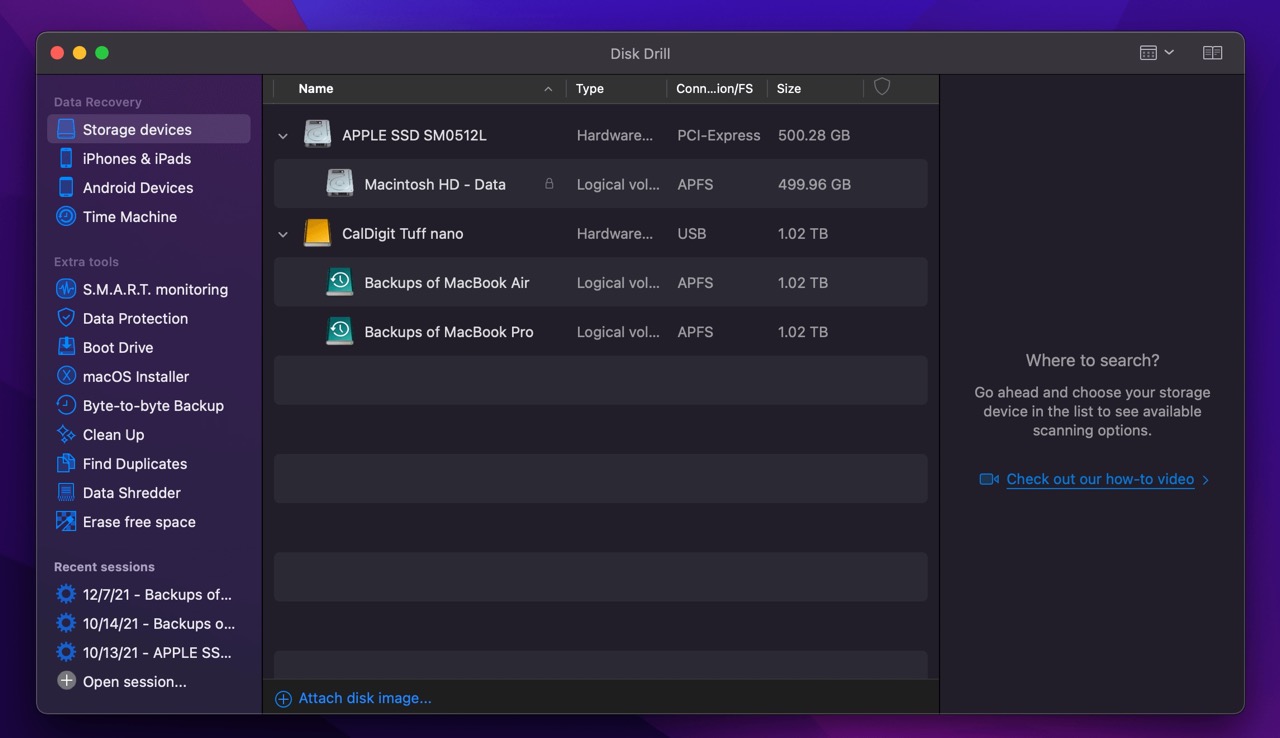
-
Connect the drive you want to backup and select “Byte-to-byte Backup” from the sidebar.
-
Review the Disk Drill backup process or watch a quick demo.
-
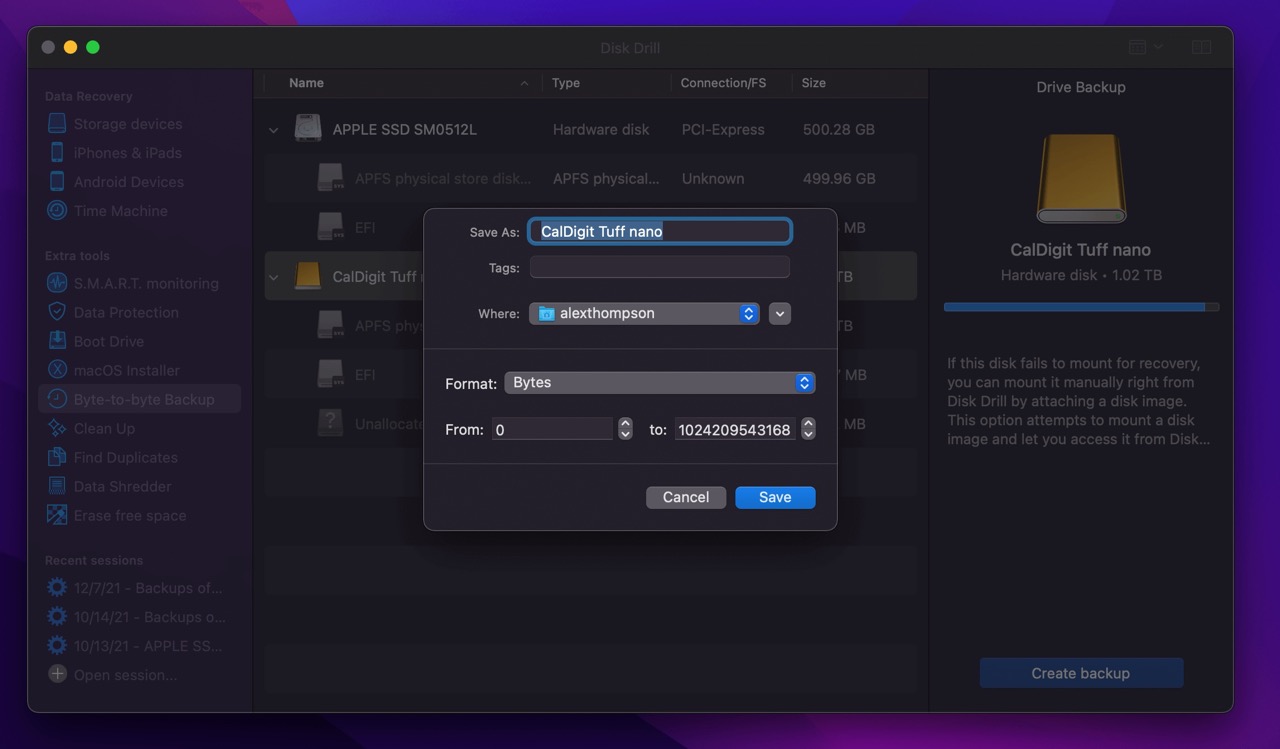
Pick the drive to backup and click “Create backup” or “Continue.” If it’s your Mac’s hard drive, grant direct device access first.
-
Choose where to save the backup and rename it. Specify start and end positions for the backup image if needed.
 Wrapping Up
Lost files, missing videos, or deleted documents? Fear not. You can recover your data without any special software using these methods. Simple and effective!