SD cards aren’t backed up by Apple’s Time Machine, but recovery is still possible on Mac. Methods include: checking Trash, recovering from backups, or using free software like PhotoRec. If these fail, paid options like Disk Drill (starting at $89) offer user-friendly interfaces and robust recovery capabilities. Act quickly to prevent data from being overwritten. Stay tuned for a detailed tutorial in our next forum post!
Hey, folks! So, I was digging into how to recover data from SD cards on a Mac, and guess what? It’s totally possible even though Apple’s Time Machine doesn’t back them up. I’ve found some nifty free ways to get your lost data back, and I’m sharing them right here.
When Can You Recover SD Card Data on Mac? 
Here’s a quick rundown of the different scenarios and your chances of getting your data back.
| Condition | Chances of Recovery |
|---|---|
| Got a backup or the data’s on another storage | High |
| Data is still on the SD card and hasn’t been overwritten | Moderate to High |
| Data has been overwritten | Zilch |
The main thing is that the deleted data has to be somewhere. If it’s on another device or still lurking on the SD card, you’re in luck.
Wondering how deleted data can still be on the SD card?
Well, when you delete a file, the OS doesn’t really erase the data. It just marks that space as available for new files. So, if no new data has taken its spot, you can still recover it. Just stop using the SD card ASAP once you realize important stuff is missing. The more you use it, the higher the chance that your files get overwritten and go bye-bye for good.
Free Ways to Recover Deleted Files from Your SD Card 
You don’t have to be a tech genius to do this! Follow these easy steps to recover your files for free.
Method 1: Check the Trash 
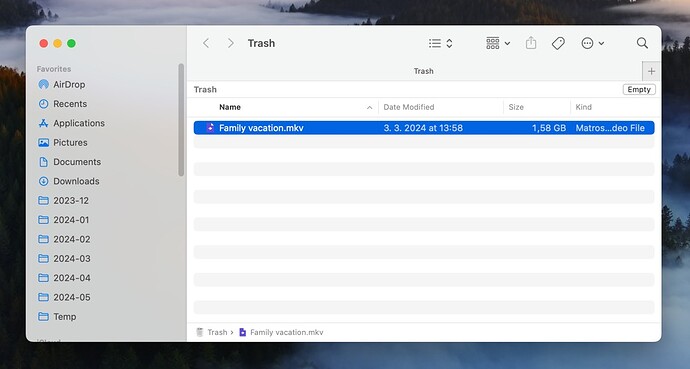
On macOS, deleted files head straight to the Trash. Unless you’ve set Finder to auto-delete after 30 days, they’ll stay there forever or until you empty it. Here’s the scoop on how to get your files back using the Trash:
-
Pop in the SD Card: Plug your SD card into your Mac’s card reader (or use an external one). macOS sticks a hidden Trashes folder on every inserted device, so when you check your Trash, it includes stuff from the SD card too.
-
Open Trash: Just click the Trash icon in the Dock.
-
Find Your Files: Look for the files you want – you should see the ones deleted from the SD card.
-
Recover Them: Drag the files out of the Trash to a safe spot on your Mac or back to the SD card.
If your files aren’t in the Trash (or they were emptied from it), don’t sweat it. We’ve got other options.
Method 2: Recover from a Backup 
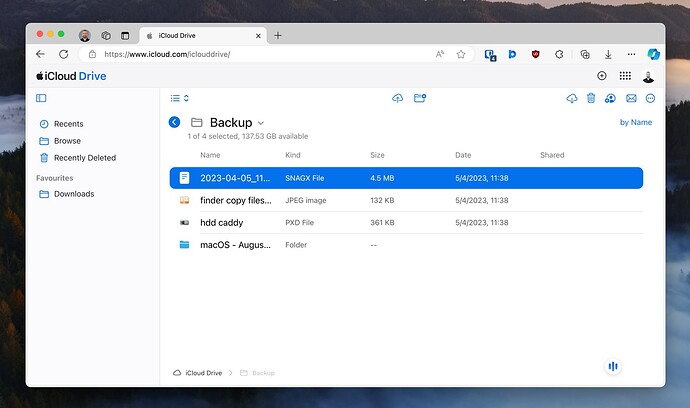
If the Trash doesn’t have your files, the next move is to check your backups. Here’s where to look:
Backup Spots to Check:
- System drive
Here’s How to Do It! 
Step 1: Check If You Have Backups 
- External backup storage devices
- Cloud storage services, like iCloud or Google Drive
Tip: When you’re pulling files from a backup, copy them to a different location on your Mac or SD card. This way, you’ve still got your backup just in case!
No Backup? You Might Need Some Free Tools 
Method 3: Try Out PhotoRec 
Ever heard of PhotoRec? It’s solid, free-to-use, and works wonders on SD cards, especially when the file system is total spaghetti. However, keep in mind it only recovers the files—not the names, folders, or timestamps.
No worries though, I’ve got the steps for ya:
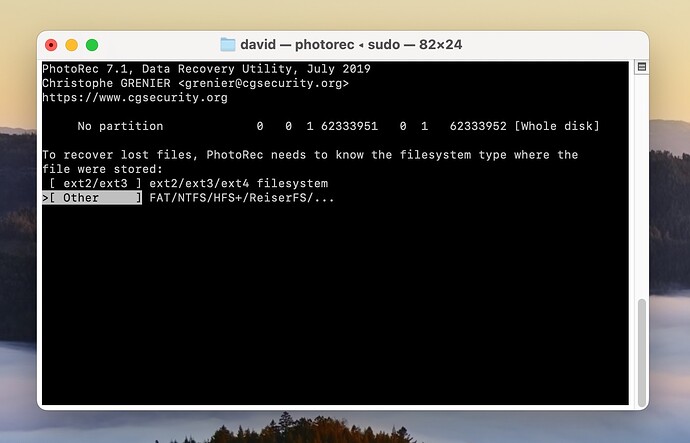
- Install PhotoRec via Homebrew (it’s packaged with TestDisk).
- Plug in your SD card: Whether it’s directly or through an external reader.
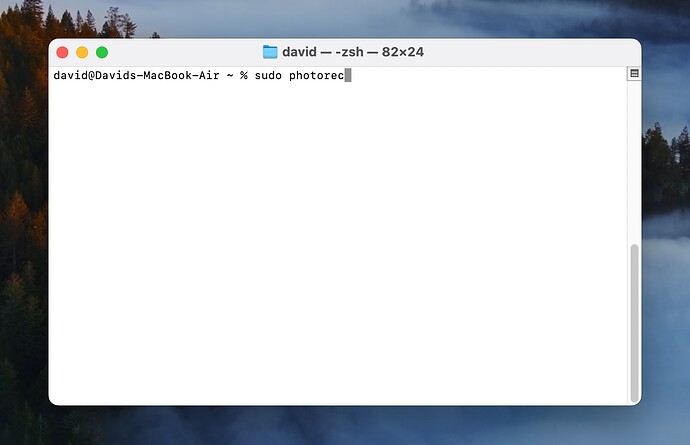
- Launch Terminal and type in
sudo photorecto get things rolling.
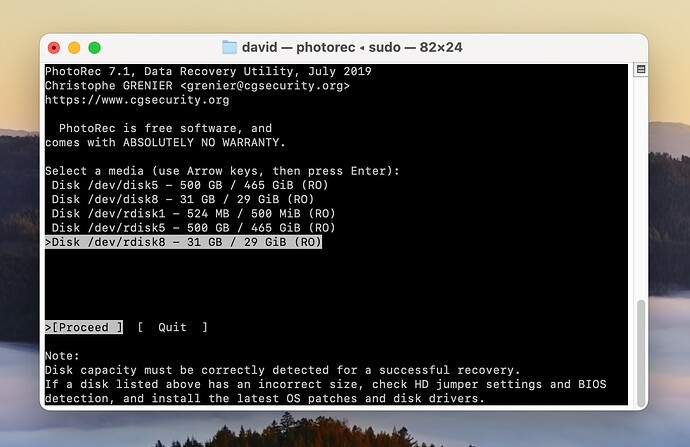
- Pick your SD card: Use arrow keys, hit Enter, and select the partition if there’s more than one.
- Choose “Other” for the file system (SD cards generally use FAT32 or exFAT).
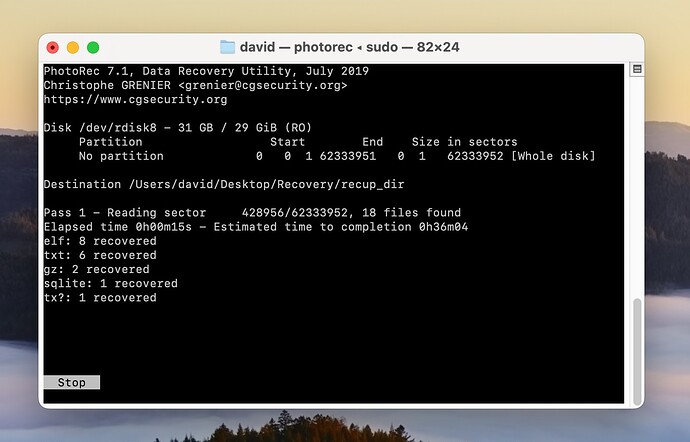
- Decide on your storage spot for the rescued files. Choose somewhere on your Mac—not the SD card.
- Wait it out: The recovery might take a bit. Head to the saved location to peek at what you’ve got!
Heads-up: If PhotoRec is a bit too techy for you, or it didn’t cut it, consider paid recovery software next. Up next is my fave…
Best Paid Option: Disk Drill 
So, if DIY didn’t work, Disk Drill might just save the day. ![]()
Here’s why Disk Drill rocks:
- Supports over 400 file formats!
- User-friendly (no need for tech wizardry)

- Even recovers metadata!

Want to give it a whirl? Here’s how:
- Grab Disk Drill from here and install it.
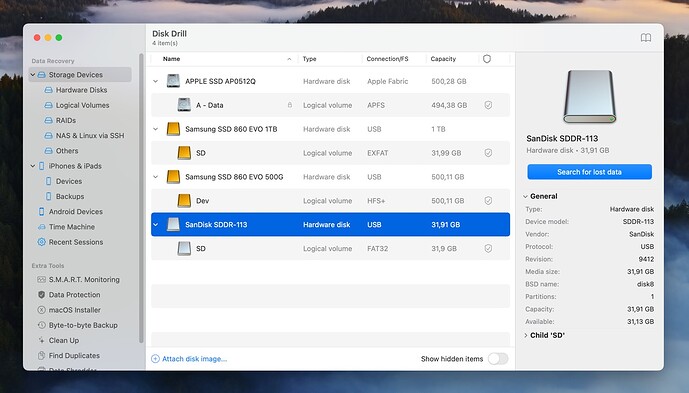
- Hook up your SD card to your Mac.
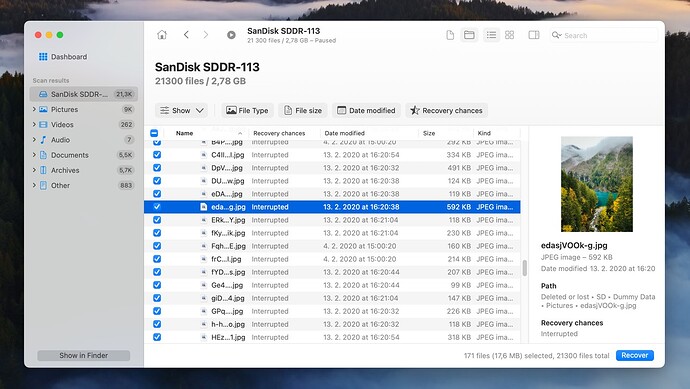
- Open Disk Drill and pick your SD card from the list. Click “Search for lost data.”
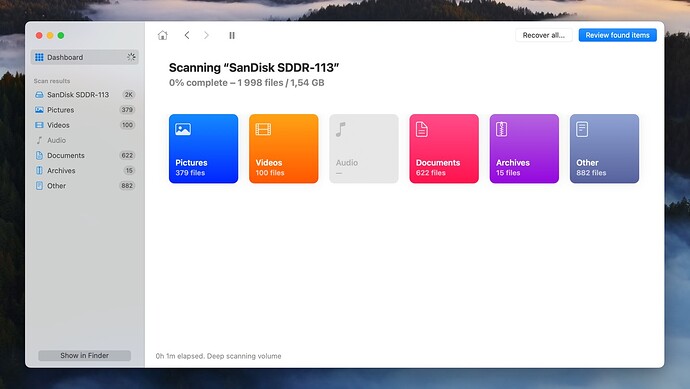
- Patiently wait for the scan to finish. It might take a while.
- Look through the list of files Disk Drill finds. You can even preview them!
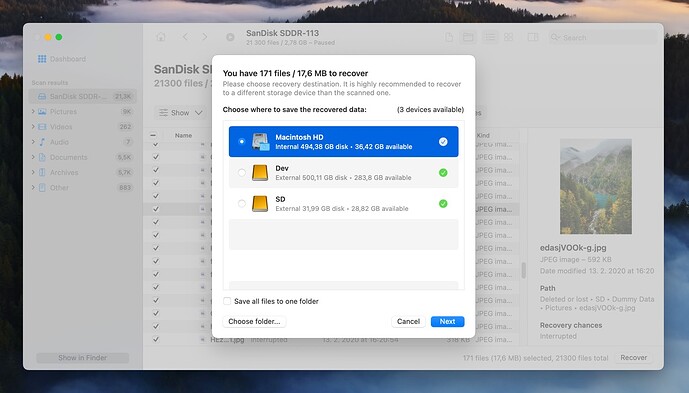
- Choose and recover the files you need, and pick a save location (anywhere but the SD card).
Disk Drill does let you preview files for free, but to actually get them back, a license costs $89.
Final Thoughts 
Recovering files from your SD card on a Mac? Totally doable! Whether you go the free route with tools like PhotoRec or spring for Disk Drill, the key is to act fast before new data overwrites your lost files.
Good luck and happy recovering! ![]()
